GE J1456W User Manual (English) - Page 58
Red-Eye Reduction
 |
View all GE J1456W manuals
Add to My Manuals
Save this manual to your list of manuals |
Page 58 highlights
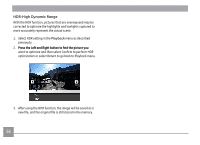
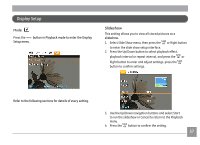
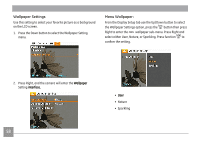
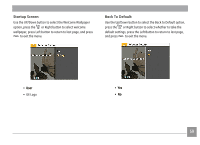
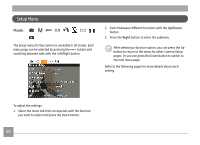
Red-Eye Reduction Use this setting to remove red-eye effect in your photos. 1. Select the Red-Eye Reduction in the Playback menu as described previously. 2. Use the Left/Right button to select the picture that requires red eye removal. 3. Use the Up/Down navigation buttons and select Yes to fix the selected image or Back to cancel and return to the Playback menu. Trim The Trim setting allows you to crop photos and save them as new pictures. To trim a picture: 1. With the camera in Playback mode press the menu button to access the Photo Menu. Then use the Left/Right button and select the "playback setup 2" tab. Use the Down button to select Trim and press the function button to enter the Trim sub-menu. 2. Using the Left/Right buttons, locate the photo that you want to crop. After the photo is displayed on the LCD screen press the Down button, select Yes and press the function button. 3. Use the zoom buttons and navigation buttons to compose the picture. 4. Press the button to confirm the setting. For best results, the face of the subject should be relatively large in the LCD screen, the subject should be facing the camera and the red-eye effect should be clearly visible. If there is no red eyes in the image, press button after selecting "Yes", such prompt will appear on the screen: red eye is not detected! 4. Press the button and a 'Save Changes?' prompt will appear. Select "O" to confirm the changes and save the new image, or select "X" to cancel the changes and return to the previous menu. The image can not be clipped/trimmed again once it has been clipped to 640X480. 55
-
 1
1 -
2
-
3
-
4
-
5
-
6
-
7
-
8
-
9
-
10
-
11
-
12
-
13
-
14
-
15
-
16
-
17
-
18
-
19
-
20
-
21
-
22
-
23
-
24
-
25
-
26
-
27
-
28
-
29
-
30
-
31
-
32
-
33
-
34
-
35
-
36
-
37
-
38
-
39
-
40
-
41
-
42
-
43
-
44
-
45
-
46
-
47
-
48
-
49
-
50
-
51
-
52
-
 53
53 -
 54
54 -
 55
55 -
 56
56 -
 57
57 -
 58
58 -
 59
59 -
 60
60 -
 61
61 -
 62
62 -
 63
63 -
64
-
65
-
66
-
67
-
68
-
69
-
70
-
71
-
72
-
73
-
74
-
75
-
76
-
77
-
78
-
79
-
80
-
81
-
82
-
83
-
84
-
85
-
86
 |
 |
