GE JGRP20BEJBB Use and Care Manual - Page 11
Using the oven., CAUTION - oven manual
 |
UPC - 084691098768
View all GE JGRP20BEJBB manuals
Add to My Manuals
Save this manual to your list of manuals |
Page 11 highlights
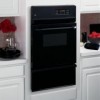
Safety Instructions Using the oven. GEAppliances.com Automatic Ignition The oven burner is lit by electric ignition. To light the burner, do the following: Touch the pad for the desired function. Then touch the + or - pad until the desired temperature is displayed. The burner should ignite within 60 seconds. After the oven reaches the selected temperature, the oven burner cycles off completely, then on with a full flame to keep the oven temperature controlled. Oven Vent When the oven is on, heated air moves through a vent behind the grille. The vent area could get hot during oven use. The vent is needed for proper air flow in the oven and good baking results. Do not block this vent. Doing so may cause oven failure or fire. Operating Instructions Troubleshooting Tips Power Outage The oven burner will not light in the event of an electrical power outage. CAUTION: Do not attempt to light it manually with a match. Oven Light Touch the OVEN LIGHT pad to turn the light on or off. Bump Oven Racks The racks are designed with stop-locks so that, when placed correctly on the rack supports, they will stop before coming completely out of the oven and will not tilt when you are removing food from them or placing food on them. When placing cookware on a rack, pull the rack out to the bump on the rack support. Place the cookware on the rack; then slide the rack back into the oven. This will eliminate reaching into the hot oven. To remove a rack from the oven, pull the rack toward you, tilt the front end upward and pull the rack out. To replace, place the rack on the rack support with the stop-locks (curved extension of the rack) facing up and toward the rear of the oven. Tilt up the front and push the rack toward the back of the oven until it goes past the bump on the rack support. Then lower the front of the rack and push it all the way back. Rack Positions The oven has 4 rack supports, identified in this illustration as A (bottom), B, C and D (top). Rack positions for cooking are suggested in the Baking, Roasting and Broiling sections. 11 Customer Service
-
 1
1 -
2
-
3
-
4
-
5
-
 6
6 -
 7
7 -
 8
8 -
 9
9 -
 10
10 -
 11
11 -
 12
12 -
 13
13 -
 14
14 -
 15
15 -
 16
16 -
17
-
18
-
19
-
20
-
21
-
22
-
23
-
24
-
25
-
26
-
27
-
28
 |
 |
