GE JX2127SH Installation Instructions - Page 2
Installation Instructions - trim kit
 |
UPC - 084691082859
View all GE JX2127SH manuals
Add to My Manuals
Save this manual to your list of manuals |
Page 2 highlights
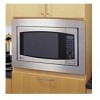
Installation Instructions 1 CUTOUT DIMENSIONS Models 27″ 30″ Height 163⁄4″ 163⁄4″ Width 251⁄2″ 251⁄2″ Depth (min.)* 191⁄2″ or 22″ 191⁄2″ or 22″ * Min. depth with receptacle outside cabinet 191⁄2″ Min. depth with receptacle inside cabinet 22″ 11⁄4″ overlap Depth 2 INSTALL BOTTOM BRACKET AND BOTTOM DUCT A Fit the tab on the bottom bracket into the slot on the back of the bottom duct, and push down until the bracket is flush with the bottom of the duct. Fasten the bottom bracket to the bottom duct by using two bronze round-head screws. B Disconnect the microwave oven before proceeding with the installation. Front 27″ Models: 9⁄16″ overlap 30″ Models: 21⁄8″ overlap Height Width 1″ Clearance beyond Trim Frame (on all sides) 1″ overlap 3″ min. CAUTION This trim kit uses air flow from the top, bottom and sides of the trim frame. Blocking the air flow can cause the microwave to function improperly and may cause damage to the microwave. Allow a 1″ clearance beyond the edge of the Trim Frame to provide proper air flow. On 27″ models, allow 11⁄4″ at the top, 9⁄16″ on the sides and 1″ at the bottom for overlap of the Trim Frame over the edges of the cutout. On 30″ models, allow 11⁄4″ at the top, 21⁄8″ on the sides and 1″ at the bottom for overlap of the Trim Frame over the edges of the cutout. Rear Screws C Remove any loose items inside the microwave oven, including the turntable and turntable support. Carefully turn the microwave oven upside down. D Line up the tabs on the bottom duct with the slots on the bottom of the microwave and insert the tabs into the slots. Secure the bottom duct with four bronze round-head screws as shown. Screws Screws Microwave Oven Upside Down 2
-
 1
1 -
 2
2 -
 3
3 -
 4
4
 |
 |
