GE zgu384nsmss Installation Instructions
GE zgu384nsmss - 30" SS GAS COOKTOP NG Manual
 |
UPC - 084691143154
View all GE zgu384nsmss manuals
Add to My Manuals
Save this manual to your list of manuals |
GE zgu384nsmss manual content summary:
- GE zgu384nsmss | Installation Instructions - Page 1
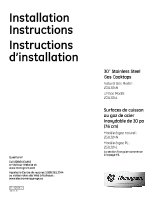
Installation Instructions Instructions d'installation 30″ Stainless Steel Gas Cooktops Natural Gas Model: ZGU384N LP Gas Model: ZGU384L Surfaces de cuisson au gaz de acier inoxydable de 30 po (76 cm) Modèle - GE zgu384nsmss | Installation Instructions - Page 2
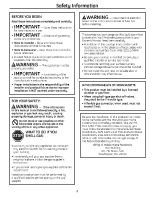
appliance. Do not touch any electrical switch; do not use any phone in your building. • Immediately call your gas supplier from a neighbor's phone. Follow the gas supplier's instructions. • If you cannot reach your gas supplier, call the fire department. Installation and service must be performed by - GE zgu384nsmss | Installation Instructions - Page 3
cooktop must be wired and fused to meet the requirements of the Canadian Electrical Code. CONTENTS Installation Preparation Models Available ...4 Parts Orifices ...15, 16 Adjusting Burner Flames ...16 Installation Instructions for LP to Natural Gas Conversion Tools You Will Need ...17 Adjusting the - GE zgu384nsmss | Installation Instructions - Page 4
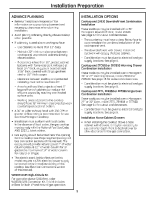
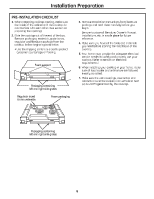
Installation Preparation MODELS AVAILABLE ZGU384N 30″ natural gas cooktop ZGU384L 30″ LP gas cooktop These models are factory set for either natural gas or LP gas operation. Be sure to order the correct model for the installation situation. PARTS INCLUDED TOOLS YOU WILL NEED FOR INSTALLATION - GE zgu384nsmss | Installation Instructions - Page 5
Conversion Kit. This kit includes orifices for both LP and Natural gas operation. INSTALLATION OPTIONS Cooktop and ZVB30 Downdraft Vent Combination Installation These cooktops may be installed with a 30″ Monogram Downdraft Vent, model ZVB30. See page 12 for cutout and clearances. - The countertop - GE zgu384nsmss | Installation Instructions - Page 6
to place all literature, Owner's Manual, Installations, etc. in a safe place for future reference. 4. Make sure you have all the tools and materials you need before starting the installation of the cooktop. 5. Your home must provide the adequate electrical service needed to safely and properly use - GE zgu384nsmss | Installation Instructions - Page 7
Installation Preparation DIMENSIONS AND CLEARANCES 1. Overall cooktop dimensions: 30-3/4″ 21″ 21-5/8″ deep at center 3. Make sure the wall coverings, countertop and cabinets around the cooktop can withstand heat (up to 200°F) generated by the cooktop. 13″ max. 3-3/4″ 30″ min. 2. Use a 30″ or wider - GE zgu384nsmss | Installation Instructions - Page 8
This cooktop may be installed in combination with a ZVB30 Monogram Downdraft Vent, a ZET1, ZEK938 or ZET938 Single Oven or a ZTD910 or ZKD910 Warming Drawer. • The gas and electrical supply must be located where it will not interfere with vent housing, the oven or the warming drawer. Review pages - GE zgu384nsmss | Installation Instructions - Page 9
Installation Instructions 1 INSTALL THE COOKTOP A. Remove the screws on the sides of the cooktop burner box. Use those screws to attach the side mounting brackets. B. Insert the cooktop centered into the cutout opening. Make sure the front edge of the countertop is parallel to the cooktop. Check - GE zgu384nsmss | Installation Instructions - Page 10
Installation Instructions 4 ASSEMBLE BURNERS, CHECK IGNITION The electrode of the electronic ignition system is positioned above the surface of the burner base. Do not remove a burner cap or touch the electrode of a burner while another is turned on. Damage or electrical shock may occur. A. Remove - GE zgu384nsmss | Installation Instructions - Page 11
Installation Instructions 4 ASSEMBLE BURNERS, CHECK IGNITION (cont.) F. Turn on each burner. On LP models, flames should be blue in color but may have yellow tips. Natural gas models should have soft, blue flames. The burner flames should not flutter or blow away from the burner. The flame should be - GE zgu384nsmss | Installation Instructions - Page 12
Installation Options COOKTOP INSTALLATION WITH A 30″ MONOGRAM DOWNDRAFT VENT, MODEL ZVB30 The installation of the downdraft vent with this cooktop requires careful consideration. Both the cooktop and the vent must be installed according to each specific installation instruction. COOKTOP - GE zgu384nsmss | Installation Instructions - Page 13
Installation Options COOKTOP INSTALLATION OVER A MONOGRAM WARMING DRAWER, MODEL ZTD910 OR ZKD910 These cooktops may be installed over a 30″ or 27″ Warming Drawer. Both the cooktop and the warming drawer must be installed according to each specific installation instruction. Install 2x4 or 2x2 anti- - GE zgu384nsmss | Installation Instructions - Page 14
Installation Options COOKTOP INSTALLATION OVER A 27″ OR 30″ MONOGRAM SINGLE OVEN, MODEL ZET1, ZEK938 OR ZET938 These cooktops may be installed over the Monogram ZET1, ZEK938 or ZET938 single oven. Both the cooktop and the oven must be installed according to each specific installation instruction. - - GE zgu384nsmss | Installation Instructions - Page 15
Installation Instructions SAFETY INFORMATION Convert Natural Gas Model ZGU384NSMSS to LP Gas Operation 1 ADJUST THE REGULATOR A. Disconnect all electrical power, at the main circuit breaker or fuse box. B. Shut off the gas supply to the cooktop by closing the manual shut-off valve. C. Adjust the - GE zgu384nsmss | Installation Instructions - Page 16
Install the proper orifices in the exact locations as noted in the illustrations above. D. Return the natural gas orifices to the bracket and reattach the bracket and the instruction on "LO", open and close the cabinet door under the cooktop. If the flame is extinguished by the air currents created - GE zgu384nsmss | Installation Instructions - Page 17
Installation Instructions SAFETY INFORMATION Convert LP Gas Model ZGU384LSMSS to Natural Gas Operation 1 ADJUST THE REGULATOR A. Disconnect all electrical power, at the main circuit breaker or fuse box. B. Shut off the gas supply to the cooktop by closing the manual shut-off valve. C. Adjust the - GE zgu384nsmss | Installation Instructions - Page 18
Installation Instructions for LP to Natural Gas Conversion 2 CHANGE BURNER ORIFICES (cont.) IMPORTANT: Orifices again. Test 2 - With the burner on "LO", open and close the cabinet door under the cooktop. If the flame is extinguished by the air currents created by the door movement, increase the flame - GE zgu384nsmss | Installation Instructions - Page 19
é AVANT DE COMMENCER Avant de commencer, lisez attentivement la totalité de ces instructions. • • - Conservez ces instructions pour votre inspecteur local. POUR VOTRE SÉCURITÉ - Si vous ne suivez pas exactement les instructions de ce manuel, vous risquez d'occasionner un incendie, une explosion ou - GE zgu384nsmss | Installation Instructions - Page 20
Information de la sécurité tout courant électrique au niveau du disjoncteur de la maison ou de la boîte - GE zgu384nsmss | Installation Instructions - Page 21
Préparation - GE zgu384nsmss | Installation Instructions - Page 22
Préparation - GE zgu384nsmss | Installation Instructions - Page 23
Préparation - GE zgu384nsmss | Installation Instructions - Page 24
Préparation - GE zgu384nsmss | Installation Instructions - Page 25
Préparation - GE zgu384nsmss | Installation Instructions - Page 26
Instructions d'installation 1 INSTALLEZ LA SURFACE DE CUISSON A. Retirez les vis des côtés de la boîte de brûleur de la surface de cuisson. Utilisez ces vis pour attacher les supports de fixation latéraux. B. Insérez la surface de cuisson centrée dans l'ouverture découpée. Assurez-vous que le rebord - GE zgu384nsmss | Installation Instructions - Page 27
Instructions d'installation 4 ASSEMBLEZ LES BRÛLEURS, VÉRIFIEZ L'ALLUMAGE L'électrode du système d'allumage électronique se trouve au-dessus de la surface de la base du brûleur. - GE zgu384nsmss | Installation Instructions - Page 28
Instructions d'installation 4 ASSEMBLEZ LES BRÛLEURS, VÉRIFIEZ L'ALLUMAGE (suite) F. Allumez chaque brûleur. Sur les modèles PL, les flammes doivent être de couleur bleue, mais les - GE zgu384nsmss | Installation Instructions - Page 29
Options d'installation INSTALLATION DE LA SURFACE DE CUISSON AVEC UN ÉVENT MONOGRAM DE 30 PO (76 CM) À COURANT DESCENDANT, MODÈLE ZVB30 Un grand nombre de facteurs sont - GE zgu384nsmss | Installation Instructions - Page 30
Options d'installation INSTALLATION DE LA SURFACE DE CUISSON AU-DESSUS D'UN TIROIR CHAUFFE-PLATS MONOGRAM, MODÈLE ZTD910 OU ZKD910 Ce type de surface de cuisson s'installe au-dessus d'un tiroir chauffe-plats de 76 ou 68,6 cm (30 ou 27 po). Tant la surface de cuisson que le tiroir sont - GE zgu384nsmss | Installation Instructions - Page 31
Options d'installation INSTALLATION DE LA SURFACE DE CUISSON AU-DESSUS D'UN FOUR SIMPLE MONOGRAM DE 68,6 CM (27 PO) OU 76 CM (30 PO), MODÈLE ZET1, ZEK938 OU ZET938 Ces surfaces de cuisson doivent être installées selon les instructions spécifiques - GE zgu384nsmss | Installation Instructions - Page 32
Instructions d'installation Convertir le modèle du gaz naturel ZGU384NSMSS au gaz PL 1 AJUSTEZ LE RÉGULATEUR DE PRESSION A. Déconnectez le bloc d'alimentation du courant de toutes les prises électriques, - GE zgu384nsmss | Installation Instructions - Page 33
Instructions d'installation pour la conversion du gaz naturel au PL 2 CHANGEZ LES ORIFICES DES BRÛLEURS (suite) IMPORTANT : Les orifices doivent être situés tels qu'indiqués sur - GE zgu384nsmss | Installation Instructions - Page 34
Instructions d'installation Convertir le modèle du gaz PL ZGU384LSMSS au gaz naturel 1 AJUSTEZ LE RÉGULATEUR DE PRESSION A. Déconnectez le bloc d'alimentation du courant de toutes les prises électriques, - GE zgu384nsmss | Installation Instructions - Page 35
Instructions d'installation pour la conversion du gaz PL au gaz naturel 2 CHANGEZ LES ORIFICES DES BRÛLEURS (suite) IMPORTANT : Les orifices doivent être situés tels qu'indiqués - GE zgu384nsmss | Installation Instructions - Page 36
: While performing installations described in this book, safety glasses or goggles should be worn. For Monogram® local service in your area, call 1.800.444.1845. NOTE: Product improvement is a continuing endeavor at General Electric. Therefore, materials, appearance and specifications are subject
-
 1
1 -
 2
2 -
 3
3 -
 4
4 -
 5
5 -
 6
6 -
 7
7 -
8
-
9
-
10
-
11
-
12
-
13
-
14
-
15
-
16
-
17
-
18
-
19
-
20
-
21
-
22
-
23
-
24
-
25
-
26
-
27
-
28
-
29
-
30
-
31
-
32
-
33
-
34
-
35
-
36
 |
 |

Installation
Instructions
Instructions
d’installation
30
″
Stainless Steel
Gas Cooktops
Natural Gas Model:
ZGU384N
LP Gas Model:
ZGU384L
Questions?
Call 800.GE.CARES
or Visit our Website at:
www.monogram.com
Appelez le Centre de réponse 1.800.561.3344
ou visitez notre site Web à l’adresse :
www.electromenagersge.ca
31-10635-2
08-07 JR
Surfaces de cuisson
au gaz de acier
inoxydable de 30 po
(76 cm)
Modèle à gaz naturel :
ZGU384N
Modèle à gaz PL :
ZGU384L
La section française commence
à la page 19.