Genie PowerLift Owner's Manual - Page 12
Garage Door Opener Installation
 |
View all Genie PowerLift manuals
Add to My Manuals
Save this manual to your list of manuals |
Page 12 highlights
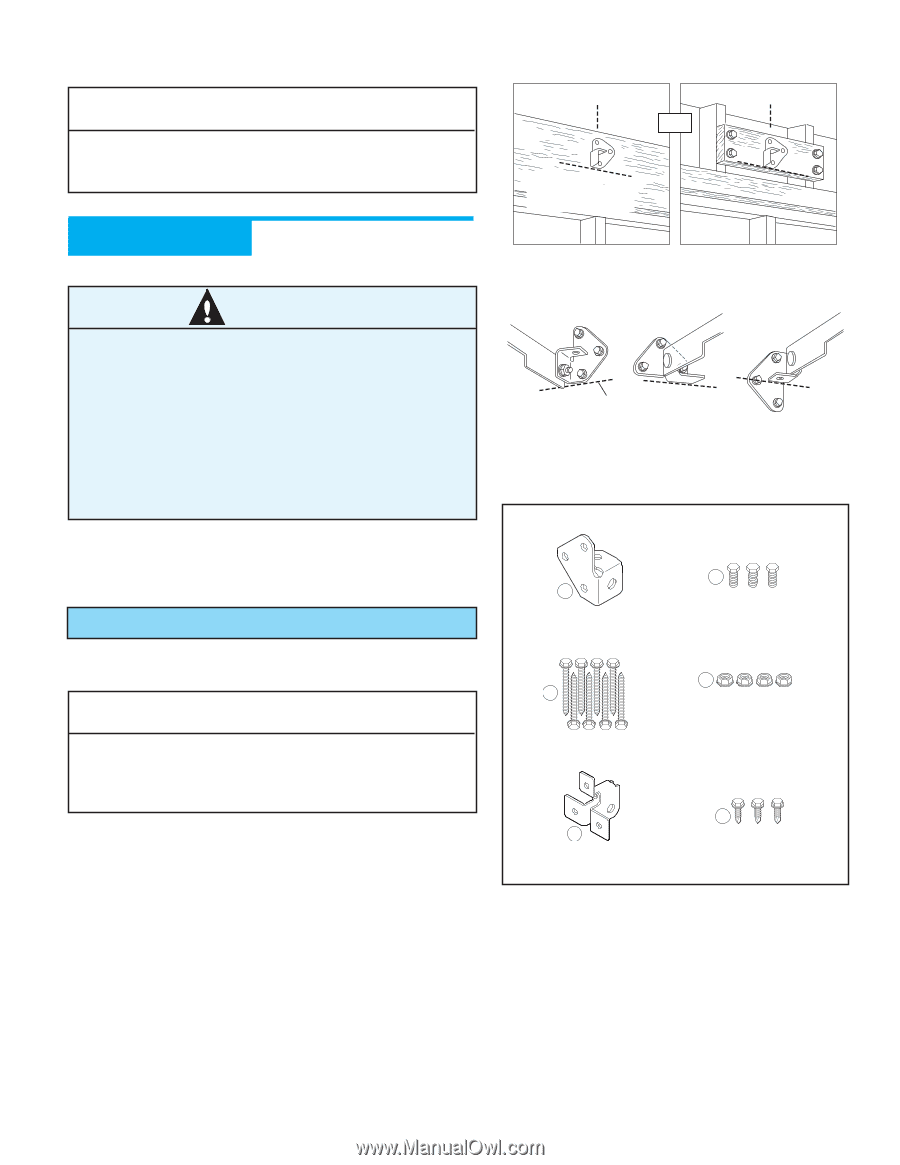
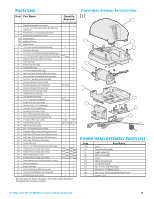
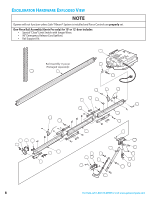
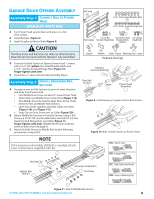
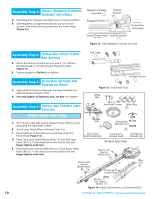
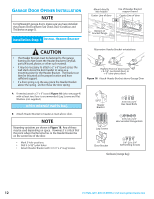
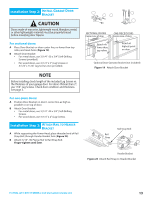
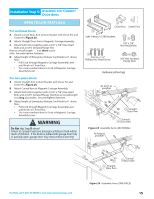
GARAGE DOOR OPENER INSTALLATION NOTE For lightweight garage doors, make sure you have installed the proper reinforcement (See Check Door Condition and Thickness on page 3). Installation SteCpH1: INSTALL HEADER BRACKET Mount directly into header Center Line of door Use of Header Bracket support board Center Line of door OR Bottom of bracket flange CAUTION • The Header Bracket must be fastened to the garage framing. Do Not fasten the Header Bracket to drywall, particle board, plaster, or other such material. • It may be necessary to attach a 2" x 6" board across the wall studs above the door header to serve as a mounting plate for the Header Bracket. The Bracket can then be mounted at the proper location and have sufficient support. • If a door spring is in the way, place the Header Bracket above the spring. Do Not move the door spring. Alternative Header Bracket orientations Highest Point of door travel + 2-1/2" (sectional door) or + 6" (one-piece door) Figure 18 Attach Header Bracket above Garage Door A If needed, attach a 2" x 6" board (Figure 18) (also see page 4) with at least two (four is recommended) Lag Screws and Flat Washers (not supplied). OPEN ORANGE PARTS BAG B Attach Header Bracket to header at mark above door. NOTE Mounting variations are shown in Figure 18. Any of these may be used depending on space. However, it is critical that the point where the Rail attaches to the Header Bracket be on the center line of the door. • Mark 3 hole positions. • Drill 3 (5/32") pilot holes. • Attach Header Bracket with 3 (1/4" x 2") Lag Screws. 26 Header Bracket 30 1/4" x 2" Lag Screws 55 5/16-18 x 3/4" Hex Head Bolts 11 5/16-18 x 3/4" Hex Serrated Flange Nuts 28 Door Bracket 56 1/4"-20 x 3/4" Self-Drilling Screws Hardware (orange bag) 12 For Help, call 1-800-35-GENIE or visit www.geniecompany.com
-
 1
1 -
2
-
3
-
4
-
5
-
6
-
 7
7 -
 8
8 -
 9
9 -
 10
10 -
 11
11 -
 12
12 -
 13
13 -
 14
14 -
 15
15 -
 16
16 -
 17
17 -
18
-
19
-
20
-
21
-
22
-
23
-
24
-
25
-
26
-
27
-
28
-
29
-
30
-
31
-
32
 |
 |