Genie PowerLift Owner's Manual - Page 4
Check Step 3, Check Step 4 - garage door opener
 |
View all Genie PowerLift manuals
Add to My Manuals
Save this manual to your list of manuals |
Page 4 highlights
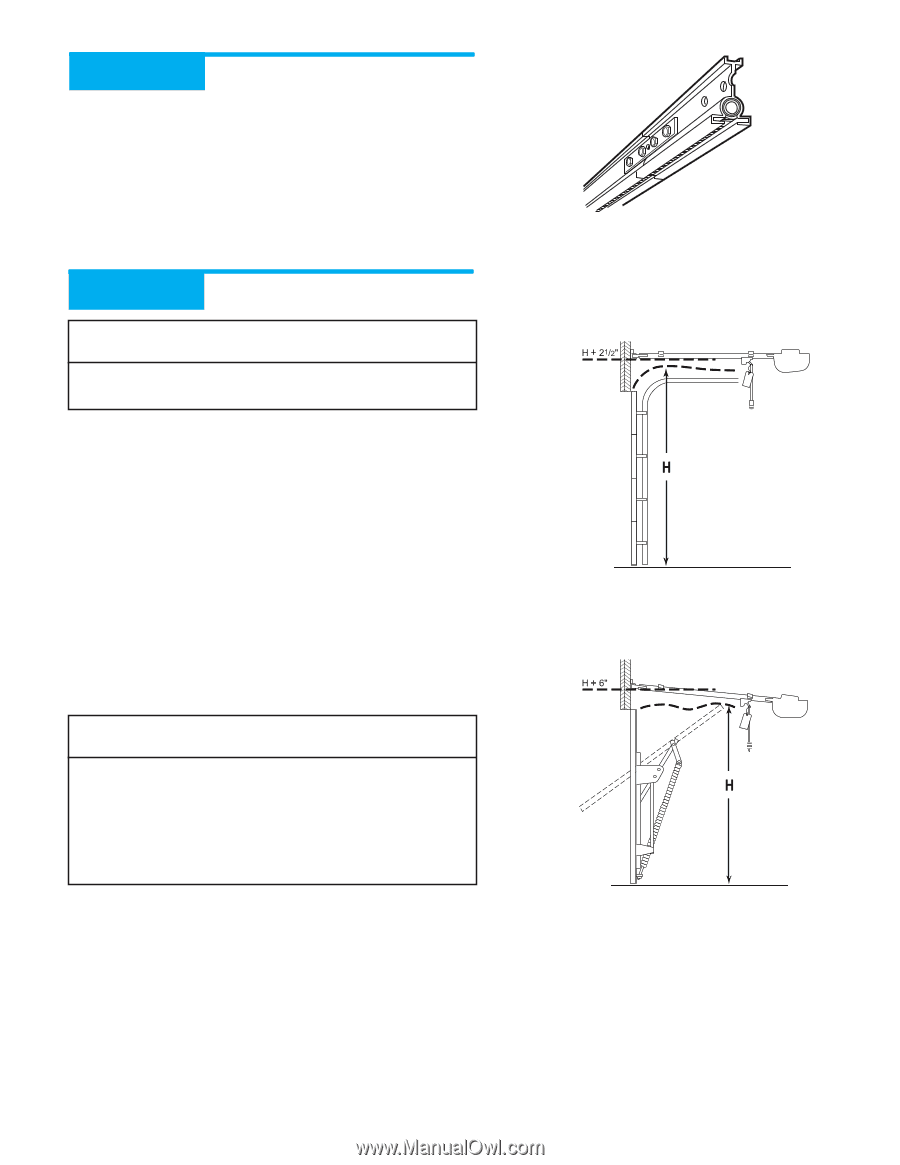
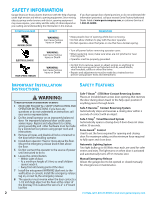
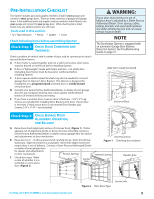
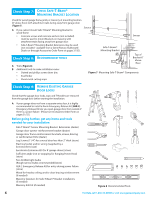
Check Step 3: MEASURE GARAGE DOOR HEIGHT Measure garage door height (7'-6", 8'-0", or taller) with tape measure. A If door height is 7'-6" or less, continue with Check Step 4. B If your door height is above 7'-6", make sure your rail is long enough to open the garage door. If there is any question contact your Customer Service Representative at 1-800-35-GENIE. Check Step 4: CHECK DOOR HEADER AREA NOTE The header is a heavily reinforced section of the wall just above the top of the garage door opening. A Find vertical center line of door and header: • Close door. • Measure door width at top. • Mark a point at center of door and on header directly above door. Draw a center line to connect points. B Find Header Bracket mounting height (Figure 4): (Do not attach Header Bracket). • Raise door, watching top edge of door and stop door when its edge reaches its highest point. • Measure distance ("H") from top edge of door to floor. - For sectional doors, add 2-1/2" to "H". Mark a point on center line. Bottom of Header Bracket will be installed here. - For one-piece doors, add 6" to "H". Mark this point on center line. Bottom of Header Bracket will be installed here. NOTE • For both types of doors: - If the ceiling in your garage is so low that there is not at least a 3" space above the Header Bracket mounting point, contact a Genie Factory Authorized Dealer. • If a door spring is in the way, place the Header Bracket avove the spring. Do Not move the door spring. C Check wall for a stud or a solid header at your mark: (If checking a finished wall, a stud finder may be helpful). • If location is above Header, a 2" x 6" board must be screwed to studs beside your mark with at least two Lag Screws and Flat Washers (not provided). • Transfer your mark to new mounting board. Rail Extension for 8' door Figure 3 Rail Extension Kit SECTIONAL DOOR ONE-PIECE DOOR Figure 4 Find Highest Point of Travel 4 For Help, call 1-800-35-GENIE or visit www.geniecompany.com
-
 1
1 -
 2
2 -
 3
3 -
 4
4 -
 5
5 -
 6
6 -
 7
7 -
 8
8 -
 9
9 -
 10
10 -
11
-
12
-
13
-
14
-
15
-
16
-
17
-
18
-
19
-
20
-
21
-
22
-
23
-
24
-
25
-
26
-
27
-
28
-
29
-
30
-
31
-
32
 |
 |