Gigabyte GA-8I945P-G Manual - Page 4
Advanced BIOS Features, Hard Disk Boot Priority, SCSI-0: IT8212, First Boot Device, CD-ROM - raid
 |
View all Gigabyte GA-8I945P-G manuals
Add to My Manuals
Save this manual to your list of manuals |
Page 4 highlights
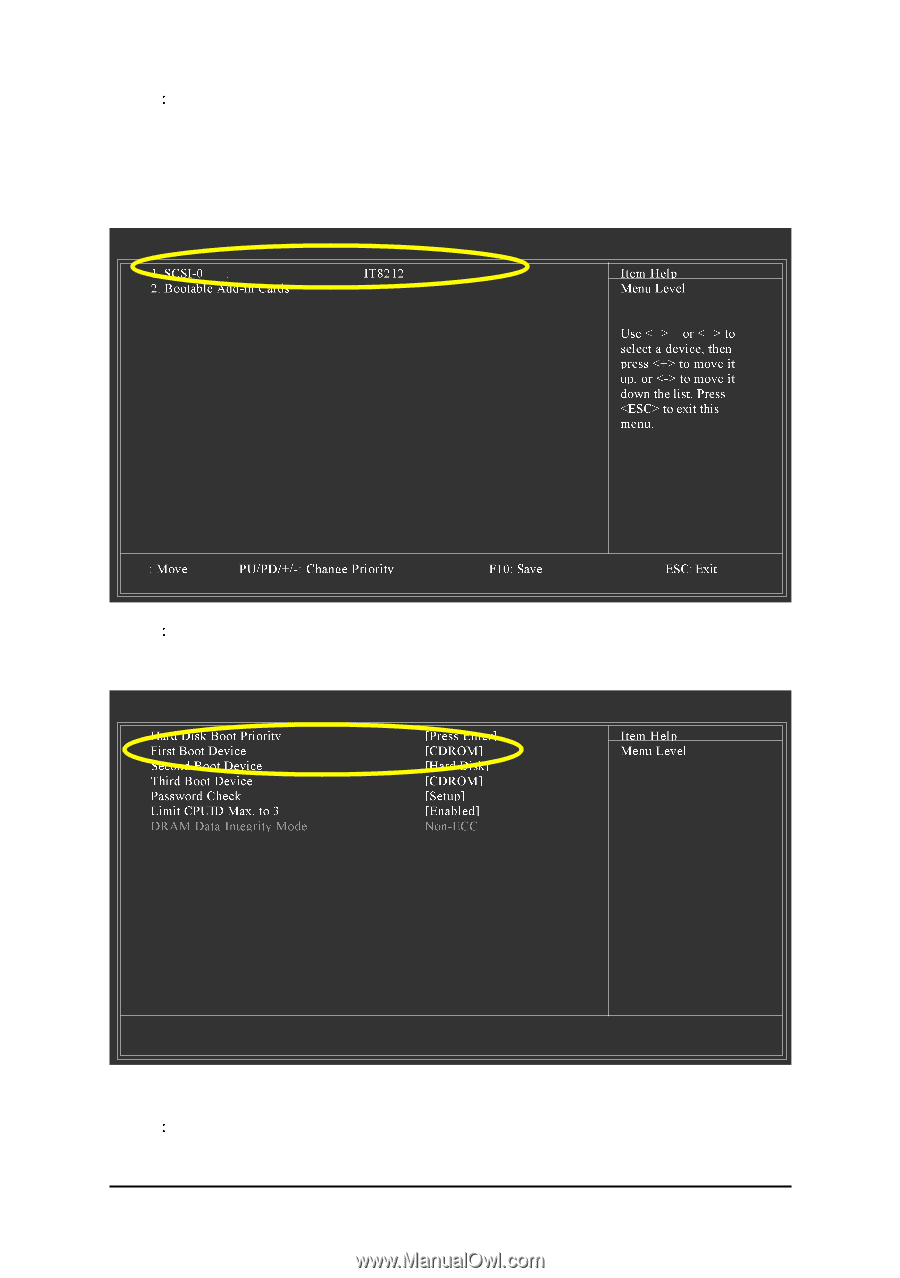
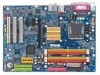
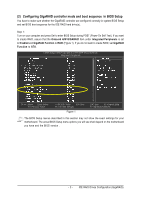
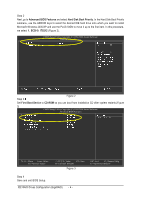
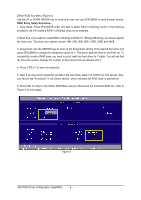
Ác Step 2 Next, go to Advanced BIOS Features and select Hard Disk Boot Priority. In the Hard Disk Boot Priority Åé submenu, use the ARROW keys to select the desired IDE hard drive onto which you want to install ¤¤ Microsoft Windows 2000/XP and use the PLUS SIGN to move it up to the first item. In this procedure, we select 1. SCSI-0: IT8212 (Figure 2). ¤å CMOS Setup Utility-Copyright (C) 1984-2004 Award Software Hard Disk Boot Priority Step 3 Figure 2 Set First Boot Device to CD-ROM so you can boot from Installation CD after system restarts.(Figure 3) CMOS Setup Utility-Copyright (C) 1984-2004 Award Software Advanced BIOS Features : Move Enter: Select F5: Previous Values +/-/PU/PD: Value F10: Save F6: Fail-Safe Defaults Figure 3 ESC: Exit F1: General Help F7: Optimized Defaults Step 4 Save and exit BIOS Setup. IDE RAID Drives Configuration (GigaRAID) - 4 -
-
 1
1 -
 2
2 -
 3
3 -
 4
4 -
 5
5 -
 6
6 -
 7
7 -
 8
8 -
 9
9 -
 10
10 -
11
-
12
-
13
-
14
-
15
-
16
-
17
-
18
 |
 |