Gigabyte GA-F2A58M-H User Manual - Page 10
Installing an Expansion Card, 1-6 Setup of the AMD Dual Graphics Configuration
 |
View all Gigabyte GA-F2A58M-H manuals
Add to My Manuals
Save this manual to your list of manuals |
Page 10 highlights
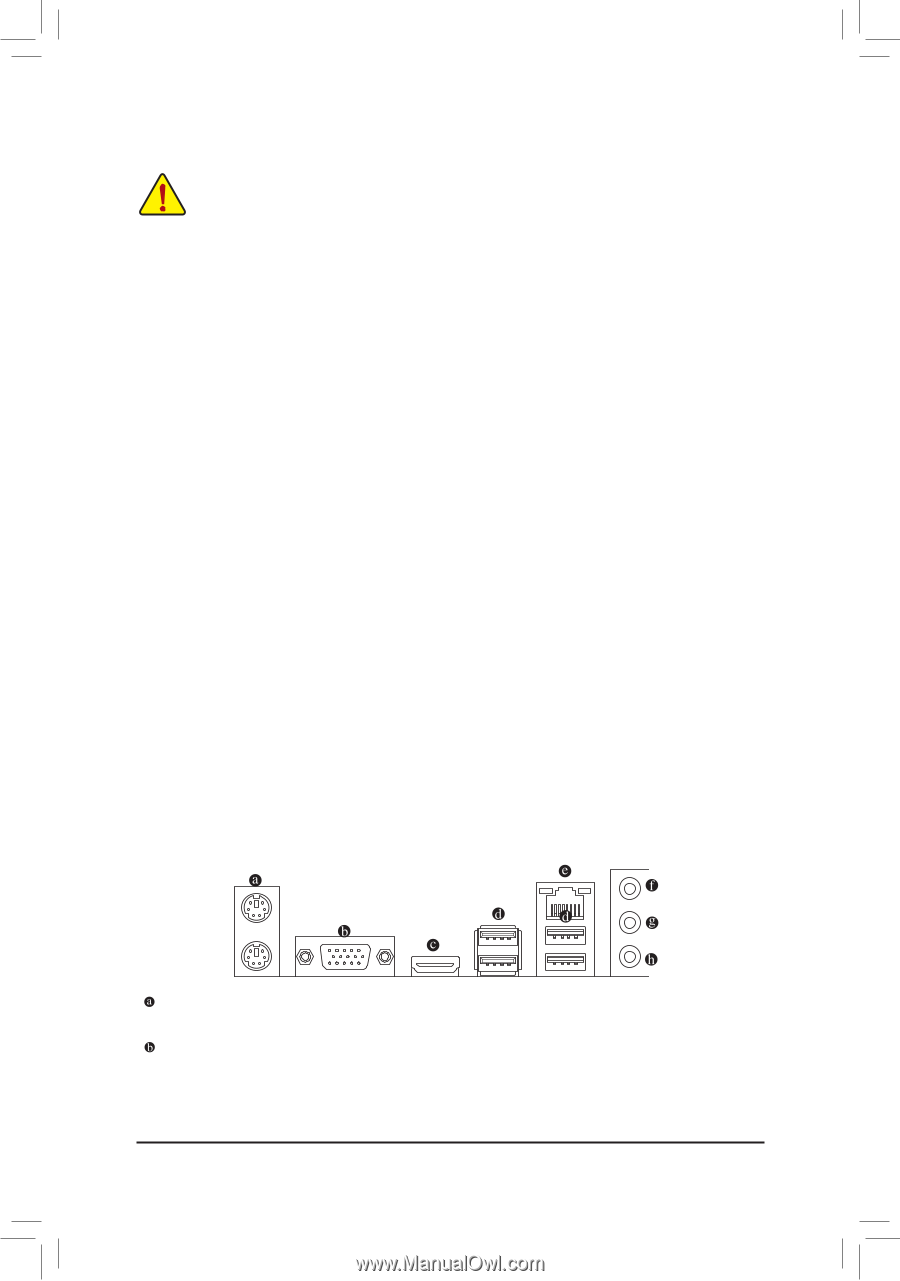
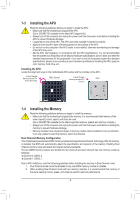
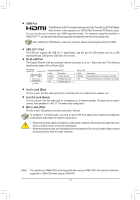
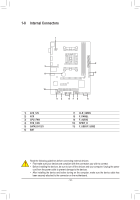
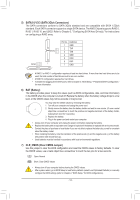
1-5 Installing an Expansion Card Read the following guidelines before you begin to install an expansion card: •• Make sure the motherboard supports the expansion card. Carefully read the manual that came with your expansion card. •• Always turn off the computer and unplug the power cord from the power outlet before installing an expansion card to prevent hardware damage. 1-6 Setup of the AMD Dual Graphics Configuration A. System Requirements -- AMD A series processor -- Windows 8.1/8/7 operating system -- An AMD Dual Graphics technology-supported motherboard (with the BIOS updated to the latest version) and correct driver (make sure the onboard graphics driver version is Rev. 8.982 or above) -- An AMD graphics card that supports AMD Dual Graphics technology (for more details, please visit AMD's official website) and correct driver (For an FM2+ APU, please use an AMD R7 200 series graphics card; for an FM2 APU, please use an AMD Radeon™ HD 6000 graphics card.) B. Installing the Graphics Cards and Configuring BIOS Setup Step 1: Observe the steps in "1-5 Installing an Expansion Card" and install an AMD Dual Graphics technology-supported graphics card on the PCIEX16 slot. Plug the monitor cable into the graphics card and start up your computer. Step 2: Enter BIOS Setup to set the following items under the Peripherals\GFX Configuration menu. -- Set Integrated Graphics to Force. -- Set UMA Frame Buffer Size to 512MB or above. Save the settings and exit BIOS Setup. Restart your computer. C. Configuring the Graphics Card Driver After installing the graphics card driver in the operating system, go to the AMD VISION Engine Control Center. Browse to Performance\AMD Radeon™ Dual Graphics and ensure the Enable AMD Radeon Dual Graphics check box is selected. (Note) Make sure the drivers for the Chipset, onboard graphics, and external graphics card are properly installed. 1-7 Back Panel Connectors PS/2 Keyboard and PS/2 Mouse Port Use the upper port (green) to connect a PS/2 mouse and the lower port (purple) to connect a PS/2 keyboard. D-Sub Port The D-Sub port supports a 15-pin D-Sub connector and supports a maximum resolution of 1920x1200 (the actual resolutions supported depend on the monitor being used). Connect a monitor that supports D-Sub connection to this port. - 10 -
-
 1
1 -
2
-
3
-
4
-
 5
5 -
 6
6 -
 7
7 -
 8
8 -
 9
9 -
 10
10 -
 11
11 -
 12
12 -
 13
13 -
 14
14 -
 15
15 -
16
-
17
-
18
-
19
-
20
-
21
-
22
-
23
-
24
-
25
-
26
-
27
-
28
-
29
-
30
-
31
-
32
-
33
-
34
 |
 |