Gigabyte GA-MA770-S3P Manual - Page 85
B. Installing Windows Vista
 |
View all Gigabyte GA-MA770-S3P manuals
Add to My Manuals
Save this manual to your list of manuals |
Page 85 highlights
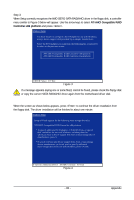
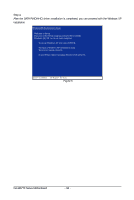
B. Installing Windows Vista (Note) (The procedure below assumes that only one RAID array exists in your system.) Step 1: Restart your system to boot from the Windows Vista setup disk and perform standard OS installation steps. When a screen similar to that below appears (RAID hard drive will not be detected at this stage), select Load Driver. (Figure 6). Figure 6 Step 2: Specify the location where the driver is saved, such as your floppy disk (Figure 7). Figure 7 (Note) For AHCI drives, installation of Windows Vista does not require you to install the SATA AHCI driver in advance during the OS installation process. - 85 - Appendix
-
 1
1 -
2
-
3
-
4
-
5
-
6
-
7
-
8
-
9
-
10
-
11
-
12
-
13
-
14
-
15
-
16
-
17
-
18
-
19
-
20
-
21
-
22
-
23
-
24
-
25
-
26
-
27
-
28
-
29
-
30
-
31
-
32
-
33
-
34
-
35
-
36
-
37
-
38
-
39
-
40
-
41
-
42
-
43
-
44
-
45
-
46
-
47
-
48
-
49
-
50
-
51
-
52
-
53
-
54
-
55
-
56
-
57
-
58
-
59
-
60
-
61
-
62
-
63
-
64
-
65
-
66
-
67
-
68
-
69
-
70
-
71
-
72
-
73
-
74
-
75
-
76
-
77
-
78
-
79
-
 80
80 -
 81
81 -
 82
82 -
 83
83 -
 84
84 -
 85
85 -
 86
86 -
 87
87 -
 88
88 -
 89
89 -
 90
90 -
91
-
92
-
93
-
94
-
95
-
96
-
97
-
98
-
99
-
100
 |
 |
Appendix
- 85 -
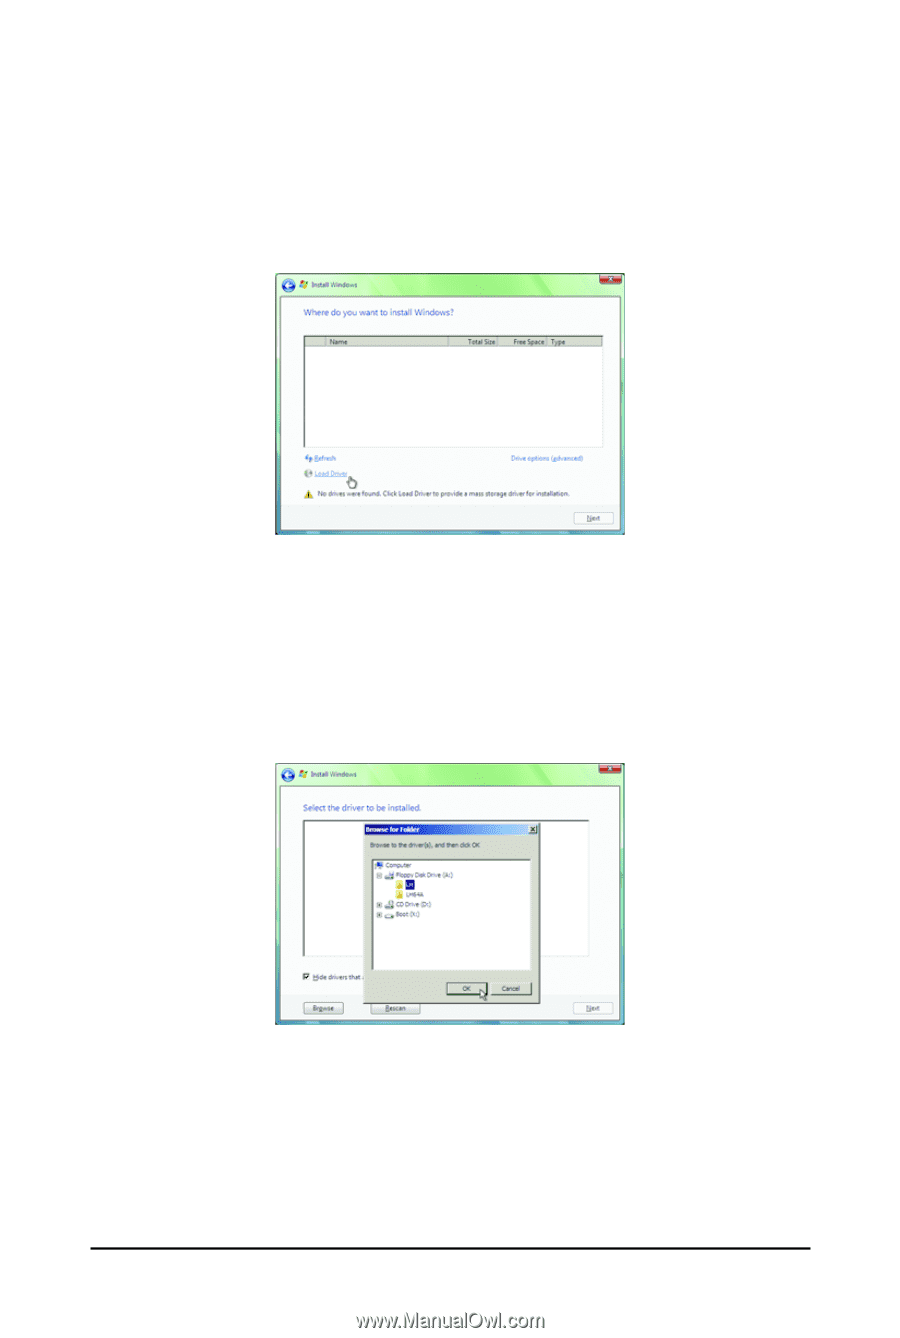
B. Installing Windows Vista
(Note)
(The procedure below assumes that only one RAID array exists in your system.)
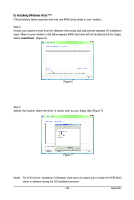
Step 1:
Restart your system to boot from the Windows Vista setup disk and perform standard OS installation
steps. When a screen similar to that below appears (RAID hard drive will not be detected at this stage),
select
Load Driver
. (Figure 6).
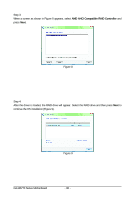
Step 2:
Specify the location where the driver is saved, such as your floppy disk (Figure 7).
(Note)
For AHCI drives, installation of Windows Vista does not require you to install the SATA AHCI
driver in advance during the OS installation process.
Figure 6
Figure 7