Gigabyte GN-AP03G User Manual - Page 9
Manually Setup WDS, Hardware Installation
 |
View all Gigabyte GN-AP03G manuals
Add to My Manuals
Save this manual to your list of manuals |
Page 9 highlights
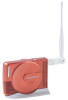
2. Manually Setup WDS GN-AP03G AirCruiser G Range Extender Hardware Installation Follow the steps below when installing your Range Extender(s). Before you begin, please keep the following in mind when placing your Range Extender(s). Select a suitable location to install the Range Extender. Assure that the location is away from any interfering radio signals from devices such as microwave ovens, garage door openers, vacuum cleaning devices, etc. Please also operate the Range Extender in a cool dry place, away from direct sunlight. Position the Range Extender appropriately. Signal strength is greatly dependent on your well-placed Range Extender. Generally, a centralized area with 360° clear line of sight is the best location with the antenna in a high position to allow optimal propagation of the signal. The location of the Range Extender greatly influences the signal reception. Step 1 Turn off all the hardware devices in your network. Step 2 Connect the Ethernet cable of your router/hub to the LAN port of the Range Extender. Step 3 Connect the other end of the Ethernet cable to the LAN port of your desktop or notebook. Step 4 Plug the power adapter cord into the Range Extender's power jack and then plug the power adapter into a power outlet. Step 5 Turn on all the hardware devices in your network. After verifying all the connections, proceed to Appendix C: PC Configuration Step 6 WDS setting of GN-AP03G Type in http://192.168.1.1 in your IE browser, then you can log in to the configuration WEB page of GN-AP03G. And follow the below instruction to configuration the WDS setting. 5
-
 1
1 -
2
-
3
-
 4
4 -
 5
5 -
 6
6 -
 7
7 -
 8
8 -
 9
9 -
 10
10 -
 11
11 -
 12
12 -
 13
13 -
 14
14 -
15
-
16
-
17
-
18
-
19
-
20
-
21
-
22
-
23
-
24
-
25
-
26
-
27
-
28
-
29
-
30
-
31
-
32
-
33
-
34
-
35
-
36
 |
 |
