Gigabyte MATMH81 Manual - Page 25
JCOM6/JCOM8 5V/12V/RI Signal Select Header for Serial Port 9/10, F_AUDIO Front Panel Audio Header
 |
View all Gigabyte MATMH81 manuals
Add to My Manuals
Save this manual to your list of manuals |
Page 25 highlights
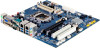
16/19) JCOM6/JCOM8 (5V/12V/RI Signal Select Header for Serial Port 9/10) 1 2 5 6 1-2 Close: 5V (Power COM) JCOM6 JCOM8 1 2 5 6 3-4 Close: RI (STAND COM) 1 2 5 6 5-6 Close: 12V (Power COM) Pin No. 1 2 3 4 5 6 Definition VCC RI9-/5V/12V NRI9RI9-/5V/12V +12V RI9-/5V/12V Pin No. 1 2 3 4 5 6 Definition VCC RI10-/5V/12V NRI10RI10-/5V/12V +12V RI10-/5V/12V 22) F_AUDIO (Front Panel Audio Header) The front panel audio header supports Intel High Definition audio (HD) and AC'97 audio. You may connect your chassis front panel audio module to this header. Make sure the wire assignments of the module connector match the pin assignments of the motherboard header. Incorrect connection between the module connector and the motherboard header will make the device unable to work or even damage it. 42 41 Pin No. Definition 1 MIC_L 21 2 -AGND 3 MIC_R 4 -ACZ_DET 10 9 5 HPOUT_R 6 SRTN1 7 FAUDIO_JD 8 NC 9 HPOUT_L 10 SRTN2 Hardware Installation - 25 -
-
 1
1 -
2
-
3
-
4
-
5
-
6
-
7
-
8
-
9
-
10
-
11
-
12
-
13
-
14
-
15
-
16
-
17
-
18
-
19
-
 20
20 -
 21
21 -
 22
22 -
 23
23 -
 24
24 -
 25
25 -
 26
26 -
 27
27 -
 28
28 -
 29
29 -
 30
30 -
31
-
32
-
33
-
34
-
35
-
36
-
37
-
38
-
39
-
40
-
41
-
42
-
43
-
44
-
45
-
46
-
47
-
48
-
49
-
50
-
51
-
52
-
53
-
54
-
55
-
56
-
57
-
58
-
59
-
60
-
61
-
62
-
63
-
64
-
65
-
66
 |
 |
