Gigabyte X299 AORUS Gaming 7 Pro Users Manual - Page 25
Onboard LEDs and Buttons, Status LEDs, Quick Buttons
 |
View all Gigabyte X299 AORUS Gaming 7 Pro manuals
Add to My Manuals
Save this manual to your list of manuals |
Page 25 highlights
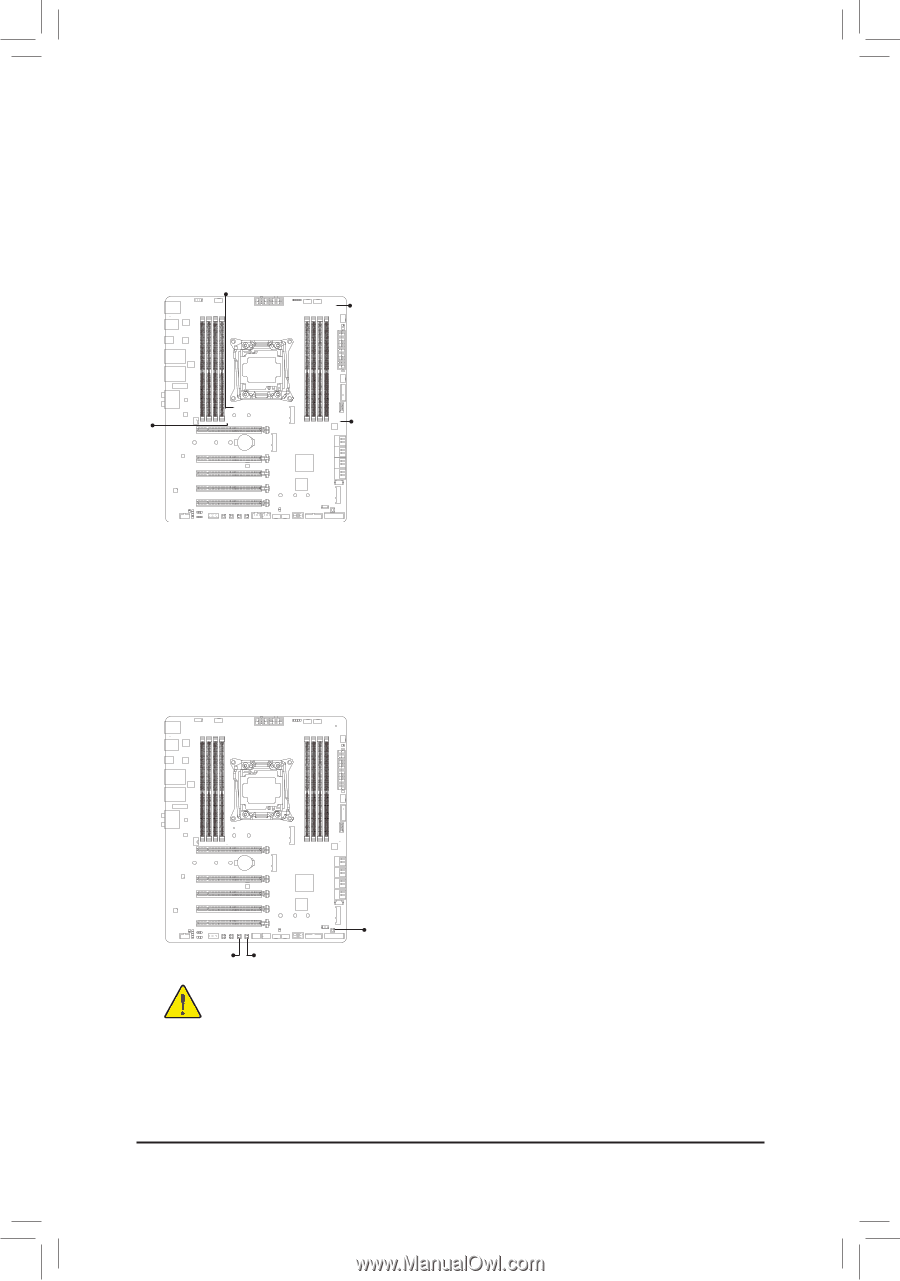
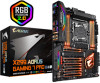
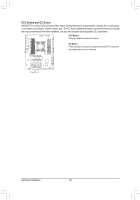
1-8 Onboard LEDs and Buttons Status LEDs The status LEDs show whether the CPU, memory, graphics card, and operating system are working properly after system power-on. If the CPU/DRAM/VGA LED is on, that means the corresponding device is not working normally; if the BOOT LED is on, that means you haven't entered the operating system yet. CPU DRAM CPU: CPU status LED DRAM: Memory status LED VGA: Graphics card status LED BOOT: Operating system status LED VGA BOOT Quick Buttons This motherboard has 3 quick buttons: power button, reset button, and clear CMOS button. The power button and reset button allow users to quickly turn on/off or reset the computer in an open-case environment when they want to change hardware components or conduct hardware testing. Use this button to clear the BIOS configuration and reset the CMOS values to factory defaults when needed. PW_SW: Power Button RST_SW: Reset Button CMOS_SW: Clear CMOS Button RST_SW PW_SW CMOS_SW •• Always turn off your computer and unplug the power cord from the power outlet before using the clear CMOS button. •• Do not use the clear CMOS button when the system is on, or the system may shutdown and data loss or damage may occur. •• After system restart, go to BIOS Setup to load factory defaults (select Load Optimized Defaults) or manually configure the BIOS settings (refer to Chapter 2, "BIOS Setup," for BIOS configurations). - 25 - Hardware Installation
-
 1
1 -
2
-
3
-
4
-
5
-
6
-
7
-
8
-
9
-
10
-
11
-
12
-
13
-
14
-
15
-
16
-
17
-
18
-
19
-
 20
20 -
 21
21 -
 22
22 -
 23
23 -
 24
24 -
 25
25 -
 26
26 -
 27
27 -
 28
28 -
 29
29 -
 30
30 -
31
-
32
-
33
-
34
-
35
-
36
-
37
-
38
-
39
-
40
-
41
-
42
-
43
-
44
-
45
-
46
-
47
-
48
-
49
-
50
-
51
-
52
-
53
-
54
-
55
-
56
-
57
-
58
-
59
-
60
-
61
-
62
-
63
-
64
-
65
-
66
-
67
-
68
-
69
-
70
-
71
-
72
-
73
-
74
-
75
-
76
-
77
-
78
-
79
-
80
-
81
-
82
-
83
-
84
-
85
-
86
-
87
-
88
-
89
-
90
-
91
-
92
-
93
-
94
-
95
-
96
-
97
-
98
-
99
-
100
-
101
-
102
-
103
-
104
-
105
-
106
-
107
-
108
-
109
-
110
-
111
-
112
-
113
-
114
-
115
-
116
-
117
-
118
-
119
-
120
-
121
-
122
-
123
-
124
-
125
-
126
-
127
-
128
-
129
-
130
-
131
-
132
-
133
-
134
-
135
-
136
-
137
-
138
-
139
-
140
-
141
-
142
-
143
-
144
-
145
-
146
-
147
-
148
-
149
-
150
-
151
-
152
 |
 |