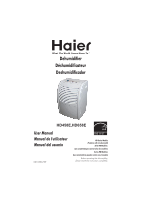
Haier DE45EA-L User Manual - Page 5
Features/Care, Cleaning
 |
UPC - 688057348988
View all Haier DE45EA-L manuals
Add to My Manuals
Save this manual to your list of manuals |
Page 5 highlights
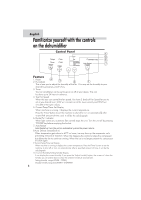
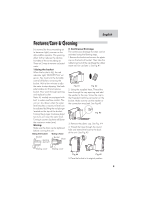
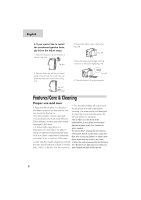
English Features/Care & Cleaning It is normal for the surrounding air to become slightly warmer as the dehumidifier operates. This warming effect further reduces the relative humidity of the surrounding air. There air 2 ways to remove collected water. 1.Using the bucket When the bucket is full, the red indicator light, "BUCKET FULL" will go on. You must turn the humidity control off before removing the bucket. Wait a few minutes to allo the water to stop dripping. Use both side handles to lift and remove bucket. Pour water through opening and replace bucket. Note: All models are equipped with built-in water overflow control. The unit will shut down when the water level reaches a maximum level can be adjusted by lifting the red plunger located on the top of the bucket. Turning the plunger clockwise about two turns will raise the water level. Turning it counter-clockwise will lower the maximum water level. Waring: Make sure the drain cap be tightened before running the unit. Using the bucket Using a hose Bucket Sealing element Bucket Hose 2. Continuous Drainage The continuous drainage function can be activated using the flowing steps. 1.Remove the bucket and remove the plastic cap on the back of bucket. Then take the rubbet insert out of the cap (Keep the rubber insert well for use later ). See Fig.#1 • Fig. #1 Fig. #2 2. Using the supplied hose, Thread the hose through the cap opening and add the washer to the cap. Screw the cap to the threaded matching connector on the bucket. Make sure to use the washer or the connection may leak. See Fig.#3 fi Fig. #3 3. Remove the plastic cap. See Fig. #4 4. Thread the hose through the round hole and extend the hose to the back of the unit .See Fig.#5 Sealing cover Sealing cover Fig. #4 Fig. #5 5. Place the bucket in its original position. 4
-
 1
1 -
 2
2 -
 3
3 -
 4
4 -
 5
5 -
 6
6 -
 7
7 -
 8
8 -
 9
9 -
 10
10 -
 11
11 -
12
-
13
-
14
-
15
-
16
-
17
-
18
-
19
-
20
-
21
-
22
-
23
-
24
 |
 |
