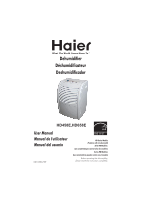
Haier DE45EA-L User Manual - Page 6
English
 |
UPC - 688057348988
View all Haier DE45EA-L manuals
Add to My Manuals
Save this manual to your list of manuals |
Page 6 highlights
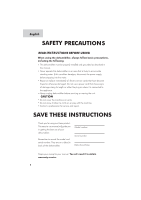
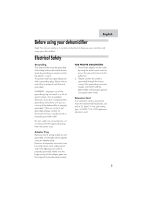
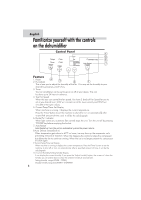
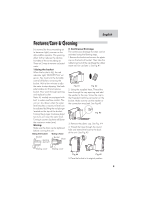
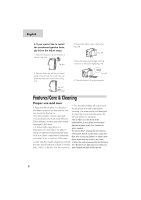
English 3.If you would like to install the pruchased garden hose, pls follow the below steps: 1. Remove the plastic cap on the back of the unit. (Fig. #6) Fig. #6 3. Remove the plastic cap on the bucket. (Fig. #8) Fig. #8 4.Screw the hose to the threaded matching connector on the bucket tightly.(Fig. #9) 2. Take out the bucket, pull the pruchased garden hose through the round hole and extend the hose to the front of the unit.(Fig. #7) Fig. #7 Fig. #9 5. Place the bucket in its original position. Features/Care & Cleaning Proper use and care • Place the dehumidifier in a location that does not restrict air flow into the rear coil or out the front grille. • The dehumidifier must be operated in an enclosed area to be most effective. Close all doors, windows and other outside openings to the room. • A dehumidifier operating in a basement will have little or no effect in drying an adjacent enclosed storage area, such as a closet, unless there is adequate circulation of air in and out of the area. • Turn the dehumidifier off and remove the plug from the wall outlet before cleaning. Use water and a mild detergent to clean the inlet and outlet grilles. Do not use bleach or abrasives. The air filter is on the front of the dehumidifier. It should be checked and cleaned at least every 2 to 3 weeks or when needed. To remove filter: Unplug the unit,remove the bucket and lift out the filter. Clean the filter with a vacuum cleaner or wash it with clean water and dry it with a dry cloth. • when stop the model, please be noticed • When the unit is powered for the first time, that you should restart it at least 3 minutes the "Bucket Full" light may be lit. Remove later, which is benefit foe the machine. and replace the light should go off. 5
-
 1
1 -
 2
2 -
 3
3 -
 4
4 -
 5
5 -
 6
6 -
 7
7 -
 8
8 -
 9
9 -
 10
10 -
 11
11 -
 12
12 -
13
-
14
-
15
-
16
-
17
-
18
-
19
-
20
-
21
-
22
-
23
-
24
 |
 |
