Haier HDV70E1 User Manual - Page 9
Mounting dryer on wall
 |
View all Haier HDV70E1 manuals
Add to My Manuals
Save this manual to your list of manuals |
Page 9 highlights
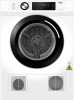
INSTALLATION INSTRUCTIONS Mounting dryer on wall 1 Determine the position of the dryer on the wall and mark the bracket position. A minimum of 50mm is needed between the top of the dryer and the ceiling for ease of installation. If mounting above a washing machine, allow sufficient room to open the lid of the washer. 2 Fix the wall hanging brackets to the wall securely, ie into the stud. If the studs are too far apart, fit a timber slat to the studs and then mount the brackets to the slat. If a slat is used install a second slat behind the spacers to ensure the dryer is horizontal. The distance between the centre of each bracket is 555mm (A). 3 To install the hooks onto the dryer, remove one screw from each side (B), reuse these screws with two more (each side) from the kit to fasten the hooks in place. 4 Remove plastic plugs from the back of the dryer and screw the spacers provided in place (C). 5 With assistance, mount the dryer on the wall brackets. 6 The inverted control panel is supplied in the accessories with your dryer. Fit inverted control panel over the existing panel. 7 Adjust the display to read correctly on an inverted panel: ■ Press and hold the 'Key Lock' and 'Option' buttons for three seconds. ■ The dryer will beep to indicate you have made a correct selection, and the display will change after three seconds. ■ Repeat the same steps to return the panel to the factory setting. A 555mm 555mm Forofmtopcehnotrlee 835mm B Froofmdrbyeorttom C 8
-
 1
1 -
2
-
3
-
 4
4 -
 5
5 -
 6
6 -
 7
7 -
 8
8 -
 9
9 -
 10
10 -
 11
11 -
 12
12 -
 13
13 -
 14
14 -
15
-
16
-
17
-
18
-
19
-
20
-
21
-
22
 |
 |
