Haier RRTG18PABW Product Manual - Page 17
To remove the crisper cover, To replace the crisper cover
 |
UPC - 688057305486
View all Haier RRTG18PABW manuals
Add to My Manuals
Save this manual to your list of manuals |
Page 17 highlights
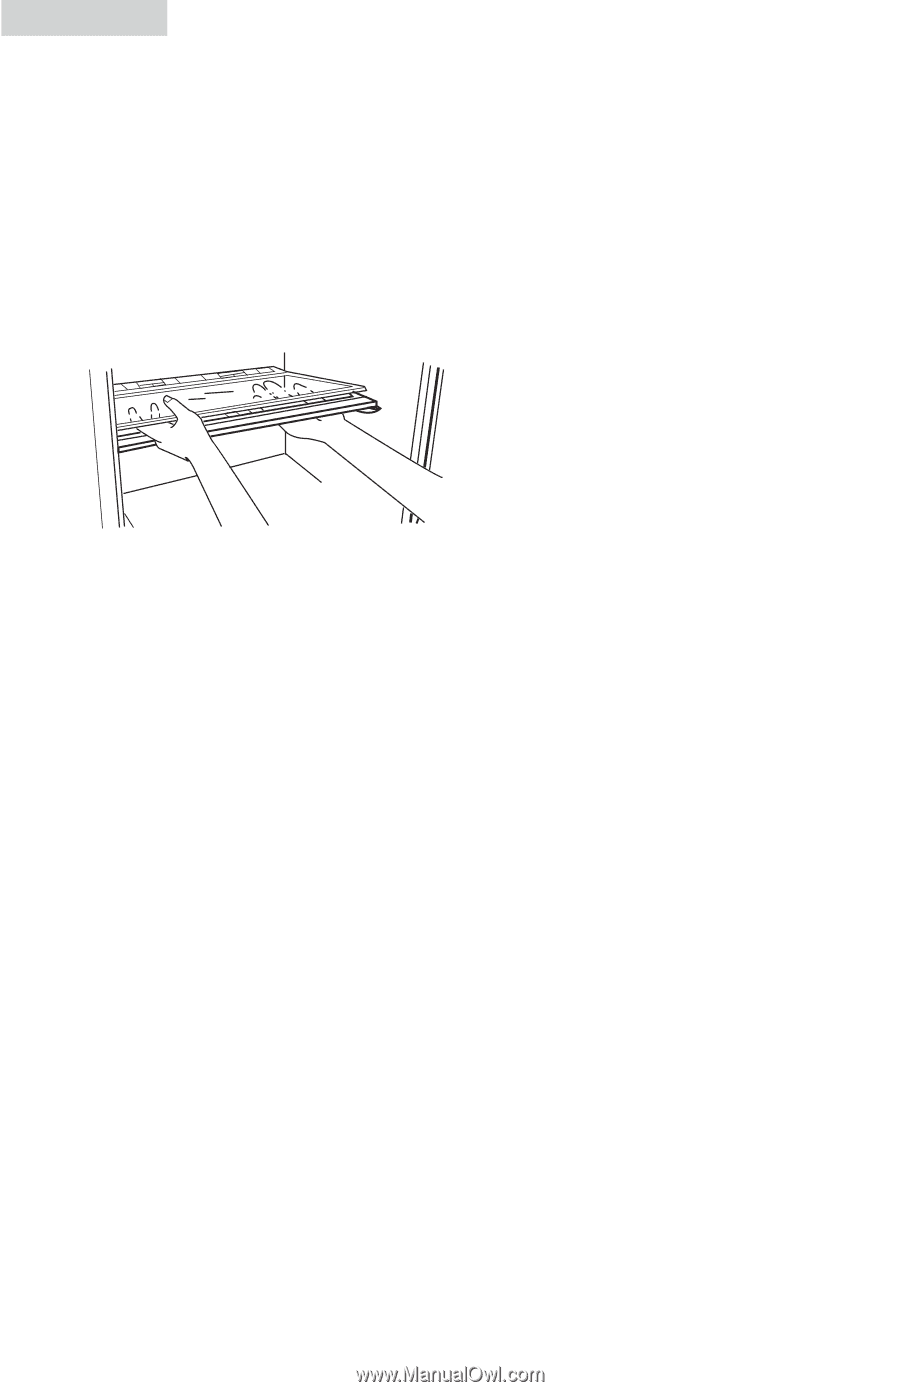
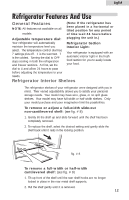
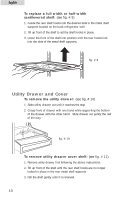
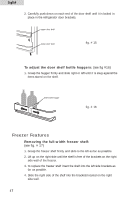
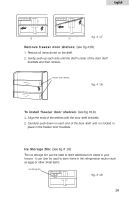
English To remove the crisper cover: (see fig. # 13) 1. First remove both crispers (see page 14 ). 2. Gently push upward from the underside of the crisper cover to remove it from the crisper cover frame. 3. Carefully grasp the crisper cover and slide out to remove. 4. Lift crisper cover frame up and remove. fig. # 13 To replace the crisper cover: (see fig. # 13) 1. Insert the rear of the crisper cover frame into the support bracket the side walls of the refrigerator. 2. Lower the front of the crisper cover frame into place. 3. Slide the rear of the crisper cover into the frame and carefully lower the front into place. 4. Replace the crispers as previously instructed. Crisper Humidity Control: (see fig. # 14) Your refrigerator model may be equipped with slide controls to raise or lower the humidity levels of your crispers. This feature will increase the storage life of your fruits and vegetables. Simply adjust the controls to the appropriate setting for the items you are storing in the crispers. 15
-
 1
1 -
2
-
3
-
4
-
5
-
6
-
7
-
8
-
9
-
10
-
11
-
 12
12 -
 13
13 -
 14
14 -
 15
15 -
 16
16 -
 17
17 -
 18
18 -
 19
19 -
 20
20 -
 21
21 -
 22
22 -
23
-
24
-
25
-
26
-
27
-
28
-
29
-
30
-
31
-
32
-
33
-
34
-
35
-
36
-
37
-
38
-
39
-
40
-
41
-
42
-
43
-
44
-
45
-
46
-
47
-
48
-
49
-
50
-
51
-
52
-
53
-
54
-
55
-
56
-
57
-
58
-
59
-
60
-
61
-
62
-
63
-
64
-
65
-
66
-
67
-
68
-
69
-
70
-
71
-
72
-
73
-
74
-
75
-
76
-
77
-
78
-
79
-
80
-
81
-
82
-
83
-
84
 |
 |