Haier XPB55-13S User Manual - Page 6
Disposal after washing
 |
View all Haier XPB55-13S manuals
Add to My Manuals
Save this manual to your list of manuals |
Page 6 highlights
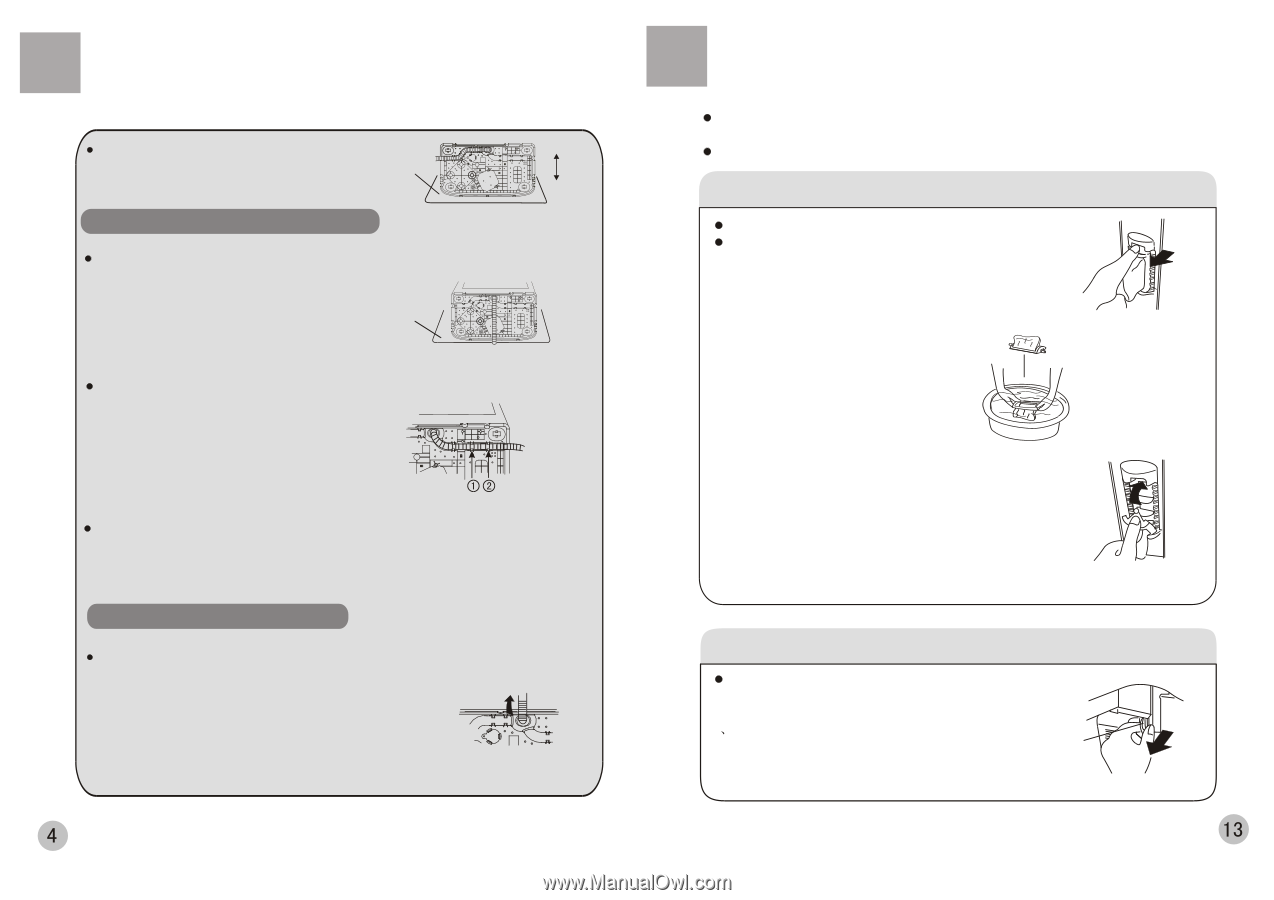
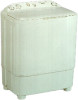
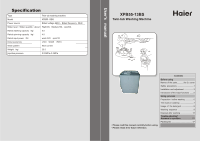
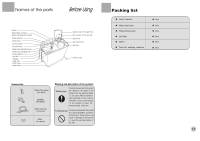
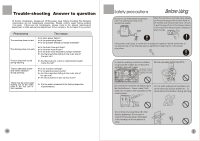
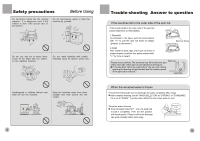
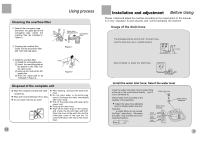
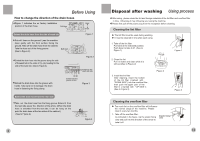
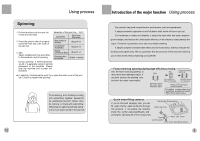
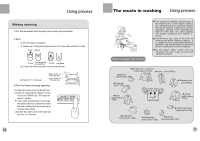
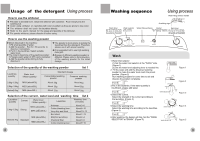
Before Using How to change the direction of the drain hoses Figure 1 indicates the ex factory installation position of the drain hose. Soft item Back Front Extend the drain hose from the side of wash tub Figure 1 Put soft items on the ground. Lean the machine down gently with the front surface facing the ground. Take off the drain hose from the cabinet. Take the hose out of the fixing groove. (See to Figure 2). Soft item Embed the drain hose into the groove along the side of thewash tub in the order of (1)~(2), heading for the side of the wash tub. (See to Figure 3). Figure 2 Extend to the wash tub side Embed the drain hose into the groove with hands. Take care not to damage the drain hose in fastening the fixing clamp. Embed into the groove in turn Figure 3 Extend the drain hose from the rear side Take out the drain hose from the fixing groove. Extend it from the rear side as per the direction of the arrow. (When the drain hose is extended from the rear side, it can be hung on the point for drain hose at the two sides of the cabinet.) (See to Figure 4). Figure 4 Disposal after washing Using process After using, please clean the lint and foreign materials of the lint filter and overflow filter in time. Otherwise it may influence your using the machine. Please first pull off the power plug from the receptacle before cleaning. Cleaning the lint filter The lint filter must be used during washing. It must be cleaned in time after each using. 1. Take off the lint filter Put hand at the indicated position. Push down to take it off. ( See to Figure 1) Figure 1 2. Clean the lint Put it in water and clean while it is still wet.(See to Figure 2) 3. Install the lint filter After cleaning, insert the bottom of the lint filter ( marked with "DOWN SIDE") into the overflow filter , then push the upper part of the filter in ( marked with " UP SIDE "). (See to Figure 3) Figure 2 Figure 3 Cleaning the overflow filter Too much lint on the overflow filter will influence the normal usage of the machine. Please clean it every two months. 1 Take off the overflow filter. As indicated in the figure, nip the elastic fixing claw and pull it to the direction of the arrow to take it off. Elastic fixing claw
-
 1
1 -
 2
2 -
 3
3 -
 4
4 -
 5
5 -
 6
6 -
 7
7 -
 8
8 -
 9
9 -
 10
10
 |
 |