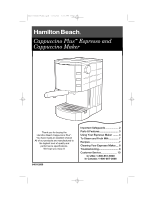
Hamilton Beach 40729 Use And Care - Page 4
Using Your Espresso Maker - parts
 |
UPC - 040094407293
View all Hamilton Beach 40729 manuals
Add to My Manuals
Save this manual to your list of manuals |
Page 4 highlights
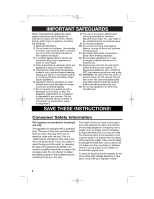
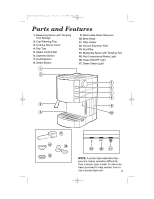
840112600 Ev00.qxd 7/16/03 1:55 PM Page 4 Using Your Espresso Maker Before First Use 1. Wash all removable parts in warm, soapy water. Do not wash these parts in a dishwasher. 2. Make sure all three buttons are in the OFF (up) position and the steam control dial is in the closed/OFF postion. Turn the steam control dial clockwise to close. 3. Plug in the unit. 4. Fill water reservoir with cold water. 5. Depress the ON/OFF button. The ON/OFF light will glow green and the Temperature/Ready light will glow red indicating the water is heating. The Temperature/Ready light will go out when the water is heated. 6. Place a shallow container under the spouts. Make sure the container is wide enough to catch the water from both spouts. 7. After the Temperature/Ready light has gone out, press the espresso button to begin the brewing cycle. Press the espresso button to turn the water off several seconds BEFORE the container is full. This extra time is necessary to avoid over-filling the container. NOTE: The first time the unit is used it will take a little longer for the machine to pump the water. 8. Empty the container and replace to run another cycle of water until water level in the water reservoir is at "MIN". NEVER run until the reservoir is empty. CAUTION: Pumping dry will permanently damage the appliance. After each brewing, the Temperature/ Ready light will cycle on for a few seconds to reheat for the next cup. 9. Place an empty container under the frothing nozzle. Ensure that the frothing nozzle is entirely inside the container and the steam button is off. Turn the steam control dial counterclockwise 3⁄4 to 1 full turn. Press the espresso button to pump water out of the frothing nozzle for 10 seconds. 10. After cleaning, empty any remaining water from the reservoir. Dry all parts. 11. Press ON/OFF button once to turn the unit OFF. 4
-
 1
1 -
 2
2 -
 3
3 -
 4
4 -
 5
5 -
 6
6 -
 7
7 -
 8
8 -
 9
9 -
 10
10 -
11
-
12
-
13
-
14
-
15
-
16
-
17
-
18
-
19
-
20
 |
 |