Hamilton Beach 66333 Use & Care - Page 5
cont.
 |
UPC - 040094663330
View all Hamilton Beach 66333 manuals
Add to My Manuals
Save this manual to your list of manuals |
Page 5 highlights
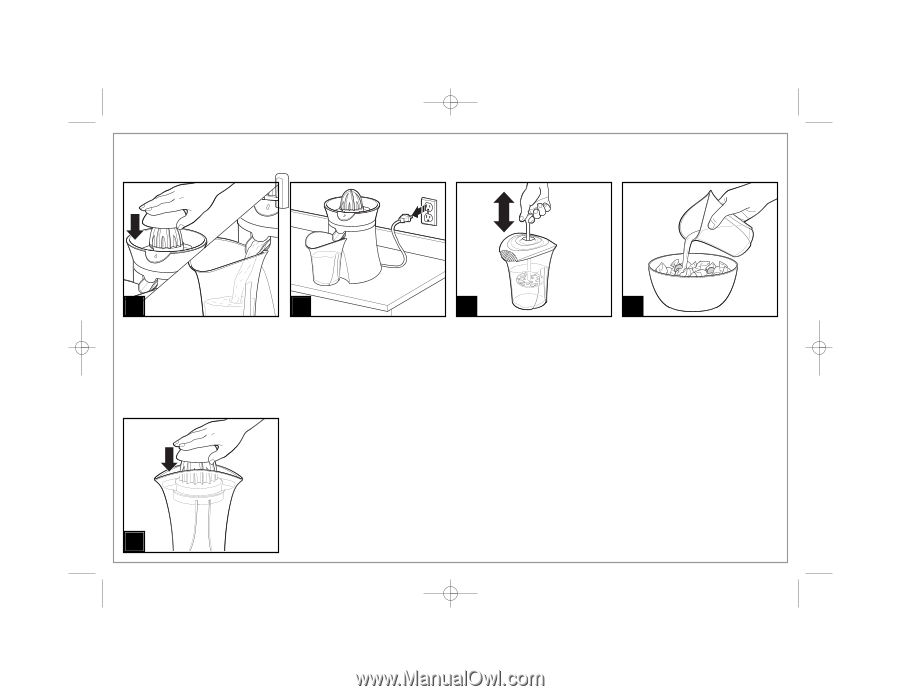
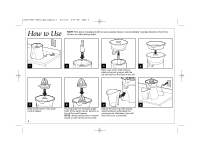
840191900 ENv04.qxd:Layout 1 5/10/10 5:54 PM Page 5 How to Use (cont.) 9 10 11 Push down on reamer with halved fruit to start the juicing action. Lift the fruit up off the reamer and the juicer stops. NOTE: Pushing down too hard on fruit while juicing can cause the unit to move around slightly on the countertop, or wiggle. If this occurs, push down on fruit with less pressure. When finished juicing, unplug from outlet. NOTE: Flip the juice spout upwards to the closed position to keep juice from dripping onto the countertop, or to stop the flow of juice into the carafe. As an alternative, the small reamer can be placed on top of the juice carafe and snapped into place. Place the fruit on top of the reamer and twist to juice. For larger fruit, place the bigger reamer on TOP of the smaller reamer. 13 12 Liquid mixture may be poured or strained from the carafe. 5
-
 1
1 -
 2
2 -
 3
3 -
 4
4 -
 5
5 -
 6
6 -
 7
7 -
 8
8 -
 9
9 -
 10
10 -
 11
11 -
12
-
13
-
14
-
15
-
16
-
17
-
18
-
19
-
20
-
21
-
22
-
23
-
24
-
25
-
26
-
27
-
28
 |
 |