Hamilton Beach 70740 Use & Care - Page 7
How to Use Slicing/Shredding Disc - bowl
 |
View all Hamilton Beach 70740 manuals
Add to My Manuals
Save this manual to your list of manuals |
Page 7 highlights
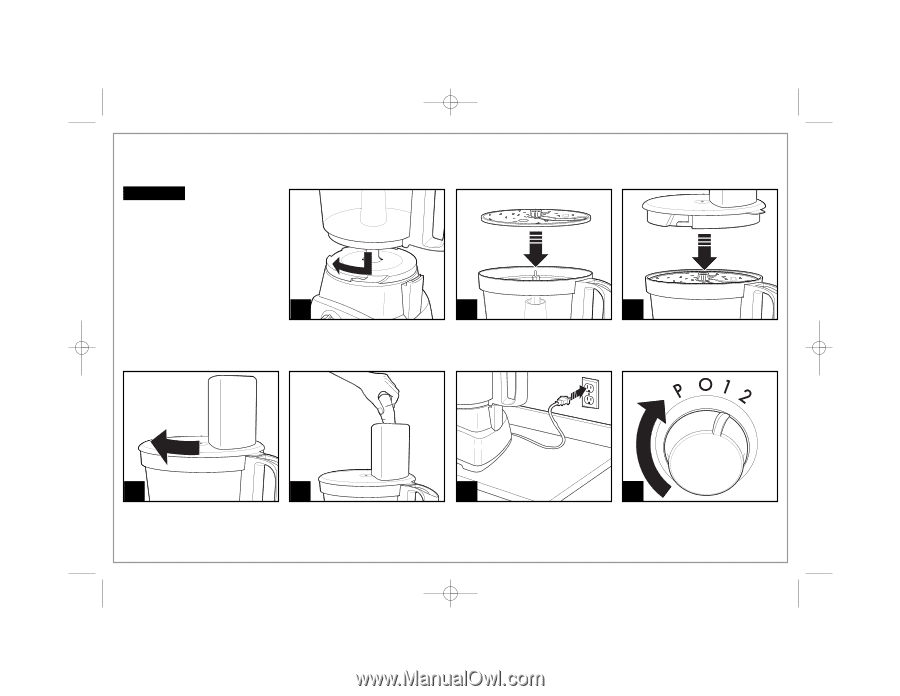
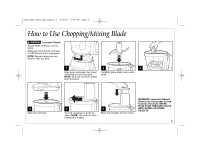
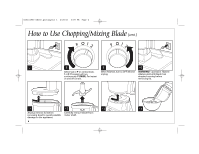
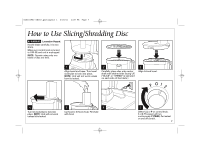
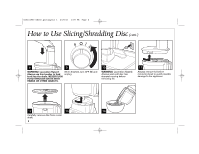
840203900 ENv02.qxd:Layout 1 4/25/11 2:09 PM Page 7 How to Use Slicing/Shredding Disc w WARNING Laceration Hazard. Handle blade carefully; it is very sharp. Make sure control knob is turned to OFF (O) and unit is unplugged. NOTE: Operate using only one blade or disc at a time. 1 Align bowl and base. Turn bowl clockwise to lock into place. NOTE: Unit will not work unless bowl is locked. 2 Carefully place disc onto motor shaft with desired side facing UP. ("SLICE" or "SHRED" is stamped on each side of the blade.) 3 Align lid and bowl. 4 Turn lid clockwise to lock into place. NOTE: Unit will not work unless lid is locked. 5 6 Cut food to fit food chute. Fill chute with food. 7 Select 1, 2, or P on control knob. 1 or 2: Processor will run continuously. P (PULSE): For instant on and off control. 7
-
 1
1 -
 2
2 -
 3
3 -
 4
4 -
 5
5 -
 6
6 -
 7
7 -
 8
8 -
 9
9 -
 10
10 -
 11
11 -
 12
12 -
13
-
14
-
15
-
16
-
17
-
18
-
19
-
20
-
21
-
22
-
23
-
24
-
25
-
26
-
27
-
28
-
29
-
30
-
31
-
32
-
33
-
34
-
35
-
36
-
37
-
38
-
39
-
40
 |
 |