Hamilton Beach 908 Operation Manual - Page 5
Operation - jar
 |
UPC - 040094040148
View all Hamilton Beach 908 manuals
Add to My Manuals
Save this manual to your list of manuals |
Page 5 highlights
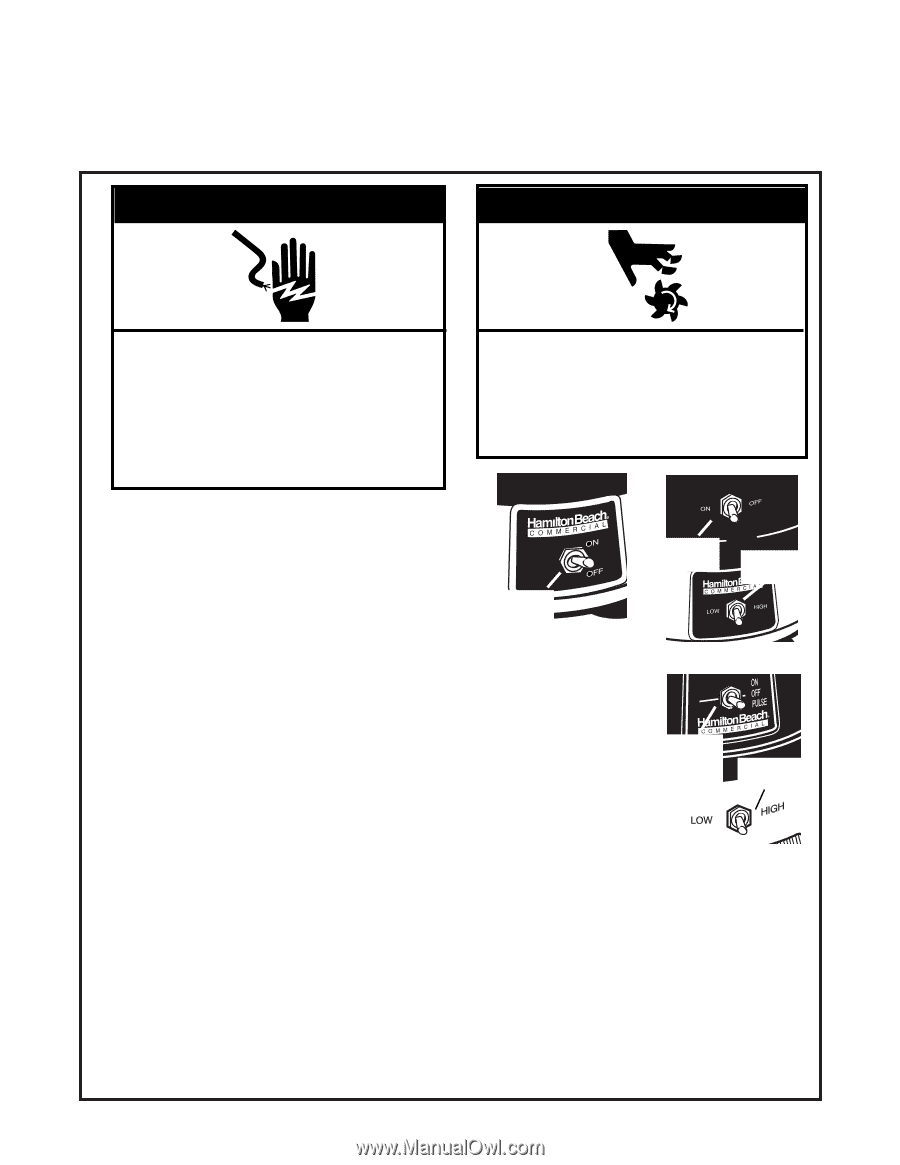
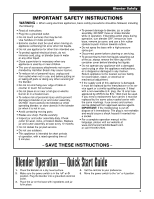
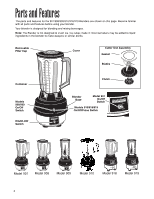
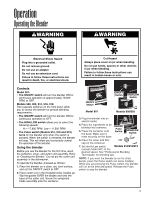
Operation Operating the Blender wWARNING wWARNING Electrical Shock Hazard Plug into a grounded outlet. Do not remove ground. Do not use an adapter. Do not use an extension cord. Failure to follow these instructions can result in death, fire, or electrical shock. Cut Hazard Always place cover on jar when blending. Do not put hands, spoons or other utensils in jar when blending. Failure to follow these instructions can result in broken bones or cuts. Controls Model 901: • The ON/OFF switch will turn the blender ON for continuous operation at approximately 18,000 RPM, or OFF. Models 908, 909, 910, 918, 919: Two separate switches on the front panel allow you to control the blender for precise blending requirements: • The ON/OFF switch will turn the blender ON for continuous operation or OFF. • The HIGH.LOW switch allows you to select the following speeds: Hi - 17,800 RPM Low - 11,500 RPM • The Pulse switch (Models 910, 918 and 919) turns on the blender only when the switch is pressed. When the switch is released, the blender will stop. This will allow you to precisely control the operation of the blender. Using the blender Before you use the blender for the first time, wash the container, cover, and cutter unit assembly. Refer to "Cleaning the Blender." Do not put the cutter unit assembly in the dishwasher. To operate the blender, proceed as follows: 1. Place the blender on a clean, dry, level surface, and set the ON/OFF switch to OFF. 2. Place cutter unit in the threaded collar, blades up. Slip the gasket OVER the blades and onto the base of the cutter unit. Screw the completed blade assembly onto the container. ON/OFF Switch ON/OFF Switch HIGH/LOW Switch Model 901 Models 908/909 3. Plug the blender into an electric outlet. 4. Place the ingredients to be blended into container. ON/OFF/ Pulse 5. Place the container onto Switch the base. Make sure it rests securely on the base. HIGH/LOW Switch 6. Place the cover and filler cap on the container. 7. Set the Hi/Low switch Models 910/918/919 (except model 901) to the desired speed. See "Professional Blending Techniques" for blending tips. NOTE: If you want the blender to run for short bursts, press the Pulse switch (on some models). While you are pressing the Pulse switch, the blender will run at the selected speed. Release the Pulse switch to stop the blender. 5
-
 1
1 -
 2
2 -
 3
3 -
 4
4 -
 5
5 -
 6
6 -
 7
7 -
 8
8 -
 9
9 -
 10
10 -
 11
11 -
12
-
13
-
14
-
15
-
16
-
17
-
18
-
19
-
20
-
21
-
22
-
23
-
24
-
25
-
26
-
27
-
28
 |
 |