Harman Kardon A401 Owners Manual - Page 3
Connecting, A-401
 |
View all Harman Kardon A401 manuals
Add to My Manuals
Save this manual to your list of manuals |
Page 3 highlights
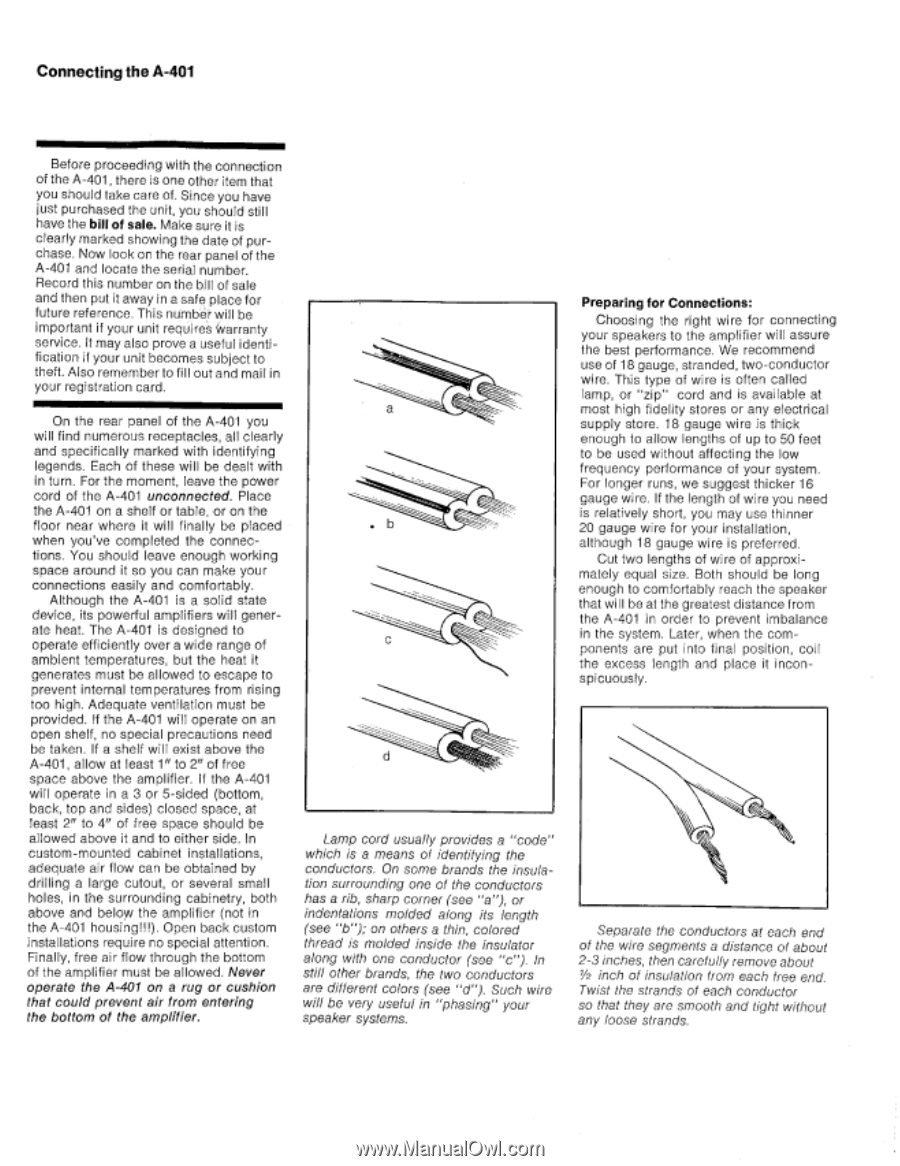
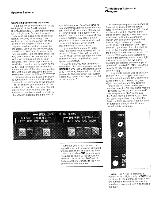
Connecting the A-401 Before proceeding with the connection of the A-401, there is one other item that you should take care of. Since you have just purchased the unit, you should still have the bill of sale. Make sure it is clearly marked showing the date of purchase. Now look on the rear panel of the A-401 and locate the serial number. Record this number on the bill of sale and then put it away in a safe place for future reference. This number will be important if your unit requires Warranty service. It may also prove a useful identification if your unit becomes subject to theft. Also remember to fill out and mail in your registration card. On the rear panel of the A-401 you will find numerous receptacles, all clearly and specifically marked with identifying legends. Each of these will be dealt with in turn. For the moment, leave the power cord of the A-401 unconnected. Place the A-401 on a shelf or table, or on the floor near where it will finally be placed when you've completed the connections. You should leave enough working space around it so you can make your connections easily and comfortably. Although the A-401 is a solid state device, its powerful amplifiers will generate heat. The A-401 is designed to operate efficiently over a wide range of ambient temperatures, but the heat it generates must be allowed to escape to prevent internal temperatures from rising too high. Adequate ventilation must be provided. If the A-401 will operate on an open shelf, no special precautions need be taken. If a shelf will exist above the A-401, allow at least 1" to 2" of free space above the amplifier. If the A-401 will operate in a 3 or 5-sided (bottom, back, top and sides) closed space, at least 2" to 4" of free space should be allowed above it and to either side. In custom-mounted cabinet installations, adequate air flow can be obtained by drilling a large cutout, or several small holes, in the surrounding cabinetry, both above and below the amplifier (not in the A-401 housing!!!). Open back custom installations require no special attention. Finally, free air flow through the bottom of the amplifier must be allowed. Never operate the A-401 on a rug or cushion that could prevent air from entering the bottom of the amplifier. a b d Lamp cord usually provides a "code" which is a means of identifying the conductors. On some brands the insulation surrounding one of the conductors has a rib, sharp corner (see "a"), or indentations molded along its length (see "b"); on others a thin, colored thread is molded inside the insulator along with one conductor (see "c"). In still other brands, the two conductors are different colors (see "d"). Such wire will be very useful in "phasing" your speaker systems. Preparing for Connections: Choosing the right wire for connecting your speakers to the amplifier will assure the best performance. We recommend use 0118 gauge, stranded, two -conductor wire. This type of wire is often called lamp, or "zip" cord and is available at most high fidelity stores or any electrical supply store. 18 gauge wire is thick enough to allow lengths of up to 50 feet to be used without affecting the low frequency performance of your system. For longer runs, we suggest thicker 16 gauge wire. If the length of wire you need is relatively short, you may use thinner 20 gauge wire for your installation, although 18 gauge wire is preferred. Cut two lengths of wire of approximately equal size. Both should be long enough to comfortably reach the speaker that will be at the greatest distance from the A-401 in order to prevent imbalance in the system. Later, when the components are put into final position, coi l the excess length and place it inconspicuously. Separate the conductors at each end of the wire segments a distance of about 2-3 inches, then carefully remove about 12/ inch of insulation from each tree end. Twist the strands of each conductor so that they are smooth and tight without any loose strands.
-
 1
1 -
 2
2 -
 3
3 -
 4
4 -
 5
5 -
 6
6 -
 7
7 -
 8
8 -
 9
9 -
10
 |
 |