Harman Kardon AVR 1700 Owners Manual - Page 24
Manual Speaker Setup - owners manual
 |
View all Harman Kardon AVR 1700 manuals
Add to My Manuals
Save this manual to your list of manuals |
Page 24 highlights
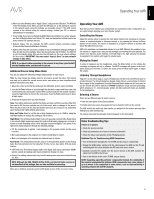
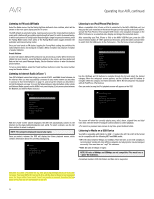
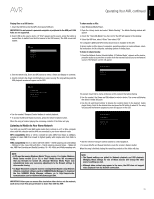
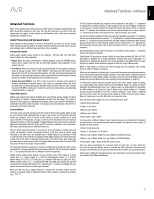
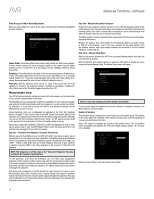
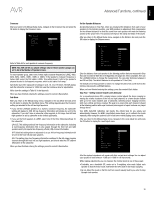
AVR Advanced Functions, continued Dolby Pro Logic II Music Mode Adjustments When you select Dolby Pro Logic II as the music surround mode, additional adjustments become available: Mode : Music Dolby Pro Logic II Music Center Width 3 Dimension 0 Panorama Off Center Width: This setting affects how vocals sound through the three front speakers. A lower number focuses the vocal information tightly on the center channel. Higher numbers (up to 7) broaden the vocal soundstage. Use the Left/Right buttons to adjust this setting. Dimension: This setting affects the depth of the surround presentation, allowing you to "move" the sound toward the front or rear of the room. The setting of "0" is a neutral default. Setting "F-3" moves the sound toward the front of the room, while setting "R-3" moves the sound toward the rear. Use the Left/Right buttons to adjust it. Panorama: With the Panorama mode turned on, some of the sound from the front speakers is moved to the surround speakers, creating an enveloping "wraparound" effect. Each press of the OK button toggles the setting On or Off. Manual Speaker Setup Your AVR is flexible and may be configured to work with most speakers and to compensate for the acoustic characteristics of your room. The EzSet/EQ process automatically detects the capabilities of each connected speaker and optimizes the AVR's performance with your speakers. If you are unable to run EzSet/ EQ calibration, or if you wish to set up your AVR for your speakers manually, use the Manual Setup on-screen menus. Before beginning, place your loudspeakers as explained in the Place Your Speakers section, on page 10, and connect them to the AVR. Consult the owner's guide for the speakers or the manufacturer's Web site for their frequency-range specification. Although you may set the AVR's individual channel levels "by ear," an SPL (sound-pressure level) meter purchased at a local electronics store will provide greater accuracy. Record your configuration settings in Tables A3 and A5 in the Appendix for easy re-entry after a system reset or after the AVR's Master Power switch has been turned off or the unit has been unplugged for more than four weeks. Step One - Determine Your Speakers' Crossover Frequencies Without using the EzSet/EQ process, the AVR can't detect how many speakers you've connected to it; nor can it determine their capabilities. Consult the technical specifications for all of your speakers and locate the frequency response, usually given as a range, e.g., 100Hz - 20kHz (±3dB). Write down the lowest frequency that each of your speakers is capable of playing (100Hz in the above example) as the crossover in Table A6 in the Appendix. NOTE: This frequency is not the same as the "Crossover Frequency" that may be listed in the speaker's specifications. For the subwoofer, write down the transducer size. The AVR's bass management determines which speakers will be used to play back the low-frequency (bass) portion of the source program. Sending the lowest notes to small satellite speakers will result in bad sound and may even damage the speakers. The highest notes may not be heard at all through the subwoofer. With proper bass management, the AVR divides the source signal at a crossover point. All information above that crossover point is played through your system's speakers, and all information below the crossover point is played through the subwoofer. This way, each loudspeaker in your system will perform at its best, delivering a more powerful and enjoyable sound experience. Step Two - Measure the Speaker Distances Ideally, all of your speakers would be placed in a circle, with the listening position at the center. However, you may have had to place some speakers a little farther away from the listening position than others. Sounds that are supposed to arrive simultaneously from different speakers may blur, due to different arrival times. Your AVR provides a Distance adjustment that compensates for these real-world speakerplacement differences. Measure the distance from each speaker to the listening position, and write it down in Table A3 in the Appendix. Even if all of your speakers are the same distance from the listening position, enter your speaker distances as described in Set the Speaker Distances, on this page 25. Step Three - Manual Setup Menu Now you are ready to program the AVR. Sit in your usual listening position, and make the room as quiet as possible. With the AVR and video display turned on, press the OSD button to display the menu system and select Manual Setup. The Manual Setup menu will appear: Manual Setup Number of Speaks Sub Mode Crossover Distance Level Adjust NOTE: To save your settings, press the remote's Back button For best results, adjust the submenus in this order: Number of Speakers, Crossover, Sub Mode, Distance and Level Adjust. Number of Speakers This selection lets you program the correct setting for each speaker group. The settings in this menu affect the remainder of the speaker-setup process and the availability of various surround modes at any time. Select "On" when the speakers are present in the system; select "Off" for positions where no speakers are installed. The Front Left & Right setting is always "On" and may not be disabled. Number of Speaks Left/Right On Center On Surround On SubWoofer On When you have finished, press the remote's Back button. 24
-
 1
1 -
2
-
3
-
4
-
5
-
6
-
7
-
8
-
9
-
10
-
11
-
12
-
13
-
14
-
15
-
16
-
17
-
18
-
 19
19 -
 20
20 -
 21
21 -
 22
22 -
 23
23 -
 24
24 -
 25
25 -
 26
26 -
 27
27 -
 28
28 -
 29
29 -
30
-
31
-
32
-
33
-
34
-
35
-
36
-
37
-
38
-
39
-
40
-
41
-
42
-
43
-
44
-
45
-
46
-
47
 |
 |