Harman Kardon AVR25MKII Owners Manual - Page 10
III ill, Ill III
 |
View all Harman Kardon AVR25MKII manuals
Add to My Manuals
Save this manual to your list of manuals |
Page 10 highlights
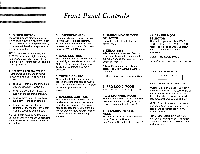
IIII II III ill • Ill III • • 13. AUDIO OUTPUT (REC) JACKS OF VCR1 Connect these jacks to the corresponding INPUT jacks of a VCR. VIDEO OUTPUT jack: Connect this jack to the VIDEO INPUT jack of the VCR. VIDEO REC jack: Connect these jacks to the AUDIO INPUT jacks of the VCR. 14. VIDEO INPUT/OUTPUT (PLAY) JACKS OF VCR 1 Connect these jacks to the corresponding OUTPUT jacks of your VCR or VDP. 15. VIDEO MONITOR JACK Connect this jack to the VIDEO INPUT jack of a TV/MONITOR. 16. REMOTE OUT JACK Connect this jack to the "REMOTE IN" jack on a Harman Kardon component. Use one of the accessory mini-plug cables. You can control many other Harman Kardon components in your system using the AVR25II remote commander. 17. REMOTE IN JACK Connect a Harman Kardon HE 1000 remote I.R. sensor to this jack. You can operate the unit by remote commander through the adaptor. It is convenient when the unit is located in a separate room. (See page 10) 18. FRONT, CENTER, REAR PRE OUT AND MAIN IN JACKS FRONT PRE OUT When a separate power amplifier is used to drive the front speakers, connect the power amplifier input to these jacks. FRONT MAIN IN When a separate pre-amplifier is connected and this unit is used as a power amplifier, connect the preamplifier output to these jacks. NOTE: When you do not use the PRE OUT and MAIN IN separately, always connect the PRE OUT and MAIN IN jacks with a jumper plug. CENTER PRE OUT When a separate power amplifier is used to drive the center speaker, connect the power amplifier input to these jacks. REAR PRE OUT When a separate power amplifier is used to drive the rear speaker, connect the power amplifier input to these jacks. 19. SPEAKER TERMINALS (1, 2 and CENTER) Connect the main left (L) and right (R) speakers to the corresponding 1 and 2 speaker terminals. Connect the center speaker to the center (+), (-) terminals. Make sure that the positive (+) and negative (-) terminals on the speaker are connected to the corresponding terminals on the receiver. 20. REAR SPEAKER TERMINALS Connect rear speakers to the corresponding terminals. 21. AC INPUT CORD Plug this cord in AC outlet on a wall. 22. AC SWITCHED OUTLET These outlets provide AC power. The AC power is switched by the power button. Use these outlets for a CD player and a cassette deck. 23. AC UNSWITCHED OUTLET This outlet provides AC power. The AC power is not switched by the power button. Use this outlet for a turntable. NOTE: Do not plug irons or toasters or other products with high power consumption into these outlets. 24. SUBWOOFER OUT When a separate power amplifier is used to power a subwoofer connect these jacks to the input of the amplifier (for subwoofer). 9
-
 1
1 -
2
-
3
-
4
-
 5
5 -
 6
6 -
 7
7 -
 8
8 -
 9
9 -
 10
10 -
 11
11 -
 12
12 -
 13
13 -
 14
14 -
 15
15 -
16
-
17
-
18
-
19
-
20
 |
 |
