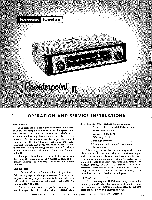
Harman Kardon FM100 Owners Manual - Page 4
Replaiement
 |
View all Harman Kardon FM100 manuals
Add to My Manuals
Save this manual to your list of manuals |
Page 4 highlights
prepaid, and which our examination' shall disclose to our satisfaction to have been thus defective. This warranty does not include free labor, nor is it applicable to any instrument which shall have been repaired or altered in any way so as in our judgement to affect its stability or reliability nor which has been subject to neglect, misuse, abuse, negligence or accident nor which has had the serial number altered, effaced, or removed. Neither shall this warranty apply to any instrument which has been connected otherwise than in accordance with the instruction furnished by us. This warranty is expressly in lieu of all other warranties, express or implied, and of all other obligations or liabilities on our part, and we neither assume nor authorize any representative or other person to assume for us any other liability in connection with the sale of the Model FM-7.00, Counterpoint II. SERVICE NOTES Servicing printed circuits is a simple matter and is no more complicated than servicing conventionally wired circuits. Printed circuit receivers, can be more easily repaired, if certain precautions are observed. Standard components are used throughout and can be removed and replaced by any serviceman. No special tools or skills are necessary. However, some parts which have special mounting and connection lugs should be replaced with exact duplicate parts. Avoid Damage to Copper Foil Be careful when removing components from the board. However, if the copper foil wiring is damaged a piece of wire can be used to replace the damaged foil. Small breaks can be "jumped" with molten solder. Larger breaks can be repaired with ordinary hook up wire, It is unnecessary to replace the entire board because of foil breakage. Avoid Damage to Printed Circuit Board Do not apply excessive pressure to the printed circuit board or components. This is especially important to note when changing tubes. Although the board is sturdy in construction and mounting, it may crack or break if proper care is not taken when servicing. In case the board is to be removed from the chassis, remove the mounting screws around the edges and unsolder the few leads that connect between the board and the chassis. If this is done, a vise with protected jaws should be used to hold the board while servicing and care should be taken not to exert excessive pressure against the board. Avoid Excessive Deposits of Solder In some areas on the printed circuit board, the wiring is very closely spaced. When resoldering a new component avoid excessive deposits of solder, Excessive solder may cause a short or an intermittent trouble to occur later which may be difficult to locate. Avoid Overheating When using the soldering iron (35 watts or less), do not overheat the component terminals or the copper foil. Excessive heat (applying soldering iron longer than necessary, using a higher wattage soldering iron 4 than recommended, or using a solder gun) may cause the bond between the board and foil to break. This will necessitate replacement or repair of the foil connection. Tools and Materials Required (1) Low wattage soldering iron with a small point or wedge (rating should not exceed 35 watts). (2) Small wire brush. (3) 60% tin, 40% lead, low temperature rosin core solder. (4) Thin bladed knife. (5) Small wire pick, or soldering aid. REPLACING COMPONENTS Soldering Replaiement Component to Old leads Cut the leads where they enter the defective component.• Clean off the ends of the leads, leaving as much of the leads as possible. Make a small loop in each lead of the replacement component and slide the loops over the remaining leads of the old component. Caution should be taken not to overheat the connection since the copper foil may peel or the original component lead may fall out of the board. This is possible due to heat transfer through the leads, The lead length of the replacement part should be kept reasonably short to provide some mechanical rigidity. Unsoldering and Resoldering Components To test a component or if the component is mounted in such a manner that the above method can not be used (such as vertically mounted capacitors, etc.) the component can be replaced by unsoldering it. This procedure should be used whenever it is necessary to unsolder any connections to replace defective components. (a) Heat the connection on the wiring side of the board with a small soldering iron. When the solder melts, brush away the solder. Do not overheat the connection. In the process of removing the solder, caution must be taken to prevent excessive heating. Therefore, do not leave the iron on the connection while brushing away the sorter. Melt the solder, remove the iron and quickly brush away the solder. It may require more than one heating and brushing process to completely remove the solder. (b) insert a knife blade between the wiring foil and the "bent-over" component lead and bend the lead perpendicular to the board. (It may be necessary to apply the soldering iron to the connection while performing this step as it is sosntimeg difficult to completely break the connection by brushing.) Do not overheat the connection. (c) While applying the soldering iron to the connections, "wiggle" the component until it is removed. (d) Remove any small particles of solder using a clean cloth dipped in solvent. (e) A thin film of solder may remain over the hole through the board after removing the component. Pierce the film with the_lead from the new component after heating the solder fi lm with the soldering iron. (f) Insert the leads of the new component through the holes provided. Cut to desired length and bend over the ends against the copper foil. Resolder the connection with 60/40 low temperature solder.
-
 1
1 -
 2
2 -
 3
3 -
 4
4
 |
 |
