Harman Kardon HK300XM Owners Manual - Page 6
connectors.
 |
View all Harman Kardon HK300XM manuals
Add to My Manuals
Save this manual to your list of manuals |
Page 6 highlights
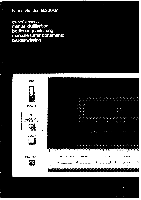
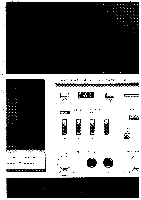
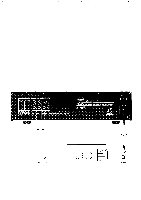
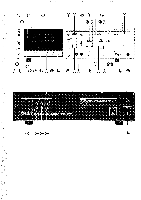
Owner's manual hk300XM Your investment in a component high fidelity system indicates that you have more than an average interest in music. The fact that your investment includes a Harman Kardon Ultrawide- band Metal Tape Deck shows us your appreciation of uricompromised reproduction in the music you enjoy. Throughout the design and manufacture of this unit, we made every effort to assure it will meet all of your expectations. To ensure continuing high performance, read this manual carefully before you connect and operate your hk300XM tape deck. Connections For the moment, leave the POWER LINE CORD (40) of the 300XM unconnected. Put the unit on the table or shelf where it will be installed. Leave enough working space so you can make all the connections easily. The 300XM requires adequate ventilation. It should not be installed on a cushion or rug and a minimum of 2 inches (5 cm.) clearance should be provided. Connecting the 300XM to your preamplifier or receiver Like most stereo equipment, your 300XM is fitted with pin-type RCA connectors. Using standard pin-type RCA patch cords (provided), connect the left HIGH INPUT connector (38) on your 300XM with the left tape output connector on your preamplifier or receiver. Connect the right channels similarly. Using a second set of patch cords, connect the left OUTPUT connector (39) of the 300XM to the left tape input connector of your preamplifier or receiver. Connect the right channels similarly. Push the plugs in all the way so they are firmly seated, making good electrical contact. If you find you are getting insufficient gain to achieve proper recording levels (as indicated by the PEAK LEVEL INDICATORS (18)), reconnect the cables from HIGH INPUT (38) to LOW INPUT (37) connectors. If your preamplifier or receiver does not accept pin-type RCA connectors, consult your audio dealer for patch cords with proper adaptors. Power connection If you have completed the connections above, you are now ready to place the 300XM in its permanent position and plug the POWER LINE CORD (40) into an AC outlet. To turn the unit on and off, press the POWER switch (2). When power is on, the POWER indicator (1) will light. Controls on the 300XM Before using your cassette deck, it's impor- tant that you familiarize yourself with the various controls on the front panel. Tape counter and reset The TAPE COUNTER (16) is used for accurate location of particular passages on a tape. At the beginning of a tape, press the TAPE COUNTER RESET button (17) and the TAPE COUNTER (16) will return to "000:" By keeping track of the TAPE COUNTER readout (16), you can easily return to any passage you like. 4
-
 1
1 -
 2
2 -
 3
3 -
 4
4 -
 5
5 -
 6
6 -
 7
7 -
 8
8 -
 9
9
 |
 |
