Harman Kardon HK300XM Owners Manual - Page 7
bias/equal
 |
View all Harman Kardon HK300XM manuals
Add to My Manuals
Save this manual to your list of manuals |
Page 7 highlights
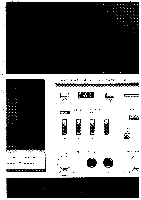
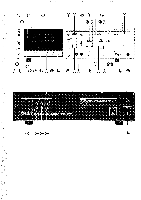
Memory rewind The 300XM incorporates a special memory rewind that helps you locate a preset point on the tape automatically. If you wish to return to a specific point on the tape, press the TAPE COUNTER RESET button (17) at that point, resetting the TAPE COUNTER (16) to "000:" To return to this point automatically at any time, simply press the MEMORY pushbutton (15) before you press the REWIND BUTTON (10). The tape will automatically stop when the TAPE COUNTER (16) reaches "000:" Note: The memory feature on the 300XM retains only one preset point at a time-selecting a new preset point clears the memory of the previous selection. Electronic Auto Search With the Electronic Auto Search system engaged, the deck will automatically scan a tape, in the fast forward mode, and play back eight seconds of music from each selection until the proper one is found and the system is disengaged. To engage the system, press the ELECTRONIC AUTO SEARCH button (3). The deck will scan to the next blank space between selections, then automatically switch to the playback mode. If the system is not disengaged by pressing the PLAY button (11) or STOP button (13), the deck will automatically shift back to the fast forward mode and repeat the process, scanning and sampling, until the end of the cassette. Note: For the Electronic Auto Search system to function properly, a minimum of 2 seconds of blank space must be left between recorded selections. Bias/equalization The 300XM is equipped to play and record all types of tape formulations presently available, including the new metal tapes. To get the best possible performance from the tape you're using, choose the appropriate button from the BIAS/ EQUALIZATION pushbuttons (22). "Low noise" (LN) for ferric tapes: FeCr for Ferrichrome tapes: CrO2 for chromium dioxide tapes: metal for metal tapes. Bias fine trim For optimum recording, each brand and formulation of tape requires minor adjustment of bias trim. To set the trim, insert a blank tape and select the proper bias/equalization setting. Dolby NR and Dolby HX shall be switched off. Using no program source, press the PLAY (11) and RECORD (8) buttons, and while the deck is recording, press and hold the RECORD CALIBRATION TONE button (28). Now rewind and replay the recording, note the reading of the PEAK LEVEL INDICATORS (18). After you have noted the level of the record calibration tone on the peak level indicators, press the PLAY (11) and RECORD (8) buttons again and hold the BIAS TONE button (27). Now rewind and replay the recording of the tone while holding the BIAS TONE button in. If the reading of the bias tone is lower than the reading of the record calibration tone, rotate the BIAS FINE TRIM knob (32) clockwise (hiboost). If the reading of the bias tone is higher than the reading of the record calibration tone, rotate the BIAS FINE TRIM knob (32) counterclockwise (hi-cut). Each setting is correct only for the brand and formulation of tape in use. If you continue to use the same brand and formulation, readjustment is not necessary. But new adjustments should be made for different tapes. Record calibration For best results, the RECORD CALIBRATION set screws (29) should be adjusted for each formulation and brand of tape. To set the calibration, insert a blank tape and select the proper bias/equalization setting. Using no program source, press the PLAY (11) and RECORD (8) buttons, and while the deck is recording, press and hold the RECORD CALIBRATION TONE button (28). Now rewind and replay the recording of the tone holding the RECORD CALIBRATION TONE button (28) in while listening. If the PEAK LEVEL INDICATORS (18) read 0 dB, record calibration adjustment is complete. If not, adjust the RECORD CALI BRATION set screws (29) (clockwise to increase the readings, counterclockwise to decrease them) and repeat the process until the reading is 0 dB. Note: Some inexpensive tape formulations have low sensitivity. With such tape formulations you might encounter difficulty in obtaining 0 dB readings during the above calibrations. In such an event change to a better quality tape. 5
-
 1
1 -
 2
2 -
 3
3 -
 4
4 -
 5
5 -
 6
6 -
 7
7 -
 8
8 -
 9
9
 |
 |
