Harman Kardon HK300XM Owners Manual - Page 8
Corporation.
 |
View all Harman Kardon HK300XM manuals
Add to My Manuals
Save this manual to your list of manuals |
Page 8 highlights
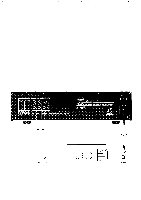
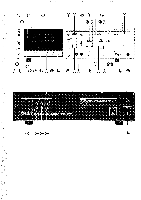
Dolby* playback calibration In most cases, the factory setting of the DOLBY PLAYBACK CALIBRATION set screws (36) on the rear panel will provide best results. However, if your listening room is very hot or very cold, adjustment may be necessary. For calibration, a special Dolby calibration tape (part # 00935520A available from Harman Kardon) is required. While playing this tape, adjust the DOLBY PLAYBACK CALIBRATION set screws (36) until the PEAK LEVEL INDICATORS (18) read 0 dB. Dolby playback calibration is now complete. Output level control A convenient OUTPUT LEVEL control (33) is incorporated into the 300XM to match the output level of your tape deck with all your other equipment. This prevents sudden bursts of high volume when switching from one program source to another. Headphones During recording you may wish to monitor the program source with headphones. The jack marked HEADPHONES (35) is included for this purpose. We recommend low impedance headphones (less than 1000 ohms). Dolby HX and Dolby NR The 300XM incorporates the new DOLBY HX headroom extension circuitry as well as Dolby NR circuitry. Together, they provide a big improvement in signal-to-noise-ratio and dynamic range, and we recommend the use of both on all recordings. To record with the DOLBY HX process, press the DOLBY HX pushbutton (24) before recording. (The DOLBY HX pushbutton (24) automatically engages DOLBY NR circuitry). When playing back a DOLBY HX recorded tape, it is not necessary that the DOLBY HX pushbutton (24) be in its "on" position (in). It is necessary to have the DOLBY NR pushbutton (25) in its "on" position (in) for proper decoding. The DOLBY HX system functions only during the recording process. The 300XM will play tapes previously recorded with no loss of quality. Tapes recorded with DOLBY NR should be labeled so you remember to engage the system during playback. Note: In some cases, recording from FM Broadcasts may contain more noise than was apparent during the original broadcast. To prevent this, place the MPX FILTER button (26) in its "on" position while recording from FM broadcasts. To listen to cassette tapes Set the tape monitor switch of your preampli- fier or receiver to the monitor or tape position. Press the EJECT button (4) on your 300XM, and the CASSETTE DOOR (6) will automatically open. Carefully seat the cassette in the CASSETTE COMPARTMENT (7) with the exposed portion of tape facing down and the full spool to your left. Once the CASSETTE DOOR (6) has been closed, press the PLAY button (11) and the cassette will begin to play. To rewind the cassette or return to a previous passage, press the REWIND button (10) and allow the tape to rewind to the appropriate point. Then press the PLAY button (11) for playback. To skip passages or to wind the cassette to its end, press the FAST FORWARD button (12) and allow the tape to wind forward to the appropriate point. To remove your cassette from the cassette deck, press the STOP button (13), then the EJECT button (4). The CASSETTE DOOR (6) will automatically open and you may remove the cassette. To record cassette tapes To record a cassette, set the function switch of your preamplifier or receiver to the program source you wish to record from. Load a blank cassette as described above, making sure the cassette is rewound to its beginning. To record, press the PLAY button (11) and the RECORD button (8) simultaneously. The RECORD indicator (9) will light any time the cassette deck is in the record mode. To optimize your recordings, the LINE LEVEL control (34) should be adjusted as high as possible without overload distortion. By adjusting the LINE LEVEL CONTROL (34) so that the PEAK LEVEL INDICATORS (18) read a maximum of 0 dB (+3 dB with metal tapes) you'll get a close approximation of the maximum recording level. However the HEADROOM SAFETY INDICATOR (19) provides a far more accurate basis for adjustment. The LINE LEVEL CONTROL (34) may be further adjusted to provide high record levels as long as the HEADROOM SAFETY INDICATOR (19) never shifts to its red position, indicating tape saturation. Occasionally, the HEADROOM SAFETY INDICATOR (19) may shift into the red even though the PEAK LEVEL INDICATORS (18) indicate "safe" levels. Regardless of the peak level readings, the recording level must be adjusted so that the HEADROOM SAFETY INDICATOR (19) never shifts into the red. *Noise Reduction System and Headroom Extension System manufactured under license from Dolby Laboratories Licensing Corporation. "Dolby" and the double-D symbol are trademarks of Dolby Laboratories Licensing Corporation. 6
-
 1
1 -
2
-
 3
3 -
 4
4 -
 5
5 -
 6
6 -
 7
7 -
 8
8 -
 9
9
 |
 |
