Harman Kardon HK395I Owners Manual - Page 9
Operations
 |
View all Harman Kardon HK395I manuals
Add to My Manuals
Save this manual to your list of manuals |
Page 9 highlights
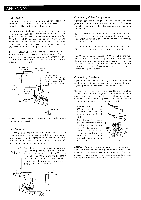
Listening to a Record (Disc) 1 . Turn the VOLUME control knob to the minimum level and press the POWER switch. 2. Press the SPEAKERS SYSTEM 1 switch or/and SPEAKERS SYSTEM 2 switch for the desired speaker system(s). 3. Press the PHONO switch of the FUNCTION selector and the PHONO FUNCTION indicator will light up. 4. Set the TAPE MONITOR switch to the source (button•out) position. 5. Activate your turntable and place the stylus on the record (disc) . 6. Turn the VOLUME control knob clockwise to increase the sound volume to the desired level. 7. If the disc has a large warp, press the SUBSONIC FILTER switch. 8. Adjust the BASS and TREBLE control knobs to obtain the desired tone. 9. Activate the BALANCE control knob, LOUDNESS or AUDIO MODE switch if necessary. NOTE: If you hear a hum at average listening levels, turn the POWER switch off and check to see that the phono and the ground connections are secure. Depending on the cartridge type used, less hum may be created without the ground connection. Listening to the Video/CD Input Source To listen to a video component, compact disc player or other component: 1 Turn the VOLUME control knob to the minimum level and press the POWER switch. 2. Press the SPEAKERS SYSTEM 1 switch or/and SPEAKERS SYSTEM 2 switch for the desired speaker system(s). 3. Press the VIDEO/CD switch of the FUNCTION selector and the VIDEO/CD FUNCTION indicator lights up. 4. Set the TAPE MONITOR switch to the source (button out) position. 5. Activate the component connected to the VIDEO/CD INPUT jacks. 6. Advance the VOLUME control knob to a comfortable level and adjust the BASS and TREBLE control knobs as desired. 7. Activate the BALANCE control knob, LOUDNESS or AUDIO MODE switch if necessary. OPERATIONS Tape Recording Recording from a program source (FM/AM broadcast, turntable or a component connected to VIDEO/CD INPUT jacks) on a tape deck connected to the TAPE jacks: 1 Turn the VOLUME control knob to the minimum level and press the POWER switch. 2. Press the SPEAKERS SYSTEM 1 switch or/and SPEAKERS SYSTEM 2 switch for the desired speaker system(s). 3. Select the desired program source with the FUNCTION selector. The FUNCTION indicator lights up to indicate the program source selected. 4. Set the TAPE MONITOR switch to the source (button out) position. 5. Advance the VOLUME control knob to a comfortable level. 6. If the program source mode is monaural, press the AUDIO MODE switch to the "mono" position according to the mono program source. 7. Start recording by activating the tape deck connected to TAPE jacks. The source sound can be l istened to from the speakers or headphone. 8. To monitor the sound being recorded, press the TAPE MONITOR switch. The TAPE MONITOR indicator lights up, indicating the monitoring state. NOTE: Recording onto the tape deck is carried out directly from the program source without being influenced by the volume, balance, bass and treble controls, loudness and subsonic filter switches of this unit. Tape Playback 1. Turn the VOLUME control knob to the minimum level and press the POWER switch. 2. Press the SPEAKERS SYSTEM 1 switch or/and SPEAKERS SYSTEM 2 switch for the desired speaker system(s). 3. Press the TAPE MONITOR switch and confirm that the TAPE MONITOR indicator lights up. 4. Insert a recorded tape in the tape deck and set the tape deck in the playback mode. 5. Advance the VOLUME control knob to a comfortable level and adjust the BASS and TREBLE control knobs as desired. 6. Activate the BALANCE control knob, LOUDNESS or AUDIO MODE switch if necessary. 8
-
 1
1 -
2
-
3
-
 4
4 -
 5
5 -
 6
6 -
 7
7 -
 8
8 -
 9
9 -
 10
10 -
 11
11
 |
 |
