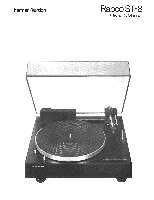
Harman Kardon ST8 Owners Manual - Page 3
Unpacking, Cartridge
 |
View all Harman Kardon ST8 manuals
Add to My Manuals
Save this manual to your list of manuals |
Page 3 highlights
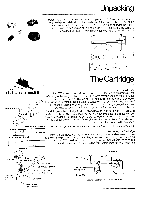
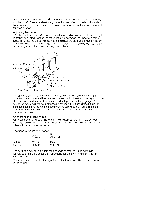
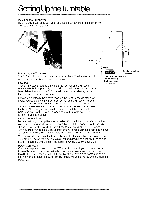
Unpacking Retain the packaging materials that accompany your ST8 so that the turntable may be shipped safely, should the need arise. After you take the ST8 out of the carton, remove the 3 cardboard shims (1) protruding from under the platter. Then remove the packing shim (2) and plastic tie (3) that secure the carriage. Move the cue lever (4) to the rear when you have removed the shim. 3 2 1 4 _ The Cartridge I/flh II is MOM Reference Tab Selecting Shims The ST8 tonearm normally accepts cartridges that weigh 10 grams or less. (Cartridges that weigh between 10 and 15 grams may be used on the ST8 with a special counterweight. This weight, Harman Kardon model 15G, is available through yoCir Harman Kardon dealer.) Because cartridges differ in height, a set of four spacers (shims) of different thicknesses and a cartridge gauge have been provided to assure that the cartridge will track at the proper vertical angle. Carefully place the cartridge (stylus up) and the cartridge gauge on a flat, smooth surface, as shown. Slide cartridge under gauge. If the stylus does not fit easily under the reference tab of the gauge, no shims are required. However, in most cases there will be a space between the top of the stylus and the lower surface of the reference tab. Select the shim(s) to fill this space. Flat Smooth Surface Note: If cartridge requires shim(s), failure to use shim(s) may result in improper tracking. Spac [ _ i _1.- Gauge Mounting the Cartridge Install the cartridge with the hex nuts, mounting screws, and necessary shims Shim or Shims Required as shown. Five pairs of cartridge mounting screws of different lengths are supplied with the ST8. Use the shortest mounting screws that will hold the cartridge. Install the hex nuts. They should be snug at this point, but only finger tight. Stylus Cartridge Cartridge Mounting Plate Hex Nuts Locking Shim Collar (4 Thicknesses)„ Gram Weight Tone Arm Assembly Gauge Locating Hole Mounting Plate Screw Adjustment 3-48 Screw (2) (5 Lengths) Nut (2) Cartridge Shinn(s) If Required Screw (2) 1 Tone Arm View of Cartridge Assembled on Arm
-
 1
1 -
 2
2 -
 3
3 -
 4
4 -
 5
5 -
 6
6 -
 7
7 -
 8
8
 |
 |
