Harman Kardon ST8 Owners Manual - Page 6
Selling, theTurntable
 |
View all Harman Kardon ST8 manuals
Add to My Manuals
Save this manual to your list of manuals |
Page 6 highlights
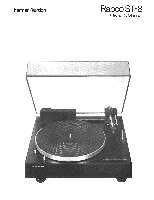
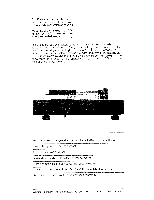
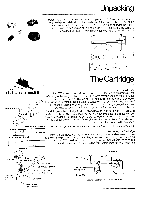
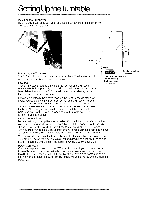
SellingUp theTurntable Installing the Dust Cover Hold the dust cover tilted as if open and fit the dust cover's brackets onto the turntable's hinges, as shown. O Hardware Positioning the Turntable The ST8 should be placed on a firm, level surface. The location should be clean, and as vibration-free as possible. Leveling A level indicator is located on the left-rear corner of the turntable. When the bubble is perfectly centered in the red circle, the turntable is level. Adjust the feet of the ST8 to level the turntable, starting with all four feet in their highest position. Rear Leveling Foot Assy (2) Clearance With Weight of Unit on Isolators (Both Sides) and Unit Leveled For example, if the bubble rests towards the right-front side of the red circle, you would lower the right-front corner of the turntable. To lower a corner, turn the foot counterclockwise, as seen from above. Make certain the rear feet are not turned up so far as to contact hardware on the base. Not doing so can result in improper isolation. Recheck balancing and tracking force of tonearm after turntable has been leveled in its final location. Output Connections Make sure that your amplifier is switched off. Connect the turntable's two output plugs and ground spade lug to your amplifier. The left channel output plug is black, the right channel plug is red. Connect these to your amplifier's PHONO inputs. Connect the ground spade lug to chassis ground terminal on your amplifier (commonly marked GND) or an unpainted chassis screw (if required to reduce hum level). You may need to separate the three cables so that they reach the receptacles on your amplifier. Move the plastic strain relief band down and gently pull the cables apart, if necessary, by pulling on the cable, never the plugs or spade lug. Power Connection Connect the power line cord of the ST8 to an AC outlet. If you connect the cord to an AC convenience outlet on the back of your amplifier, you may prefer a SWITCHED outlet. With a SWITCHED outlet, the turntable's power switch can be left in the on position and power to the turntable will be controlled by the amplifier's power switch.
-
 1
1 -
 2
2 -
 3
3 -
 4
4 -
 5
5 -
 6
6 -
 7
7 -
 8
8
 |
 |
