Harman Kardon T40 Owners Manual - Page 7
Speed, Control, Capacitance, Operating
 |
View all Harman Kardon T40 manuals
Add to My Manuals
Save this manual to your list of manuals |
Page 7 highlights
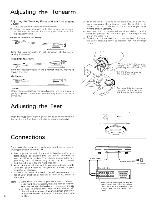
Speed Lock and Speed Control To turn ON the speed lock button, push it once while the indicator is OFF; the indicator will go on tel l ing you that the speed lock is active. Pushing it again turns OFF the indicator and speed lock is released. • After placing the speed selector in the 33 or 45 position in accordance with disc speed, set the speed lock button to ON position. This locks the disc speed at the correct reference speed and no further fine adjustment using the stroboscope is required. • To adjust disc speed as desired when reproducing an old disc on which recording is not performed at an accurated constant speed, when precisely matching reproduced sound with the sound of instrument to play, or when changing the disc speed preferably, turn the speed control knob to adjust the disc speed after pushing the speed lock button to the OFF position to release the speed lock. (With the speed lock button in ON position, the speed control knob is inoperative.) Disc speed, whether increasing or decreasing, can be examined by using the disc stabilizer with stroboscope provided with the turntable. Capacitance Trim • Disc stabilizer with stroboscope Disc stabilizer is used to grip the disc firmly on the platter mat; use of it enables the stylus tip to trace accurately the groove on the disc as wel l as it corrects distortion of a disc. The stabi l izer is also marked with striped stroboscope so that the disc speed can be easily examined. Disk stabilizer with StYCibiOSOapQ. control Place a disc on the platter mat and then the disc stabil izer with stroboscope on the disc. Speed becomes faster Speed becomes slower 2. Set the speed selector to 33 or 45 position in accordance with the required disc speed. 3. Turn the speed lock button OFF to release the speed lock, then adjust the disc speed by turning the speed control knob, with observing the striped markings on the disc stabil izer with stroboscope under fluorescent l ight. The capacitance trim is a capacitance selector switch that enables your cartridge to deliver its optimum performance. Each cartridge had its own characteristic capacitance, and the output leads used to connect the cartridge to the ampl ifier or receiver also have their own capacitance. Only when these two capacitances are at their optimum values can the cartridge transfer its output and retain its optimum frequency response to the amplifier. LESS When the CAP. TRIM is w properly adjusted, OVER 10 k Hz FREQUENCY Operating Cartridge capacity Trim position Less than 300pF normal 300 to 400pF +100pf Over 400pF +200pf •Please read the owner's manual of the cartridge and adjust the trim position accordingly. `• normal • • +100pf • +200pf Use a coin to change the setting. 1. Turn down the volume of your ampl ifier to the minimum position. 2. Turn on your amplifier or receiver and select the phono function according to the owner's manual of the amplifier or receiver. 3. Place the disc on the platter mat. If this is an extended play disc, you will need to use the center hole adaptor provided with the turntable. 4. Set the speed selector to 33 or 45. 5. Turn the speed lock button ON to maintain the accu- rate disc speed. 6. Push the lift button to set to the auto position. (With auto position selected, the tonearm automatical ly lifts and the platter stops as power supply is cut off when the disc ends.) 7. Fl ip the cue lever forward to lift the tonearm up, then bring the tonearm over the disc and the platter will begin to rotate. Now flip the cue lever down and the tonearm will s be lowered and reproduc- ton starts. 8. Slowly raise the volume of amplifier up to your de- sired listening point. 9. If you wish to terminate audition before the end of the disc, raise the tonearm by flipping the cue lever forward and bring it to the armrest after turning down the volume of your amplifier to the minimum position. At the end of the disc, the tonearm wil automatical ly l ift up and the platter stops. Bring the tonearm to the armrest, then. 10. Since the tonearm wil l not stop at the end of the disc with the lift button set to the manual position, it is nece- ssary to manual ly raise the tonearm at the disc end and bring it to the armrest. Select the manual position to reproduce a disc which has groove cut exceeding the normal disc end position by preventing automatic stop at the normal disc end posi- tion. 7
-
 1
1 -
 2
2 -
 3
3 -
 4
4 -
 5
5 -
 6
6 -
 7
7
 |
 |
