Hayward AquaBug 500 - Page 5
Installation, Instructions, cont.
 |
View all Hayward AquaBug manuals
Add to My Manuals
Save this manual to your list of manuals |
Page 5 highlights
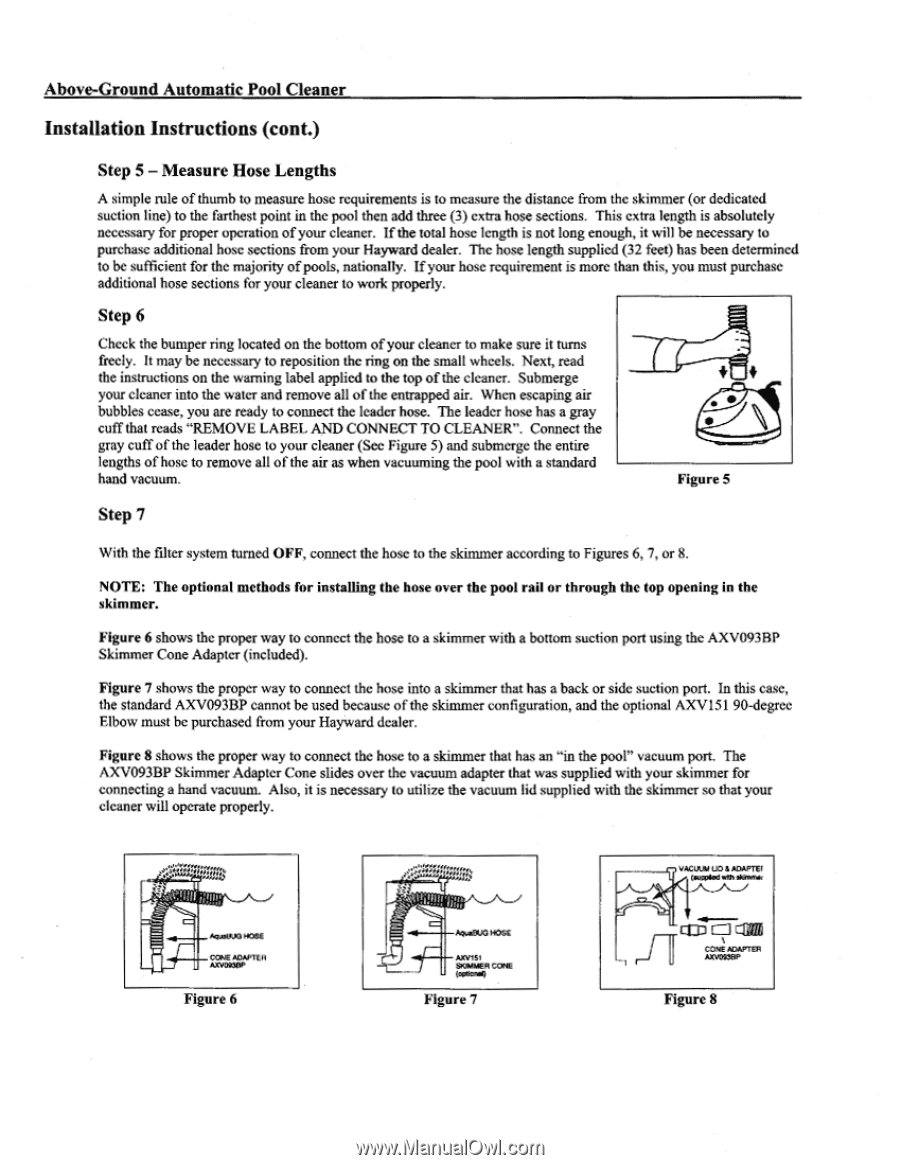
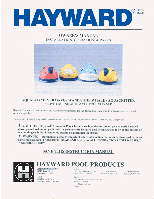
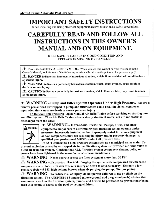
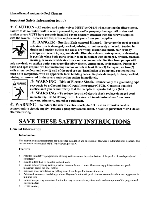
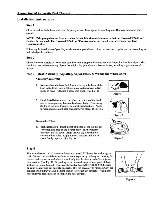
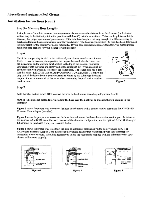
Above-Ground Automatic Pool Cleaner Installation Instructions (cont.) Step 5 - Measure Hose Lengths A simple rule of thumb to measure hose requirements is to measure the distance from the skimmer (or dedicated suction line) to the farthest point in the pool then add three (3) extra hose sections. This extra length is absolutely necessary for proper operation of your cleaner. If the total hose length is not long enough, it will be necessary to purchase additional hose sections from your Hayward dealer. The hose length supplied (32 feet) has been determined to be sufficient for the majority ofpools,nationally. If your hose requirement is more than this, you must purchase additional hose sections for your cleaner to work properly. Step 6 Cheek the bumper ring located on the bottom of your cleaner to make sure it turns freely. It may be necessary to reposition the ring on the small wheels. Next, read the instructions on the warning label applied to the top of the cleaner. Submerge your cleaner into the water and remove all of the entrapped air. When escaping air bubbles cease, you are ready to connect the leader hose. The leader hose has a gray cuff that reads "REMOVE LABEL AND CONNECT TO CLEANER". Connect the gray cuff of the leader hose to your cleaner (Sec Figure 5) and submerge the entire lengths of hose to remove all of the air as when vacuuming the pool with a standard hand vacuum. f • • • Figure 5 Step 7 With the filter system turned OFF, connect the hose to the skimmer according to Figures 6, 7, or 8. NOTE: The optional methods for installing the hose over the pool rail or through the top opening in the skimmer. Figure 6 shows the proper way to connect the hose to a skimmer with a bottom suction port using the AXV093BP Skimmer Cone Adapter (included). Figure 7 shows the proper way to connect the hose into a skimmer that has a back or side suction port. In this case, the standard AXV093BP cannot be used because of the skimmer configuration, and the optional AXV151 90-degree Elbow must be purchased from your Hayward dealer. Figure 8 shows the proper way to connect the hose to a skimmer that has an "in the pool" vacuum port. The AXV093BP Skimmer Adapter Cone slides over the vacuum adapter that was supplied with your skimmer for connecting a hand vacuum. Also, it is necessary to utilize the vacuum lid supplied with the skimmer so that your cleaner will operate properly. Jae WO HOU COM ADAM I Figure 6 Ap•IXXI HOS( MY'S. SK•OIER COM Figure 7 ACUUII aNIADAPTEI Catiplal wth ibises ct)o c11-12 co Figure 8
-
 1
1 -
 2
2 -
 3
3 -
 4
4 -
 5
5 -
 6
6 -
 7
7 -
 8
8 -
 9
9 -
 10
10 -
 11
11
 |
 |