Hayward AquaBug 500 - Page 6
Installation, Instructions, cont., Important, Disclaimer
 |
View all Hayward AquaBug manuals
Add to My Manuals
Save this manual to your list of manuals |
Page 6 highlights
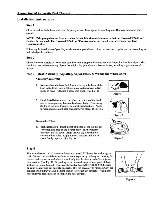
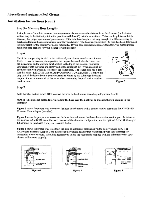
Above-Ground Automatic Pool Cleaner Installation Instructions (cont.) Step 8 Turn ON your filter system. Now that your cleaner is operating, check to see that the cleaner is moving about the pool. It should be operating with left and right turns. It should turn away from the walls in a short time frame. If the cleaner is performing as stated above, your installation is'eomplete. NOTE: Hayward automatic pool cleaners are powered by your pool's filter system and are designed to work with most systems for above-ground pools. Therefore, the performance of your cleaner will be relative to the power source. It may be necessary to purchase a V096P "In-Line" Vacuum Gauge from your Hayward dealer to verify performance of your system. Step 9 Observe your cleaner in operation. The pool's return water flow may affect the operation of your cleaner by interfering with the hose on the surface of the water or the cleaner on the bottom of the pool. If the pool is equipped with an adjustable-type "eyeball" return fitting, redirect the water flow so that it does not interfere with the cleaner's movement. If the return water flow is preventing the cleaner from functioning properly, and the pool is not equipped with an adjustable-type "eyeball" fitting, it will be necessary to purchase a Hayward AXICI9A Return-line Diverter or a Hayward SPX1105ZB 90 Degree Elbow Fining from your Hayward dealer. Now that your cleaner is installed and operating, enjoy a carefree pool. It is necessary to run your cleaner only long enough to clean the pool bottom, not for the entire filter cycle. It is, however, a good idea to run your cleaner daily, as this is an excellent way to improve water circulation and chemical distribution in the pool because your cleaner functions as a moving "bottom drain". Important Tips 1. Periodically check to make sure all other outlets to the pump are securely closed (i.e., other skimmers or bottom drain) when operating your cleaner. 2. Periodically check to make sure that the cleaner hose is securely attached to the suction fitting in the skimmer. 3. Disconnect the cleaner hose from the skimmer prior to backwashing the filter. This will assure the flow of water necessary for effective backwashing. 4 A\ CAUTION - When shock treating your pool, the cleaner and hoses MUST be removed from your swimming pool until such time that the chlorine levels have normalized. 5. ih CAUTION - Never coil the cleaner hose. Coiled hose is not under warranty. 6. When the cleaner is out of the pool, always disconnect the leader hose from the cleaner head. 7. When carrying or lifting the cleaner, always use the molded-in handle. Do NOT carry it by the hose. 8. When swimming in the pool, remove the cleaner and hoses from the water. 9. Pools bottoms that arc severely wrinkled, have large bubbles, deep footprints, or other imperfections, might affect the cleaner's operation. 10. Keep rear screen clear of fixed debris by brushing regularly. NOTE: We do NOT recommend installation of your cleaner until these conditions are corrected. Disclaimer 1) Vinyl can be affected by age, sunlight, and water chemistry. 2) Vinyl can become brittle and weak. 3) Vinyl can also be affected by the installation and the pool's surroundings. 4) When installing your cleaner, you must assume all responsibility for the condition of the pool and the pool's surroundings.
-
 1
1 -
 2
2 -
 3
3 -
 4
4 -
 5
5 -
 6
6 -
 7
7 -
 8
8 -
 9
9 -
 10
10 -
 11
11
 |
 |