Hayward Navigator Pro Pool Vac Classic - Page 3
Installation - cleaner
 |
View all Hayward Navigator Pro manuals
Add to My Manuals
Save this manual to your list of manuals |
Page 3 highlights
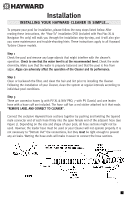
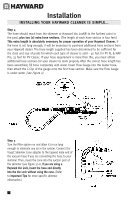
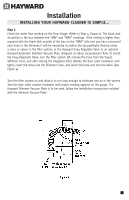
Installation INSTALLING YOUR HAYWARD CLEANER IS SIMPLE... To prepare your pool for installation, please follow the easy steps listed below. After reading these instructions, the "How To" installation DVD (included with Pool Vac XL & Navigator Pro only) will walk you through the installation step-by-step, and it will also give you some maintenance and trouble-shooting hints. These instructions apply to all Hayward Turbine Cleaner models. Step 1 Check the pool and remove any large objects that might interfere with the cleaner's operation. Check to see that the water level is at the recommended level. Check the water chemistry. Make sure that the water is properly balanced and that the pool is free from algae. Algae can adversely affect the operation of the Cleaner and its performance. Step 2 Clean or backwash the filter, and clean the hair and lint prior to installing the Cleaner. Following the installation of your Cleaner, clean the system at regular intervals according to individual pool conditions. Step 3 There are connector hoses (9 with PV XL & NAV PRO, 7 with PV Classic) and one leader hose with a hose cuff are included. The hose cuff has a red sticker attached to it that reads "REMOVE LABEL AND CONNECT TO CLEANER". Connect the exclusive Hayward hose sections together by pushing and twisting the tapered male connector end of each hose firmly into the open female end of the adjacent hose (see Figure 1). Depending on the size and shape of your pool, all hose sections might not be used. However, the leader hose must be used or your Cleaner will not operate properly. It is not necessary to "Bottom Out" the connections, but they must be tight enough to prevent any air leaks. Wetting the hose ends will make it easier to connect the hose sections. 1
-
 1
1 -
 2
2 -
 3
3 -
 4
4 -
 5
5 -
 6
6 -
 7
7 -
 8
8 -
 9
9 -
10
-
11
-
12
-
13
-
14
-
15
-
16
-
17
-
18
-
19
-
20
-
21
-
22
-
23
-
24
 |
 |
