Hayward Navigator Pro Pool Vac Classic - Page 7
Step 9, Step 10, Step 11, Position - pool cleaner for concrete pools
 |
View all Hayward Navigator Pro manuals
Add to My Manuals
Save this manual to your list of manuals |
Page 7 highlights
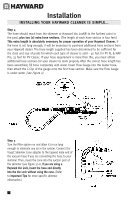
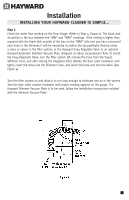
Installation INSTALLING YOUR HAYWARD CLEANER IS SIMPLE... Step 9 Observe your Cleaner in operation, and make sure that the return line flow is not affecting the Cleaner's programmed steering and preventing the Cleaner from covering the entire pool. If the cleaner hose is being pushed across the surface of the pool, it will be necessary to redirect the return line water flow downward. This is to allow the Cleaner to move its programmed cleaning pattern. Step 10 Observing the Cleaner in operation, it should move about the pool without spending an excessive amount of time against the steps or other obstructions (vertical walls, ladders, etc.) If the Cleaner seems to get "hung up," turn the rear flap adjuster to position I (see Figure 5). Step 11 Your Cleaner will climb the vertical walls in concrete and fiberglass swimming pools if there is at least a seven inch (7") radius where the walls and floor meet. The Cleaner's wall climbing is governed by the programmed steering and therefore it will not climb the wall each time it comes in contact with a wall. When the Cleaner does start up a wall, it will not always go all the way up the wall. If the Cleaner does not seem to be "sticking" to the wall, turn the rear flap adjuster to position III (see Figure 5). If the Cleaner climbs to the water's surface and sucks air, turn the rear flap adjuster to Position I (see Figure 5). If the cleaner continues to climb too high, reduce the water flow until proper operation is achieved. Approximately ninety percent (90%) of the dirt in a concrete pool will be on the floor of the pool. Approximately ten percent (10%) of the dirt will be on the walls. Your Cleaner will spend its cleaning time accordingly. 5
-
 1
1 -
 2
2 -
 3
3 -
 4
4 -
 5
5 -
 6
6 -
 7
7 -
 8
8 -
 9
9 -
 10
10 -
 11
11 -
 12
12 -
13
-
14
-
15
-
16
-
17
-
18
-
19
-
20
-
21
-
22
-
23
-
24
 |
 |
