HealthRider 225p Instruction Manual - Page 5
Before You Begin
 |
View all HealthRider 225p manuals
Add to My Manuals
Save this manual to your list of manuals |
Page 5 highlights
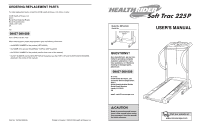
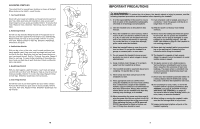
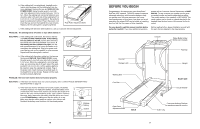
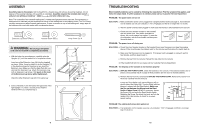
b. If the walking belt is overtightened, treadmill performance may decrease and the walking belt may become damaged. Remove the key and UNPLUG THE POWER CORD. Using the allen wrench, turn both rear roller adjustment bolts counterclockwise, 1/4 of a turn. When the walking belt is properly tightened, you should be able to lift each side of the walking belt 5 to 8 cm (2 to 3 in.) off the walking platform. Be careful to keep the walking belt centred. Plug in the power cord, insert the key and run the treadmill for a few minutes. Repeat until the walking belt is properly tightened. b 5-8 cm Rear Roller Adjustment Bolts c. If the walking belt still slows when walked on, call our Customer Service Department. PROBLEM: The walking belt is off-centre or slips when walked on SOLUTION: a. If the walking belt is off-centre, first remove the key and UNPLUG THE POWER CORD. If the walking a belt has shifted to the left, use the allen wrench to turn the left rear roller bolt clockwise 1/2 of a turn; if the walking belt has shifted to the right, turn the bolt counterclockwise 1/2 of a turn. Be careful not to overtighten the walking belt. Plug in the power cord, insert the key and run the treadmill for a few minutes. Repeat until the walking belt is centred. b. If the walking belt slips when walked on, first remove the key and UNPLUG THE POWER CORD. Using b the allen wrench, turn both rear roller bolts clockwise, 1/4 of a turn. When the walking belt is correctly tight- ened, you should be able to lift each side of the walk- ing belt 5 to 8 cm (2 to 3 in.) off the walking platform. Be careful to keep the walking belt centred. Plug in the power cord, insert the key and carefully walk on the treadmill for a few minutes. Repeat until the walk- ing belt is properly tightened. PROBLEM: The heart rate monitor does not function properly SOLUTION: a. If the heart rate monitor does not function properly, refer to CHEST PULSE SENSOR TROUBLESHOOTING on page 10. b. If the heart rate monitor still does not function properly, the battery should be replaced. To replace the battery, locate the battery cover b on the back of the sensor unit. Insert a coin into the slot in the cover and turn the cover counterclockwise to the "open" position. Remove the cover. Next, remove the old battery from the sensor unit. Insert a new CR 2032 battery, making sure that the writing is on top. Make sure that the rubber gasket is in place in the sensor unit. Reattach the battery cover and turn it to the closed position. CR2032 Battery Gasket 16 BEFORE YOU BEGIN Congratulations for selecting the new HealthRider® SoftTrac 225P treadmill. The 225P treadmill combines advanced technology with innovative design to help you get the most from your exercise in the convenience and privacy of your home. And when you're not exercising, the unique 225P can be folded up, requiring less than half the floor space of other treadmills. please call our Customer Service Department at 08457 089 009. To help us assist you, please note the product model number and serial number before calling. The model number of the treadmill is HETL40530. The serial number can be found on a decal attached to the treadmill (see the front cover of this manual for the location). For your benefit, read this manual carefully before using the treadmill. If you have additional questions, Before reading further, please familiarise yourself with the parts that are labelled in the drawing below. Console Water Bottle Holder (Bottle not included) Handrail Storage Latch Key/Clip Upright Walking Belt Foot Rail RIGHT SIDE Circuit Breaker Rear Roller Adjustment Bolts BACK Cushioned Walking Platform for maximum exercise comfort Incline Leg 5
-
 1
1 -
 2
2 -
 3
3 -
 4
4 -
 5
5 -
 6
6 -
 7
7 -
 8
8 -
 9
9 -
 10
10 -
 11
11 -
12
 |
 |
