HP 10622 10842 Rack Reference Guide - Page 51
Installing the Components into the Rack
 |
View all HP 10622 manuals
Add to My Manuals
Save this manual to your list of manuals |
Page 51 highlights
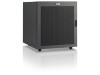
Installing Components in the Rack Installing the Components into the Rack After all rack-mounting hardware has been installed on the component, you can insert it into the rack. WARNING: Components can be very heavy. To reduce the risk of personal injury or damage to the equipment: • Remove all pluggable power supplies and modules to reduce the weight of the product before lifting it. • Observe local occupational health and safety requirements and guidelines for manual material handling. • Get help to lift and stabilize the product during installation or removal, especially when the product is not fastened to the rails. • The product is unstable when it is not fastened to the rails during installation into or removal from the rack. Installing a Component into a Rack with Adjustable Fixed Rails To install a component into a rack with adjustable fixed rails: With the unit well supported, lift the component up and slide it into place along the adjustable fixed rails you installed in the rack. Installing a Component into a Rack with Sliding Rails IMPORTANT: Read and adhere to the cautions and warnings in this section. To install a component into a rack with sliding rails: 1. Fully extend the sliding rails. 2. With the unit well supported, lift it up and align the component rails on the component with the sliding rails secured to the rack. HP 10842 Rack Reference Guide 4-17
-
 1
1 -
2
-
3
-
4
-
5
-
6
-
7
-
8
-
9
-
10
-
11
-
12
-
13
-
14
-
15
-
16
-
17
-
18
-
19
-
20
-
21
-
22
-
23
-
24
-
25
-
26
-
27
-
28
-
29
-
30
-
31
-
32
-
33
-
34
-
35
-
36
-
37
-
38
-
39
-
40
-
41
-
42
-
43
-
44
-
45
-
 46
46 -
 47
47 -
 48
48 -
 49
49 -
 50
50 -
 51
51 -
 52
52 -
 53
53 -
 54
54 -
 55
55 -
 56
56 -
57
-
58
-
59
-
60
-
61
-
62
-
63
-
64
-
65
-
66
-
67
-
68
-
69
-
70
 |
 |
