HP 10622 10842 Rack Reference Guide - Page 54
rack and attach the cable management arm to the rail with two 10-32 x 5/8
 |
View all HP 10622 manuals
Add to My Manuals
Save this manual to your list of manuals |
Page 54 highlights
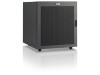
Installing Components in the Rack 3. Align the screw-retaining plate behind the rack-mounting rail at the rear of the rack and attach the cable management arm to the rail with two 10-32 x 5/8 screws. NOTE: As you slide the unit in and out of the front of the rack, the cable management arm collapses and extends so that the cables remain connected to the unit and stay untangled. Figure 4-16: Attaching the cable management arm to the rack 4. Secure any cables that you connect to the component to this arm. 4-20 HP 10842 Rack Reference Guide
-
 1
1 -
2
-
3
-
4
-
5
-
6
-
7
-
8
-
9
-
10
-
11
-
12
-
13
-
14
-
15
-
16
-
17
-
18
-
19
-
20
-
21
-
22
-
23
-
24
-
25
-
26
-
27
-
28
-
29
-
30
-
31
-
32
-
33
-
34
-
35
-
36
-
37
-
38
-
39
-
40
-
41
-
42
-
43
-
44
-
45
-
46
-
47
-
48
-
 49
49 -
 50
50 -
 51
51 -
 52
52 -
 53
53 -
 54
54 -
 55
55 -
 56
56 -
 57
57 -
 58
58 -
 59
59 -
60
-
61
-
62
-
63
-
64
-
65
-
66
-
67
-
68
-
69
-
70
 |
 |

Installing Components in the Rack
4-20
HP 10842 Rack Reference Guide
3.
Align the screw-retaining plate behind the rack-mounting rail at the rear of the
rack and attach the cable management arm to the rail with two 10-32 x 5/8
screws.
NOTE:
As you slide the unit in and out of the front of the rack, the cable management
arm collapses and extends so that the cables remain connected to the unit and stay
untangled.
Figure 4-16:
Attaching the cable management arm to
the rack
4.
Secure any cables that you connect to the component to this arm.