HP 15-bs000 Maintenance and Service Guide 1 - Page 80
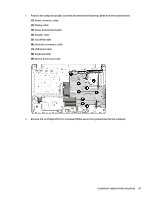
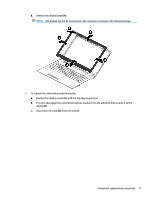
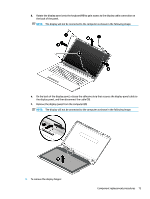
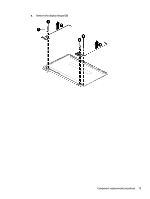
that secure the display panel to the top of the, Remove the four Phillips PM2.0×3.0 screws
 |
View all HP 15-bs000 manuals
Add to My Manuals
Save this manual to your list of manuals |
Page 80 highlights
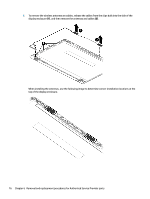
d. Remove the tape from the enclosure (3). Replacement cameras come with tape already installed. 3. To remove the display panel: a. Remove the four Phillips PM2.0×3.0 screws (1) that secure the display panel to the top of the enclosure. b. Remove the two Phillips PM2.0×3.0 screws (2) that secure the display panel to the bottom of the enclosure. c. Lift the hinges up and move aside enough to be able to rotate the panel up and over (3). 72 Chapter 6 Removal and replacement procedures for Authorized Service Provider parts
-
 1
1 -
2
-
3
-
4
-
5
-
6
-
7
-
8
-
9
-
10
-
11
-
12
-
13
-
14
-
15
-
16
-
17
-
18
-
19
-
20
-
21
-
22
-
23
-
24
-
25
-
26
-
27
-
28
-
29
-
30
-
31
-
32
-
33
-
34
-
35
-
36
-
37
-
38
-
39
-
40
-
41
-
42
-
43
-
44
-
45
-
46
-
47
-
48
-
49
-
50
-
51
-
52
-
53
-
54
-
55
-
56
-
57
-
58
-
59
-
60
-
61
-
62
-
63
-
64
-
65
-
66
-
67
-
68
-
69
-
70
-
71
-
72
-
73
-
74
-
 75
75 -
 76
76 -
 77
77 -
 78
78 -
 79
79 -
 80
80 -
 81
81 -
 82
82 -
 83
83 -
 84
84 -
 85
85 -
86
-
87
-
88
-
89
-
90
-
91
-
92
-
93
-
94
-
95
-
96
-
97
-
98
-
99
-
100
-
101
-
102
-
103
-
104
-
105
-
106
-
107
-
108
-
109
-
110
-
111
-
112
-
113
-
114
-
115
-
116
 |
 |
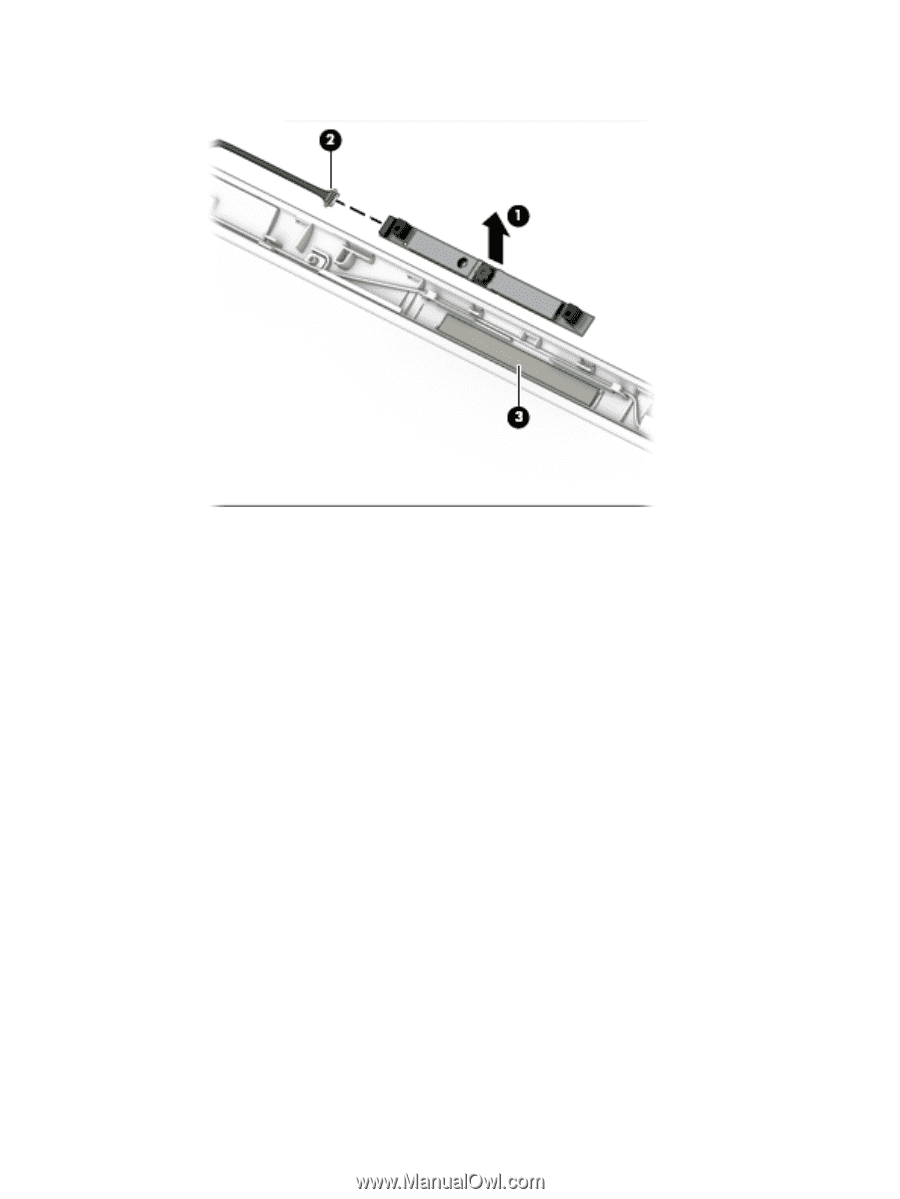
d.
Remove the tape from the enclosure
(3)
. Replacement cameras come with tape already installed.
3.
To remove the display panel:
a.
Remove the four Phillips PM2.0×3.0 screws
(1)
that secure the display panel to the top of the
enclosure.
b.
Remove the two Phillips PM2.0×3.0 screws
(2)
that secure the display panel to the bottom of the
enclosure.
c.
Lift the hinges up and move aside enough to be able to rotate the panel up and over
(3)
.
72
Chapter 6
Removal and replacement procedures for Authorized Service Provider parts