HP 17.3kVA HP Monitored Power Distribution Unit User Guide - Page 74
SNMP, Enable/Disable the SNMP Agent, Define SNMPv1 Users
 |
View all HP 17.3kVA manuals
Add to My Manuals
Save this manual to your list of manuals |
Page 74 highlights
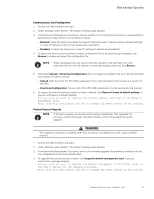
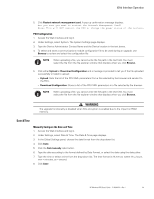
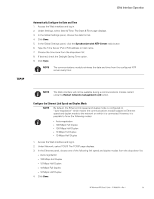
Web Interface Operation SNMP Enable/Disable the SNMP Agent 1. Access the Web interface and log in. 2. Under Network, select SNMP. The SNMP Settings page displays. 3. Choose one of the following SNMP versions: l Disabled: the agent is disabled; the MIB cannot be read and no traps are sent. l SNMPv1: only SNMPv1 users and SNMPv1 traps are supported. l SNMPv3: only SNMPv3 users and SNMPv3 traps are supported. l SNMPv1 & v3: both SNMPv1 and SNMPv3 users and traps are supported. 4. Type the SNMP Port number and the SNMP Trap Port number in the entry boxes. 5. Click Save. Define SNMPv1 Users 1. Access the Web interface and log in. 2. Under Network, select SNMP. The SNMP Settings page displays. 3. Ensure that SNMPv1 is selected in the SNMP Version field. 4. In the SNMP V1 panel, in the Community column, select the SNMPv1 user to configure. 5. Choose one of the following access rights for the selected SNMPv1 user: l No Access: The user is not allowed to access the Web interface. l Read-Only: the SNMPv1 user can only get the MIB objects. l Read-Write: the SNMPv1 user can get and set the MIB objects. 6. Click Save. Otherwise, click Cancel to return to the SNMP Settings page. Define SNMPv3 User-based Security Model Users 1. Access the Web interface and log in. 2. Under Network, select SNMP. The SNMP Settings page displays. 3. Ensure that SNMPv1 is selected in In the SNMP Version field. 4. In the SNMP V3 panel, in the Users column, select the SNMPv3 user to configure. 5. Choose one of the following access rights for the SNMPv3 user: l No Access: the SNMPv3 user is disabled with no access to the MIB objects. l Read-Only: the SNMPv3 user can only get the MIB objects. l Read-Write: the SNMPv3 user can get and set the MIB objects. 6. Choose one of the following security levels to be applied to the SNMPv3 user: l Not Set: The SNMPv3 user is not configured and therefore disabled. l Auth Priv: An authentication password and a privacy key are required to access the MIB objects. l Auth No Priv: An authentication password but no privacy key are required to access the MIB objects. l No Auth No Priv: No authentication password or privacy key are required to access the MIB objects. 7. Type the authentication password (if required by security level), with 8 to 24 characters allowed. HP Monitored PDU User's Guide P-164000281-Rev 1 68
-
 1
1 -
2
-
3
-
4
-
5
-
6
-
7
-
8
-
9
-
10
-
11
-
12
-
13
-
14
-
15
-
16
-
17
-
18
-
19
-
20
-
21
-
22
-
23
-
24
-
25
-
26
-
27
-
28
-
29
-
30
-
31
-
32
-
33
-
34
-
35
-
36
-
37
-
38
-
39
-
40
-
41
-
42
-
43
-
44
-
45
-
46
-
47
-
48
-
49
-
50
-
51
-
52
-
53
-
54
-
55
-
56
-
57
-
58
-
59
-
60
-
61
-
62
-
63
-
64
-
65
-
66
-
67
-
68
-
 69
69 -
 70
70 -
 71
71 -
 72
72 -
 73
73 -
 74
74 -
 75
75 -
 76
76 -
 77
77 -
 78
78 -
 79
79 -
80
-
81
-
82
-
83
-
84
-
85
-
86
-
87
-
88
-
89
-
90
-
91
-
92
-
93
-
94
-
95
-
96
-
97
-
98
-
99
-
100
-
101
-
102
-
103
-
104
-
105
-
106
-
107
-
108
-
109
-
110
-
111
-
112
-
113
-
114
-
115
-
116
-
117
-
118
-
119
-
120
 |
 |
