HP 22-b100 Optical Drive Replacement Instructions - Page 3
Replacing the optical drive
 |
View all HP 22-b100 manuals
Add to My Manuals
Save this manual to your list of manuals |
Page 3 highlights
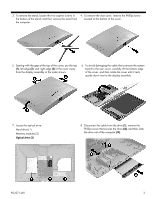
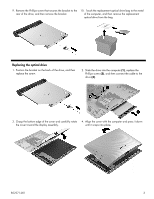
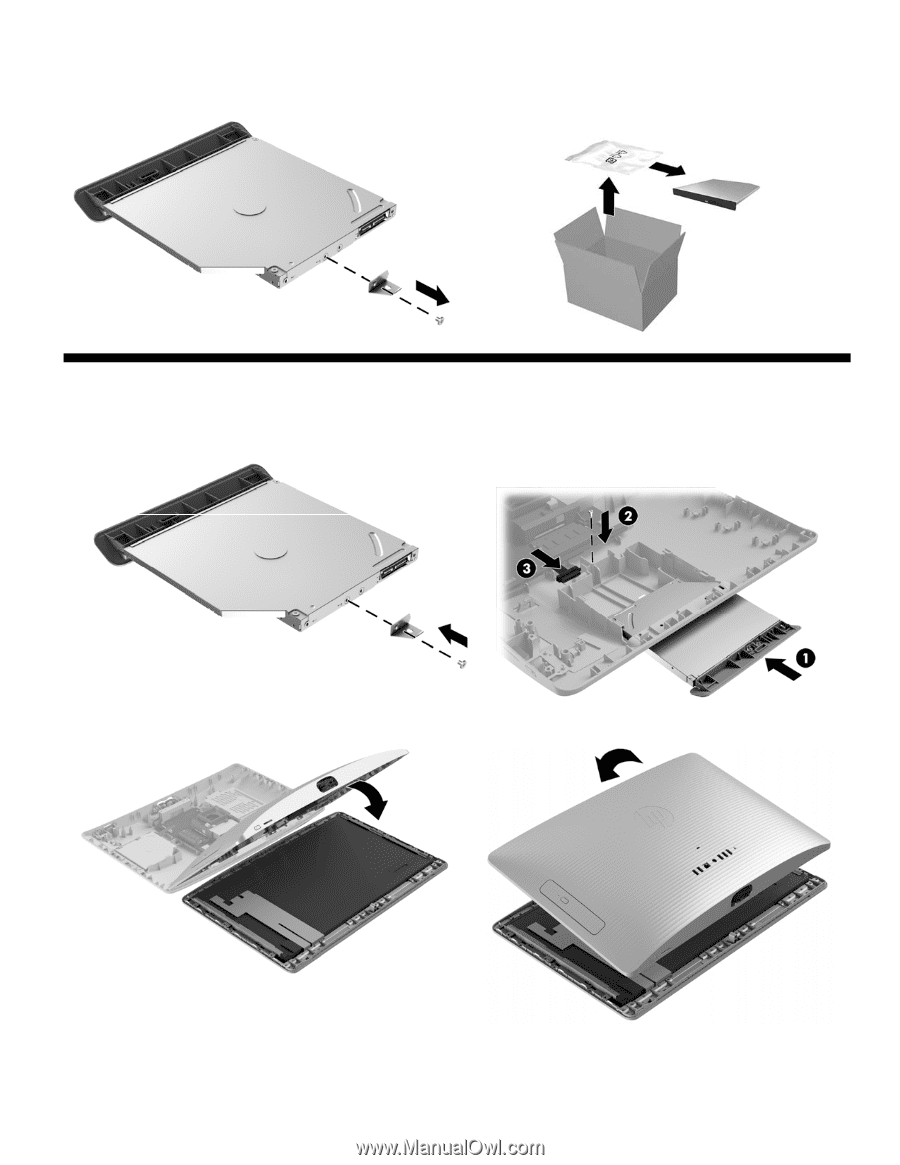
9. Remove the Phillips screw that secures the bracket to the rear of the drive, and then remove the bracket. 10. Touch the replacement optical drive bag to the metal of the computer, and then remove the replacement optical drive from the bag. Replacing the optical drive 1. Position the bracket on the back of the drive, and then replace the screw. 2. Slide the drive into the computer (1), replace the Phillips screw (2), and then connect the cable to the drive (3). 3. Grasp the bottom edge of the cover and carefully rotate the cover toward the display assembly. 4. Align the cover with the computer and press it down until it snaps into place. 852271-001 3
-
 1
1 -
 2
2 -
 3
3 -
 4
4
 |
 |
852271-001
3
9.
Remove the Phillips screw that secures the bracket to the
rear of the drive, and then remove the bracket.
10.
Touch the replacement optical drive bag to the metal
of the computer, and then remove the replacement
optical drive from the bag.
Replacing the optical drive
1.
Position the bracket on the back of the drive, and then
replace the screw.
2.
Slide the drive into the computer
(1)
, replace the
Phillips screw
(2)
, and then connect the cable to the
drive
(3)
.
3.
Grasp the bottom edge of the cover and carefully rotate
the cover toward the display assembly.
4.
Align the cover with the computer and press it down
until it snaps into place
.