HP 2420dn HP LaserJet 2400 Series - Software Technical Reference (External) - Page 225
Job Name, Using Job Storage features when printing, Releasing a Job Storage print job, Automatic
 |
UPC - 829160290010
View all HP 2420dn manuals
Add to My Manuals
Save this manual to your list of manuals |
Page 225 highlights
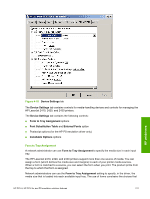
Job Name Selecting a Job Storage option causes the Job Name group box to become available. Use the Job Name options to specify a name to identify the job at the control panel. The following are the Job Name settings: ■ Automatic. This option automatically generates the job name associated with the stored print job. The file name of the print job is used if it is available to the print driver. Otherwise, the software program name or a time stamp is used for the job name. ■ Custom. Use this to type a custom job name for the stored print job. When you click the Custom option button, the text field below the option becomes available. ■ If Job Name Exists. Use this drop-down menu to choose whether a duplicate job name should have a number appended to it, or whether it should overwrite the existing job with the same name. The Job Name field can contain no more than 16 characters. If Custom is selected, but no job name is specified, as soon as the focus is removed from the control (that is, when the Tab key is pressed or another control is selected), the empty string is replaced with . In those languages for which cannot be translated without the use of invalid characters, the driver uses a string of three dashes. The acceptable characters for job name and user name vary for each operating system. The string must be of a length and type that can appear on the product control-panel display. Using Job Storage features when printing To use Job Storage features when printing, follow these steps: 1 Click File and then click Print from the software program. The Print dialog box appears. NOTE Clicking the print icon in the software program toolbar prints the job without Job Storage features. 2 Click Properties. The Properties dialog box appears. 3 Click the Job Storage tab. 4 Select the job-storage options (described previously) by clicking the appropriate option button, and then complete any required fields. 5 Click OK. Releasing a Job Storage print job After you send a print job that uses the Job Storage feature, you can release the job to print by using the product control panel. 1 Press the SELECT button (the one with the check mark) to open the menus. RETRIEVE JOB is highlighted. 2 Press the SELECT button. 3 Press the up and down buttons to scroll to your User Name, and then press the SELECT button. 4 Press the up and down buttons to scroll to the Job Name, and then press the SELECT button. PRINT is highlighted. HP unidrivers HP PCL 6, HP PCL 5e, and PS emulation unidriver features 209
-
 1
1 -
2
-
3
-
4
-
5
-
6
-
7
-
8
-
9
-
10
-
11
-
12
-
13
-
14
-
15
-
16
-
17
-
18
-
19
-
20
-
21
-
22
-
23
-
24
-
25
-
26
-
27
-
28
-
29
-
30
-
31
-
32
-
33
-
34
-
35
-
36
-
37
-
38
-
39
-
40
-
41
-
42
-
43
-
44
-
45
-
46
-
47
-
48
-
49
-
50
-
51
-
52
-
53
-
54
-
55
-
56
-
57
-
58
-
59
-
60
-
61
-
62
-
63
-
64
-
65
-
66
-
67
-
68
-
69
-
70
-
71
-
72
-
73
-
74
-
75
-
76
-
77
-
78
-
79
-
80
-
81
-
82
-
83
-
84
-
85
-
86
-
87
-
88
-
89
-
90
-
91
-
92
-
93
-
94
-
95
-
96
-
97
-
98
-
99
-
100
-
101
-
102
-
103
-
104
-
105
-
106
-
107
-
108
-
109
-
110
-
111
-
112
-
113
-
114
-
115
-
116
-
117
-
118
-
119
-
120
-
121
-
122
-
123
-
124
-
125
-
126
-
127
-
128
-
129
-
130
-
131
-
132
-
133
-
134
-
135
-
136
-
137
-
138
-
139
-
140
-
141
-
142
-
143
-
144
-
145
-
146
-
147
-
148
-
149
-
150
-
151
-
152
-
153
-
154
-
155
-
156
-
157
-
158
-
159
-
160
-
161
-
162
-
163
-
164
-
165
-
166
-
167
-
168
-
169
-
170
-
171
-
172
-
173
-
174
-
175
-
176
-
177
-
178
-
179
-
180
-
181
-
182
-
183
-
184
-
185
-
186
-
187
-
188
-
189
-
190
-
191
-
192
-
193
-
194
-
195
-
196
-
197
-
198
-
199
-
200
-
201
-
202
-
203
-
204
-
205
-
206
-
207
-
208
-
209
-
210
-
211
-
212
-
213
-
214
-
215
-
216
-
217
-
218
-
219
-
 220
220 -
 221
221 -
 222
222 -
 223
223 -
 224
224 -
 225
225 -
 226
226 -
 227
227 -
 228
228 -
 229
229 -
 230
230 -
231
-
232
-
233
-
234
-
235
-
236
-
237
-
238
-
239
-
240
-
241
-
242
-
243
-
244
-
245
-
246
-
247
-
248
-
249
-
250
-
251
-
252
-
253
-
254
-
255
-
256
-
257
-
258
-
259
-
260
-
261
-
262
-
263
-
264
-
265
-
266
-
267
-
268
-
269
-
270
-
271
-
272
-
273
-
274
-
275
-
276
-
277
-
278
-
279
-
280
-
281
-
282
-
283
-
284
-
285
-
286
-
287
-
288
-
289
-
290
-
291
-
292
-
293
-
294
-
295
-
296
-
297
-
298
-
299
-
300
-
301
-
302
-
303
-
304
-
305
-
306
-
307
-
308
-
309
-
310
-
311
-
312
-
313
-
314
-
315
-
316
-
317
-
318
-
319
-
320
-
321
-
322
-
323
-
324
-
325
-
326
-
327
-
328
-
329
-
330
-
331
-
332
-
333
-
334
 |
 |
