HP 3150 Service Manual - Page 147
HP LaserJet 3150 product. Some HP LaserJet 3100 products do
 |
UPC - 879889002135
View all HP 3150 manuals
Add to My Manuals
Save this manual to your list of manuals |
Page 147 highlights
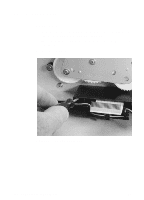
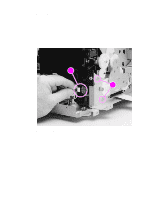
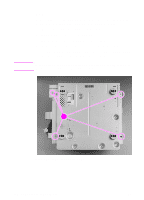
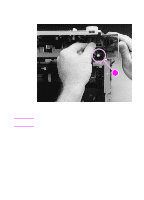
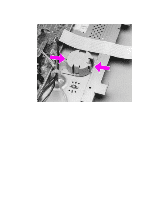
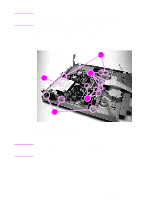
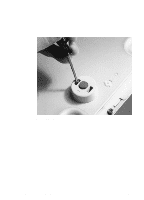
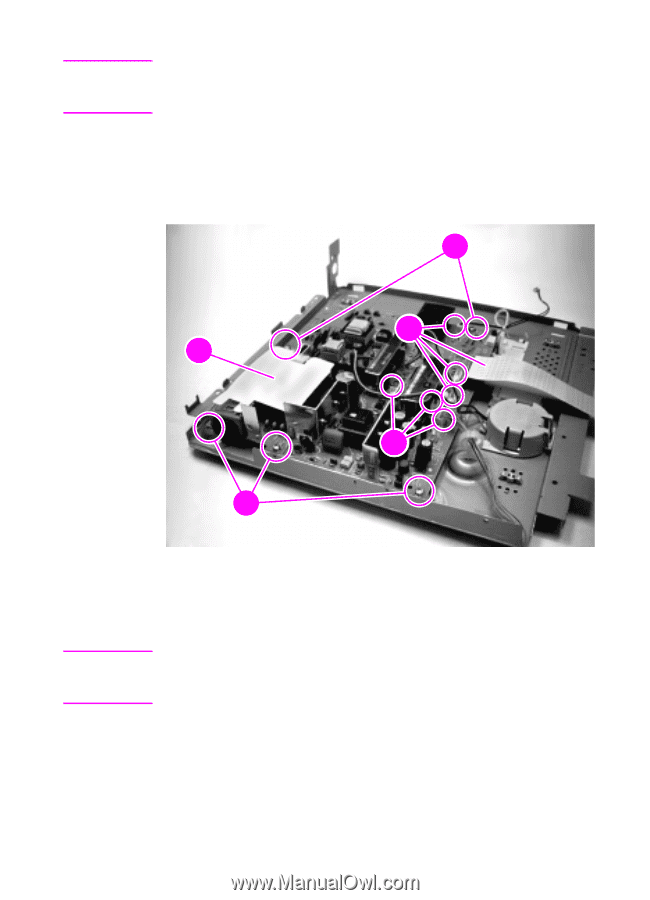
Note In Figure 73 below, the photograph shows the ECU from an HP LaserJet 3150 product. Some HP LaserJet 3100 products do not contain the protective sheet (callout 1). 8 Remove the (7) remaining cables (callout 2). 9 Remove the screws (5) that secure the ECU to the bottom plate (callout 3). 32 2 12 Note 2 32 Figure 73. ECU removal (4 of 4) 10 Remove the ECU by lifting gently on the side opposite the formatter, then sliding it out. When ordering, the ECU does not come with any cables. Reuse the cables from the product on which you are working or see Chapter 7, "Parts and diagrams," for ordering information. EN Bottom assemblies 145
-
 1
1 -
2
-
3
-
4
-
5
-
6
-
7
-
8
-
9
-
10
-
11
-
12
-
13
-
14
-
15
-
16
-
17
-
18
-
19
-
20
-
21
-
22
-
23
-
24
-
25
-
26
-
27
-
28
-
29
-
30
-
31
-
32
-
33
-
34
-
35
-
36
-
37
-
38
-
39
-
40
-
41
-
42
-
43
-
44
-
45
-
46
-
47
-
48
-
49
-
50
-
51
-
52
-
53
-
54
-
55
-
56
-
57
-
58
-
59
-
60
-
61
-
62
-
63
-
64
-
65
-
66
-
67
-
68
-
69
-
70
-
71
-
72
-
73
-
74
-
75
-
76
-
77
-
78
-
79
-
80
-
81
-
82
-
83
-
84
-
85
-
86
-
87
-
88
-
89
-
90
-
91
-
92
-
93
-
94
-
95
-
96
-
97
-
98
-
99
-
100
-
101
-
102
-
103
-
104
-
105
-
106
-
107
-
108
-
109
-
110
-
111
-
112
-
113
-
114
-
115
-
116
-
117
-
118
-
119
-
120
-
121
-
122
-
123
-
124
-
125
-
126
-
127
-
128
-
129
-
130
-
131
-
132
-
133
-
134
-
135
-
136
-
137
-
138
-
139
-
140
-
141
-
 142
142 -
 143
143 -
 144
144 -
 145
145 -
 146
146 -
 147
147 -
 148
148 -
 149
149 -
 150
150 -
 151
151 -
 152
152 -
153
-
154
-
155
-
156
-
157
-
158
-
159
-
160
-
161
-
162
-
163
-
164
-
165
-
166
-
167
-
168
-
169
-
170
-
171
-
172
-
173
-
174
-
175
-
176
-
177
-
178
-
179
-
180
-
181
-
182
-
183
-
184
-
185
-
186
-
187
-
188
-
189
-
190
-
191
-
192
-
193
-
194
-
195
-
196
-
197
-
198
-
199
-
200
-
201
-
202
-
203
-
204
-
205
-
206
-
207
-
208
-
209
-
210
-
211
-
212
-
213
-
214
-
215
-
216
-
217
-
218
-
219
-
220
-
221
-
222
-
223
-
224
-
225
-
226
-
227
-
228
-
229
-
230
-
231
-
232
-
233
-
234
-
235
-
236
-
237
-
238
-
239
-
240
-
241
-
242
-
243
-
244
-
245
-
246
-
247
-
248
-
249
-
250
-
251
-
252
-
253
-
254
-
255
-
256
-
257
-
258
-
259
-
260
-
261
-
262
-
263
-
264
-
265
-
266
-
267
-
268
-
269
-
270
-
271
-
272
 |
 |
EN
Bottom assemblies
145
Note
In Figure 73 below, the photograph shows the ECU from an
HP LaserJet 3150 product. Some HP LaserJet 3100 products do not
contain the protective sheet (callout 1).
8
Remove the (7) remaining cables (callout 2).
9
Remove the screws (5) that secure the ECU to the bottom plate
(callout 3).
Figure 73.
ECU removal (4 of 4)
10
Remove the ECU by lifting gently on the side opposite the
formatter, then sliding it out.
Note
When ordering, the ECU does not come with any cables. Reuse the
cables from the product on which you are working or see Chapter 7,
“Parts and diagrams,” for ordering information.
2
2
2
2
2
1
3
2
2
3