HP 4345mfp HP LaserJet 4345mfp - User Guide - Page 34
Installing Macintosh printing system software for direct connections, HP LaserJet 4345 MFP
 |
UPC - 829160499956
View all HP 4345mfp manuals
Add to My Manuals
Save this manual to your list of manuals |
Page 34 highlights
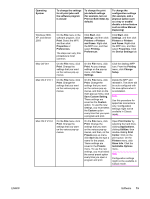
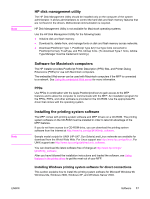
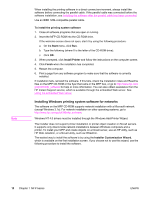
Note Note Note 2. Insert the CD-ROM into the CD-ROM drive. The CD-ROM menu runs automatically. If the CD-ROM menu does not run automatically, double-click the CD-ROM icon on the desktop, and then double-click the Installer icon. This icon is located in the Installer/ folder of the Starter CD-ROM, where is your language preference. For example, the Installer/English folder contains the Installer icon for the English MFP software. 3. Follow the instructions on the screen. 4. From HD, click Applications, click Utilities, and then open Desktop Printer Utility. 5. Double click Printer (AppleTalk). 6. Next to AppleTalk Printer Selection, click Change. 7. Select the MFP, click Auto Setup, and then click Create. 8. On the Printing menu, click Set Default Printer. To install printer drivers in Mac OS X V10.1 and later 1. Connect the network cable between the HP Jetdirect print server and a network port. 2. Insert the CD-ROM into the CD-ROM drive. The CD-ROM menu runs automatically. If the CD-ROM menu does not run automatically, double-click the CD-ROM icon on the desktop, and then double-click the Installer icon. This icon is located in the Installer/ folder of the Starter CD-ROM, where is your language preference. For example, the Installer/English folder contains the Installer icon for the English MFP software. 3. Double-click the HP LaserJet Installers folder. 4. Follow the instructions on the computer screen. 5. Double-click the Installer icon for the appropriate language. If Mac OS X and Mac OS 9.x (Classic) are installed on the same computer, the installer will show both the Classic and the Mac OS X installation options. 6. On your computer hard drive, double-click Applications, double-click Utilities, and then double-click Print Center or Print Setup Utility. If you are using Mac OS X V10.3, "Print Setup Utility" has replaced "Print Center". 7. Click Add Printer. 8. Select your connection type. 9. Select HP LaserJet 4345 MFP from the list. 10. Click Add Printer. 11. Close the Print Center or the Print Setup Utility by clicking the close button in the upper- left corner. Installing Macintosh printing system software for direct connections Macintosh computers do not support parallel port connections. To connect the MFP directly to a Macintosh computer, order an HP Jetdirect Connectivity card, which has USB port. See Ordering parts, accessories, and supplies for information about ordering this card. (Order part number J4135A.) 20 Chapter 1 MFP basics ENWW
-
 1
1 -
2
-
3
-
4
-
5
-
6
-
7
-
8
-
9
-
10
-
11
-
12
-
13
-
14
-
15
-
16
-
17
-
18
-
19
-
20
-
21
-
22
-
23
-
24
-
25
-
26
-
27
-
28
-
 29
29 -
 30
30 -
 31
31 -
 32
32 -
 33
33 -
 34
34 -
 35
35 -
 36
36 -
 37
37 -
 38
38 -
 39
39 -
40
-
41
-
42
-
43
-
44
-
45
-
46
-
47
-
48
-
49
-
50
-
51
-
52
-
53
-
54
-
55
-
56
-
57
-
58
-
59
-
60
-
61
-
62
-
63
-
64
-
65
-
66
-
67
-
68
-
69
-
70
-
71
-
72
-
73
-
74
-
75
-
76
-
77
-
78
-
79
-
80
-
81
-
82
-
83
-
84
-
85
-
86
-
87
-
88
-
89
-
90
-
91
-
92
-
93
-
94
-
95
-
96
-
97
-
98
-
99
-
100
-
101
-
102
-
103
-
104
-
105
-
106
-
107
-
108
-
109
-
110
-
111
-
112
-
113
-
114
-
115
-
116
-
117
-
118
-
119
-
120
-
121
-
122
-
123
-
124
-
125
-
126
-
127
-
128
-
129
-
130
-
131
-
132
-
133
-
134
-
135
-
136
-
137
-
138
-
139
-
140
-
141
-
142
-
143
-
144
-
145
-
146
-
147
-
148
-
149
-
150
-
151
-
152
-
153
-
154
-
155
-
156
-
157
-
158
-
159
-
160
-
161
-
162
-
163
-
164
-
165
-
166
-
167
-
168
-
169
-
170
-
171
-
172
-
173
-
174
-
175
-
176
-
177
-
178
-
179
-
180
-
181
-
182
-
183
-
184
-
185
-
186
-
187
-
188
-
189
-
190
-
191
-
192
-
193
-
194
-
195
-
196
-
197
-
198
-
199
-
200
-
201
-
202
-
203
-
204
-
205
-
206
-
207
-
208
-
209
-
210
-
211
-
212
-
213
-
214
-
215
-
216
-
217
-
218
-
219
-
220
-
221
-
222
-
223
-
224
-
225
-
226
-
227
-
228
-
229
-
230
-
231
-
232
-
233
-
234
-
235
-
236
-
237
-
238
-
239
-
240
-
241
-
242
-
243
-
244
-
245
-
246
-
247
-
248
-
249
-
250
-
251
-
252
-
253
-
254
-
255
-
256
-
257
-
258
-
259
-
260
-
261
-
262
-
263
-
264
-
265
-
266
-
267
-
268
-
269
-
270
-
271
-
272
-
273
-
274
-
275
-
276
-
277
-
278
-
279
-
280
-
281
-
282
-
283
-
284
-
285
-
286
-
287
-
288
-
289
-
290
-
291
-
292
-
293
-
294
-
295
-
296
-
297
-
298
-
299
-
300
-
301
-
302
-
303
-
304
-
305
-
306
-
307
-
308
-
309
-
310
-
311
-
312
-
313
-
314
-
315
-
316
-
317
-
318
-
319
-
320
-
321
-
322
-
323
-
324
 |
 |
