HP 7650n User's Manual - Page 11
Save a document to a drive, disk, or CD, E-mail a scanned document or picture, Make copies
 |
UPC - 883585045990
View all HP 7650n manuals
Add to My Manuals
Save this manual to your list of manuals |
Page 11 highlights
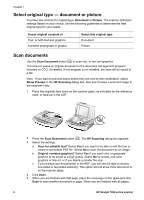
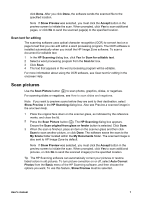
Chapter 1 Save a document to a drive, disk, or CD Use the File Documents button ( a hard drive, or a recordable CD. ) to save scanned documents to a disk, such as Tip For color, grayscale or color graphics, or editable text, use the Scan Document button. 1 Place the original face down on the scanner glass, as indicated by the reference marks, or face-up in the ADF. 2 Press the File Documents button ( ) and the scan occurs. 3 The Scan document window appears. Scan another document or click Done. 4 The Save As dialog box appears. Select the desired destination folder, type a file name and select a file type. 5 Click OK. The software saves the document to the specified folder. If you do not choose a location in the Save as dialog box, the document will be saved to the My Documents folder on your computer by default. Note If you want to preview scans before they are sent to their destination, see Preview a scanned image in the onscreen Help. E-mail a scanned document or picture Use the E-mail button ( ) to scan documents or pictures and insert them in an email message as an attachment. You must have a supported e-mail software program. The E-mail button scans using grayscale image settings to keep the file size small for e-mail and sends the scan to your e-mail software (if supported). There is an option to scan pictures, slides, or negatives in color. 1 Place the original face down on the scanner glass, as indicated by the reference marks, or face-up in the ADF. 2 Press the E-mail button ( ). The Scanning to E-mail dialog box appears. Type a file name, and then select a file type. Click Continue. The scan begins. 3 When the scan is completed, you are prompted to scan another page. If you have another page or picture that you wish to include in the e-mail, place the picture or document page on the scanner glass and click Scan. 4 Click Done at the prompt when you are finished scanning. Your e-mail program opens and the scanned file appears as an attachment to a message. 5 Use your e-mail program to complete and send the e-mail. To view the scanned image before you send the e-mail, double-click the attachment in your e-mail software. To change the e-mail program, open the HP Director software from your desktop icon or from the Start menu, and then select E-mail Settings in the Settings drop-down list. The E-mail Settings dialog box appears. Select the e-mail program that you want to use, and then click OK. Make copies Use the Copy button ( ) to scan an original and send it to a printer. 8 HP Scanjet 7600 series scanner
-
 1
1 -
2
-
3
-
4
-
5
-
 6
6 -
 7
7 -
 8
8 -
 9
9 -
 10
10 -
 11
11 -
 12
12 -
 13
13 -
 14
14 -
 15
15 -
 16
16 -
17
-
18
-
19
-
20
-
21
-
22
-
23
-
24
-
25
-
26
-
27
-
28
-
29
-
30
-
31
-
32
-
33
 |
 |