HP 9000 K570 Installation Guide - K-Class (HP 9000/Kxx0) - Page 7
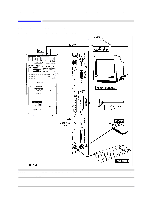
Optional Graphics Console
 |
View all HP 9000 K570 manuals
Add to My Manuals
Save this manual to your list of manuals |
Page 7 highlights
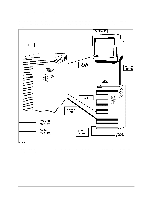
Introduction Overview of System Installation Optional Graphics Console If desired, a graphics console and mouse can be connected to the SPU instead of the standard console. To install the graphics console, substitute the following Step 1 for the standard Step 1 in the installation procedure listed above: Optional Graphics Console: A4032A/A4033A/A4331A Graphics Display with Keyboard and Mouse: 1. Connect the graphics console data cable to the "OPTIONAL I/O" port on the system core I/O card. 2. Plug the graphics console power cable into a UPS power receptacle. 3. Plug the graphics console power cable into a UPS power receptacle. 4. Connect the keyboard cable to the keyboard connector on the core I/O card. 5. Connect the mouse cable to the connector labeled "MOUSE" on the system core I/O card. 6. Connect the UPS data cable between the "UPS" connector on the system and the appropriate data connector on the UPS. Overview of System Power/Data Cabling CAUTION UPS Requirements The 1.8kVA (A2997A), 3kVA (A2998A), and 5.5kVA (A3589A) Power Trust UPSs are the only UPSs supported on PA8000-based systems: HP9000 K250/K260/K370/K380 and HP9000 K450/K460/K570/K580. The 1.3kVA and 1.6kVA Power Trust UPSs do not have a 20amp receptacle and cannot provide sufficient current. Rackmount Requirements Ensure that the PDU (cabinet power strip) has a 20 amp receptacle. Upgrade kits for the PDU strip are available if required. 3
-
 1
1 -
 2
2 -
 3
3 -
 4
4 -
 5
5 -
 6
6 -
 7
7 -
 8
8 -
 9
9 -
 10
10 -
 11
11 -
 12
12 -
13
-
14
-
15
-
16
-
17
-
18
-
19
-
20
 |
 |