HP All-in-One 200-5100 Upgrade and Service - Page 5
from the computer., Locate the three tabs that secure the front panel to
 |
View all HP All-in-One 200-5100 manuals
Add to My Manuals
Save this manual to your list of manuals |
Page 5 highlights
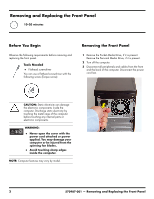
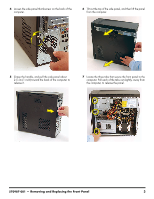
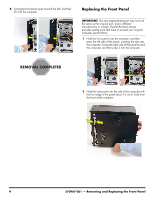
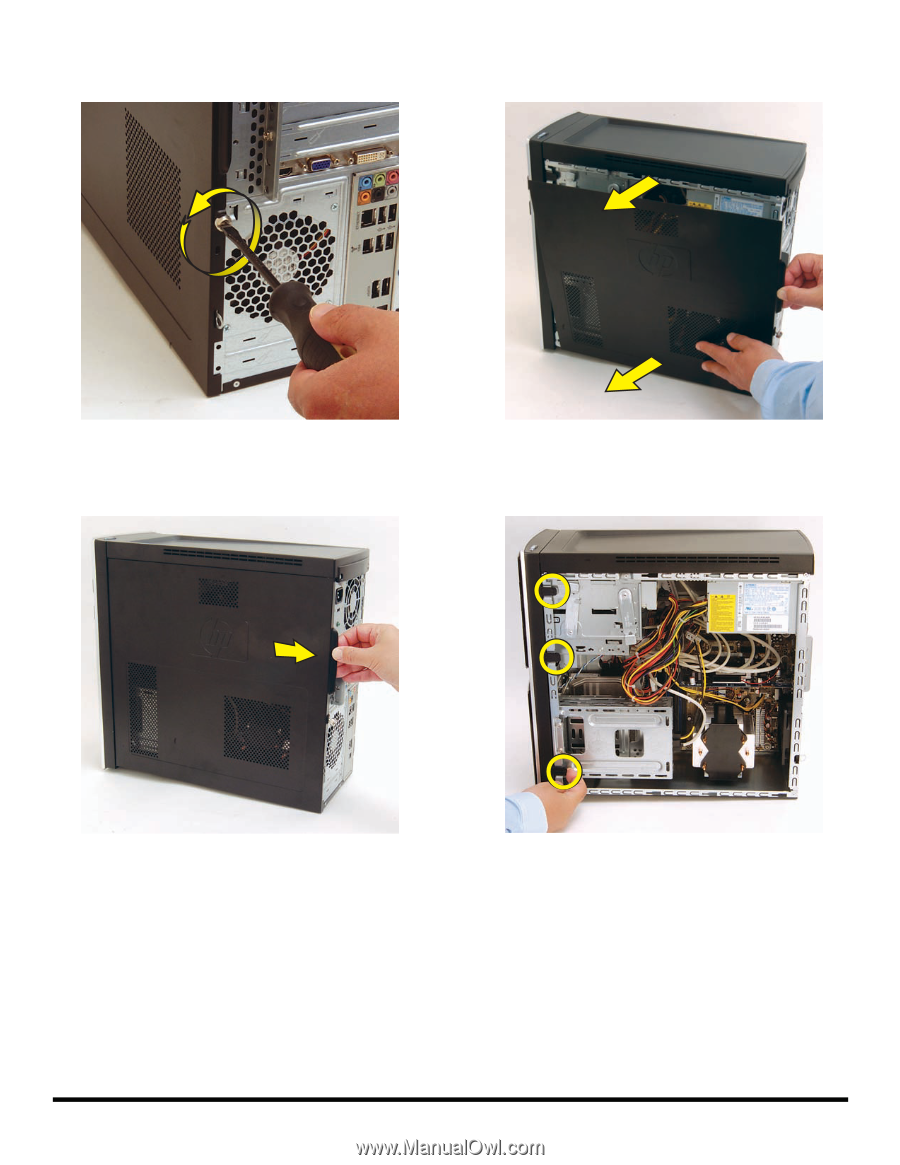
4 Loosen the side panel thumbscrew on the back of the computer. 6 Tilt out the top of the side panel, and then lift the panel from the computer. 5 Grasp the handle, and pull the side panel about 2.5 cm (1 inch) toward the back of the computer to release it. 7 Locate the three tabs that secure the front panel to the computer. Pull each of the tabs out slightly, away from the computer, to release the panel. 570987-001 - Removing and Replacing the Front Panel 3
-
 1
1 -
 2
2 -
 3
3 -
 4
4 -
 5
5 -
 6
6 -
 7
7 -
 8
8 -
 9
9 -
 10
10 -
 11
11 -
12
-
13
-
14
-
15
-
16
-
17
-
18
-
19
-
20
-
21
-
22
-
23
-
24
-
25
-
26
-
27
-
28
-
29
-
30
-
31
-
32
-
33
-
34
-
35
-
36
-
37
-
38
-
39
-
40
-
41
-
42
-
43
-
44
-
45
-
46
 |
 |
570987-001
— Removing and Replacing the Front Panel
3
4
Loosen the side panel thumbscrew on the back of the
computer.
5
Grasp the handle, and pull the side panel about
2.5 cm (1 inch) toward the back of the computer to
release it.
6
Tilt out the top of the side panel, and then lift the panel
from the computer.
7
Locate the three tabs that secure the front panel to the
computer. Pull each of the tabs out slightly, away from
the computer, to release the panel.