HP Armada 1500 Compaq Armada 1500 Family of Personal Computers Maintenance and
HP Armada 1500 - Notebook PC Manual
 |
View all HP Armada 1500 manuals
Add to My Manuals
Save this manual to your list of manuals |
HP Armada 1500 manual content summary:
- HP Armada 1500 | Compaq Armada 1500 Family of Personal Computers Maintenance and - Page 1
terms of the agreement. Product names mentioned herein may be trademarks and/or registered trademarks of their respective companies. Maintenance and Service Guide Compaq Armada 1500 Family of Personal Computers First Edition (March 1997) Spare Part Number 255011-001 Document Part Number 284820-001 - HP Armada 1500 | Compaq Armada 1500 Family of Personal Computers Maintenance and - Page 2
Preface This Maintenance and Service Guide is a troubleshooting guide that can be used for reference when servicing the Compaq Armada 1500 Family of Personal Computers. Additional information is available in the Service Quick Reference Guide and in QuickFind. Compaq Computer Corporation reserves the - HP Armada 1500 | Compaq Armada 1500 Family of Personal Computers Maintenance and - Page 3
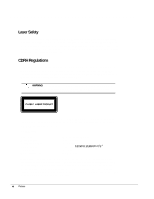
Compaq systems, equipped with CD-ROM drives, comply with appropriate safety standard including IEC 825. With specific or in the CD ROM installation guide may result in hazardous radiation exposure. service provider, dealer, or reseller should attempt to repair this equipment. All troubleshooting - HP Armada 1500 | Compaq Armada 1500 Family of Personal Computers Maintenance and - Page 4
than 60 degrees C. In North America, dispose of nickel metal hydride or lithium-ion batteries by taking advantage of the Compaq battery recycling program. You will be provided with a postage-paid battery pack mailer preaddressed to a reclamation facility where the metals are recycled. In Europe, do - HP Armada 1500 | Compaq Armada 1500 Family of Personal Computers Maintenance and - Page 5
The following documentation is available to support the products: s Quick Setup s Reference Guide s Introducing Microsoft Windows 95 s Compaq Service Quick Reference Guide s Service Training Guides s Compaq Service Advisories and Bulletins s Compaq QuickFind s Technical Reference Guide xiv Preface - HP Armada 1500 | Compaq Armada 1500 Family of Personal Computers Maintenance and - Page 6
Contents Preface Symbols xi Technician Notes xi Laser Safety xii CDRH Regulations xii Battery Notice xiii Serial Number xiii Locating Additional Information xiv Chapater 1 Computer Product Description 1.1 Computer Features and Models 1-1 1.2 Standard Features 1-2 1.2.1 - HP Armada 1500 | Compaq Armada 1500 Family of Personal Computers Maintenance and - Page 7
Compaq Utilities 3-7 Running Computer Setup 3-7 Running Computer Checkup (TEST) 3-8 View System Information (INSPECT) 3-10 3.6 Diagnostic Error Codes 3-11 3.7 Troubleshooting Without Diagnostics 3-17 3.7.1 Solving Minor Problems Equipment 6-2 Removing Batteries 6-2 Preventing Damage - HP Armada 1500 | Compaq Armada 1500 Family of Personal Computers Maintenance and - Page 8
the AC Power 7-5 7.4.2 Undocking the Computer 7-5 7.4.3 Battery Pack 7-6 7.4.4 DualBay Devices 7-8 7.4.5 PCMCIA 7-9 7.5 Modem 7-10 7.6 CD-ROM Drive 7-11 7.7 Keyboard 7-13 7.8 Memory Board 7-16 7.9 Hard Drive 7-19 7.10 Lithium Real Time Clock Battery 7-21 7.11 Microphone/Display - HP Armada 1500 | Compaq Armada 1500 Family of Personal Computers Maintenance and - Page 9
Fan 7-47 7.18 I/O Fixture Connector 7-49 7.19 System Board 7-51 7.20 AC Power 7-53 7.21 External Computer Components 7-54 7.21.1 Computer Logo 7-54 7.21 Specifications 9.1 Computer 9-2 9.2 Displays 9-3 9.3 Hard Drives 9-4 9.4 Diskette Drive 9-5 9.5 CD-ROM Drive 9-6 9.6 Battery - HP Armada 1500 | Compaq Armada 1500 Family of Personal Computers Maintenance and - Page 10
Appendix A Comput A-1 Appendix B Power Cord Set Requirements 3-Conductor Power Cord Set B-1 General Requirements B-1 Country-Specific Requirements B-2 Notes: B-2 Appendix C Modem Commands C-1 Index I-1 Contents ix - HP Armada 1500 | Compaq Armada 1500 Family of Personal Computers Maintenance and - Page 11
Models The Compaq Armada 1500 Family of Personal Computers is a line of multimedia notebook computers with advanced modularity, processors, and 1550T 1550DMT Pentium Processor 120-MHz 120-MHz 133-MHz 133-MHz 133-MHz 133-MHz 133-MHz Table 1-1 Compaq Armada Personal Computers Display Level 2 Hard - HP Armada 1500 | Compaq Armada 1500 Family of Personal Computers Maintenance and - Page 12
Computer 1.2 Standard Features The Compaq Armada models have the following standard features: s 120- or 133-MHz Pentium processors s 16-MB of EDO user-programmable keys s Touchpad pointing device s Operates from an internal battery pack, plus an optional battery pack in the DualBay, or integrated AC - HP Armada 1500 | Compaq Armada 1500 Family of Personal Computers Maintenance and - Page 13
and one type III PC Cards, PCMCIA and CardBus cards; Compaq Telephony modem in the top slot and Zoomed-Video in the bottom slot s 176 pin expansion connector provides from Compaq Computer Corporation. Both the model and the serial numbers of the computer are needed to identify the specific software - HP Armada 1500 | Compaq Armada 1500 Family of Personal Computers Maintenance and - Page 14
boards s Li-ion and NiMH battery packs s Automobile Adapter s External Battery Charger s PCMCIA modem s AC power cords for international travelers s Hard drive upgrade s Internal modem s Internal CD-ROM drive 1.3.1 Convenience Base Compaq Armada models support the following convenience base models - HP Armada 1500 | Compaq Armada 1500 Family of Personal Computers Maintenance and - Page 15
battery charge slots s Accepts both NiMH and Li-ion modular batteries s Charges one battery in 1.5 hours s Charges two batteries in 3 hours 1.3.4 External Keyboards and Pointing Devices Supports Compaq or Compaq compatible PS2 keyboards and pointing devices 1.3.5 External Monitors The Compaq Armada - HP Armada 1500 | Compaq Armada 1500 Family of Personal Computers Maintenance and - Page 16
and left side external components are shown in the following figure and identified in this section: 1 Display latches 2 Battery charge light 3 Power/Suspend light 4 DualBay compartment 5 PC Card slots 6 PC Card eject levers 7 RJ-11 port (on some models) Figure 1-2. Front and Left Side Components - HP Armada 1500 | Compaq Armada 1500 Family of Personal Computers Maintenance and - Page 17
1.4.2 Right Side Components The right side external components are shown in the following figure and identified in this section: 1 Battery bay 2 Stereo/speaker headphone jack 3 Microphone jack 4 Volume control buttons 5 CD-ROM drive (on some models) 6 Cable lock provision Figure 1-3. Right Side - HP Armada 1500 | Compaq Armada 1500 Family of Personal Computers Maintenance and - Page 18
the following figure and identified in this section: 1 Serial connector 2 Serial number 3 Parallel connector 4 External monitor connector 5 AC Power connector 6 Docking connector 7 Airflow vents 8 Infrared port 9 Keyboard/Mouse connector Figure 1-4. Rear Components 1-8 Computer Product Description - HP Armada 1500 | Compaq Armada 1500 Family of Personal Computers Maintenance and - Page 19
components are shown in the following figure and are identified in this section: 1 Docking alignment guide 2 Modem compartment 3 Diskette drive 4 Diskette drive release latch 5 Docking latch receptacles 6 Battery bay traction grip Figure 1-5. Bottom Components Computer Product Description 1-9 - HP Armada 1500 | Compaq Armada 1500 Family of Personal Computers Maintenance and - Page 20
1.4.5 Status Panel Lights The status panel lights are shown in the following figure and are identified in this section: 1 Hard drive light 2 Diskette drive light 3 Num Lock light 4 Caps Lock light 5 Scroll Lock light Figure 1-6. Status Panel Lights 1-10 Computer Product Description - HP Armada 1500 | Compaq Armada 1500 Family of Personal Computers Maintenance and - Page 21
and disconnections are made automatically when the computer is docked and undocked. The following convenience models are available: Table 2-1 Compaq Armada 1500 Family of Convenience Bases Model Serial Configuration Convenience Base Pass Through model BNH3 Convenience Base with Ethernet BNH1 - HP Armada 1500 | Compaq Armada 1500 Family of Personal Computers Maintenance and - Page 22
Figure 2-1. Compaq Armada 1500 Convenience Base 2-2 Convenience Base Description - HP Armada 1500 | Compaq Armada 1500 Family of Personal Computers Maintenance and - Page 23
Speaker/headphone Audio Line-In Serial Parallel External Monitor Keyboard Pointing Device MIDI/Joystick Other Features Cable lock provision Pass through AC Power BNC connector (not available in all countries) RJ-45 connector Options Monitor Stand Localized Power Cords Kensington lock Optional - HP Armada 1500 | Compaq Armada 1500 Family of Personal Computers Maintenance and - Page 24
identified in this section. 1 Power button 2 Security cable lock provision 3 Docking lever 4 Battery charge light 5 Suspend button 6 Power/Suspend light 7 Retaining latch 8 Pass through AC power outlet 9 Docking connector : Docking alignment pins ; Docking latches 2-4 Convenience Base Description - HP Armada 1500 | Compaq Armada 1500 Family of Personal Computers Maintenance and - Page 25
Figure 2-2. Convenience Base Front and Right Side Components Convenience Base Description 2-5 - HP Armada 1500 | Compaq Armada 1500 Family of Personal Computers Maintenance and - Page 26
-45 jack 3 Serial connector 4 Parallel connector 5 External monitor connector 6 MIDI/Joystick connector 7 Pointing device connector 8 Keyboard connector 9 Speaker/headphone jack : Audio Line-in jack ; Fan < AC power connector 2-6 Convenience Base Description - HP Armada 1500 | Compaq Armada 1500 Family of Personal Computers Maintenance and - Page 27
Figure 2-3. Convenience Base Rear Components Convenience Base Description 2-7 - HP Armada 1500 | Compaq Armada 1500 Family of Personal Computers Maintenance and - Page 28
tables in Section 3.6 if you are unable to exercise POST or Computer Checkup or if the problem persists after running POST and Computer Checkup. Follow these guidelines when troubleshooting: s Complete the recommended actions in the order in which they are given. s Repeat POST and Computer - HP Armada 1500 | Compaq Armada 1500 Family of Personal Computers Maintenance and - Page 29
Run: POST Computer Checkup (TEST) under Compaq Utilities View System Information (INSPECT)under Compaq Utilities Computer Setup 3.1 Preliminary Steps IMPORTANT: Use AC Power when running POST, Computer Setup, or Computer Checkup. A low-battery condition could initiate Suspend or Hibernation and - HP Armada 1500 | Compaq Armada 1500 Family of Personal Computers Maintenance and - Page 30
battery. 4. Wait five minutes. 5. Reconnect the AC power. 6. Restart the computer. During the Power-On Self Test (POST), a "162 System Options not Set" message appears. (See Section 3.4 for additional POST error messages). 7. Shut down the computer, then turn off the power again. Troubleshooting - HP Armada 1500 | Compaq Armada 1500 Family of Personal Computers Maintenance and - Page 31
8. Replace the real time clock battery. 9. Install the battery pack(s). 10. Proceed with the troubleshooting procedures. 3.3 Power-On Self Test (POST) The Power-On Self-Test (POST) is a series of tests that run every time the computer is turned on. POST verifies that the system is configured and - HP Armada 1500 | Compaq Armada 1500 Family of Personal Computers Maintenance and - Page 32
SCU utility.) Fatal errors emit a beep and may display a FATAL message. Fatal errors indicate severe problems, such as a hardware failure. Fatal errors do not system and check all appropriate connections. The video adapter type specified in CMOS RAM does not match the installed hardware. Run Computer - HP Armada 1500 | Compaq Armada 1500 Family of Personal Computers Maintenance and - Page 33
Description Beep Code A walking bit test of CMOS RAM location 0E (Hex) - 3 3F (Hex) failed checksum of the ROM BIOS does not match the 2 byte value at F000:FFFF. RAM error occurred during The keyboard controller failed. Graphics adapter is faulty. Internal RAM is faulty. Remedy Replace system - HP Armada 1500 | Compaq Armada 1500 Family of Personal Computers Maintenance and - Page 34
only) If the problem persists, call for support. Follow these steps to prepare for the support call: 1. Run Computer support. Running Computer Setup Computer Setup contains a group of utilities that give you an overall picture of the computer's hardware configuration and aid in troubleshooting - HP Armada 1500 | Compaq Armada 1500 Family of Personal Computers Maintenance and - Page 35
and other input devices n Network-Network adapter, or other network-related devices ( PCI bus and connected devices n PC Card (PCMCIA) -PC Card bus and PC Card devices and are functioning properly. You can display, print, or save the information Compaq Customer Support Center. 3-8 Troubleshooting - HP Armada 1500 | Compaq Armada 1500 Family of Personal Computers Maintenance and - Page 36
If errors occur, they display when the testing is complete instructions on the screen as the devices are tested. When testing is complete, the Diagnostics menu appears. 10. Exit the Diagnostics menu. NOTE: Exiting the Compaq Utilities menu restarts the computer and saves the changes. Troubleshooting - HP Armada 1500 | Compaq Armada 1500 Family of Personal Computers Maintenance and - Page 37
displayed by referring to "Computer Checkup (TEST) Error Codes" and take the recommended action. 12. Rerun POST and Computer Checkup, taking the recommended actions in given order until the problem the problem problem XX = Specific problem. View of the display. The Compaq Utilities screen instructions - HP Armada 1500 | Compaq Armada 1500 Family of Personal Computers Maintenance and - Page 38
the system recognizes a problem while running the Compaq Diagnostic program. These Processor Test Error Codes Description CPU test failed Coprocessor or Weitek Error DMA page registers test failed Interrupt controller master test failed Port 61 error Keyboard controller self-test failed CMOS RAM - HP Armada 1500 | Compaq Armada 1500 Family of Personal Computers Maintenance and - Page 39
printer. 2. Check power to the printer. 3. Install the loop-back connector and retest. 4. Check port and IRQ configuration. 5. Replace the system board and retest. 3-12 Troubleshooting - HP Armada 1500 | Compaq Armada 1500 Family of Personal Computers Maintenance and - Page 40
codes 1701-xx through 1736-xx : 1. Run Computer Setup. 2. Replace the hard drive and retest. 3. Replace the system board and retest. * ECC = Error Correction Code Troubleshooting 3-13 - HP Armada 1500 | Compaq Armada 1500 Family of Personal Computers Maintenance and - Page 41
xx: 1. Connect and external monitor and retest. 2. Replace the LED status board and retest. 3. Replace the display and retest. 4. Replace the system board and retest. The following steps apply to error codes 2403-xx through noise pattern test failed ECG/VGC memory test failed 3-14 Troubleshooting - HP Armada 1500 | Compaq Armada 1500 Family of Personal Computers Maintenance and - Page 42
test failed 2. Disconnect external monitor and test with internal LCD display. 2423-xx ECG/VGC 640 × 350 64 color set test failed 3. Replace the display assembly and retest. 2424-xx ECG/VGC monochrome text mode test System Internal Error Replace the audio board and retest. Troubleshooting 3-15 - HP Armada 1500 | Compaq Armada 1500 Family of Personal Computers Maintenance and - Page 43
and 6600-xx through 6623-xx: 1. Replace the CD and retest. 2. Replace the CD-ROM drive and retest. 3. Replace the system board and retest. 3-16 Troubleshooting - HP Armada 1500 | Compaq Armada 1500 Family of Personal Computers Maintenance and - Page 44
some common hardware, memory, and software problems. It also explains several types of common messages that may be displayed on the screen. The following pages contain troubleshooting information on: s Audio s Pointing device s Battery/Battery gauge s Memory s Diskette/Diskette drive s Hard - HP Armada 1500 | Compaq Armada 1500 Family of Personal Computers Maintenance and - Page 45
" section in this chapter also may be applicable. Table 3-16 Solving Battery and Battery Gauge Problems Problem Probable Cause Solution(s) Computer won't turn on when Battery is discharged. battery pack is inserted and power cord is unplugged. Connect the computer to an external power source - HP Armada 1500 | Compaq Armada 1500 Family of Personal Computers Maintenance and - Page 46
ROM drive or PC Card. Battery pack is being exposed to high temperatures or extremely cold temperatures. Keep the battery pack within the recommended temperature ranges: Operating: 50°F to 104°F (10°C to 40°C) Storage: -4°F to 86°F (-20°C to 30°C ). Recharge the battery pack. Troubleshooting 3-19 - HP Armada 1500 | Compaq Armada 1500 Family of Personal Computers Maintenance and - Page 47
Table 3-17 Solving Diskette and Diskette Drive Problems Problem Probable Cause Solution(s) Diskette drive light does . diskette. Drive error has occurred. Run Computer Checkup from the Compaq Diagnostics diskette. Diskette is not formatted. Format the diskette. At . 3-20 Troubleshooting - HP Armada 1500 | Compaq Armada 1500 Family of Personal Computers Maintenance and - Page 48
. Hard drive does not work. Table 3-18 Solving Hard Drive Problems Probable Cause Solution(s) System entered Hibernation due to low-battery condition and is now exiting from it. Give the system time to in The drive is initialized during power up. Suspend, or in Hibernation. Troubleshooting 3-21 - HP Armada 1500 | Compaq Armada 1500 Family of Personal Computers Maintenance and - Page 49
. Baud rate conflict. Select the same baud rate for both computers. Data transmission problem. Direct sunlight, fluorescent light, or flashing incandescent light is close to the infrared other. Distance. Verify that devices are not more than 3 feet (1 m) apart. 3-22 Troubleshooting - HP Armada 1500 | Compaq Armada 1500 Family of Personal Computers Maintenance and - Page 50
listed in the following table. Table 3-23 Solving Pointing Device Problems Problem Cause Solution(s) External pointing device does Incorrect device driver or no Install the device driver. not work. device driver is installed. The device driver is not installed in Windows. Install the device - HP Armada 1500 | Compaq Armada 1500 Family of Personal Computers Maintenance and - Page 51
the following table. Table 3-24 Solving Memory Problems Problem Probable Cause Solution(s) Memory count during PowerOn board is installed correctly. "Out of Memory" message is displayed on the screen or insufficient memory error occurs during operation. System . running. 3-24 Troubleshooting - HP Armada 1500 | Compaq Armada 1500 Family of Personal Computers Maintenance and - Page 52
instructions. The PC Card slots are disabled. Run Computer Setup and then select the Security menu to enable PC Card slots. Card or card driver is not supported. Check the list of PC Cards tested successfully in Compaq PC Card platforms. The PC Card drivers (Socket Services, Card Services - HP Armada 1500 | Compaq Armada 1500 Family of Personal Computers Maintenance and - Page 53
to be loaded. Hard drives on flash mass storage cards require the PC Card ATA driver to be loaded. You are trying to access the hard drive card using the wrong card. The card is not supported. Check the list of PC Card cards tested successfully in Compaq PC Card platforms. 3-26 Troubleshooting - HP Armada 1500 | Compaq Armada 1500 Family of Personal Computers Maintenance and - Page 54
Solving Power Problems Also see "Solving Battery and Battery Gauge Problems" in this chapter. Table 3-26 Solving Power Problems Problem Probable Cause Solution(s) Computer won't turn on and Computer is not connected LEDs aren't lit. to a power source. Insert battery or connect an external - HP Armada 1500 | Compaq Armada 1500 Family of Personal Computers Maintenance and - Page 55
printer for instructions. If the self-test fails, it is a printer-specific problem. Also refer to the printing section of the application documentation. Problem Printer will and right sides of the display. Either of these displays indicates that the monitor is working properly. 3-28 Troubleshooting - HP Armada 1500 | Compaq Armada 1500 Family of Personal Computers Maintenance and - Page 56
.SYS driver to the CONFIG.SYS file. Add the following line: DEVICE=C:\ANSI.SYS Restart the computer. If simultaneous display is desired, use 640 × 480 resolution. This is typical; no action is required. This is typical; no action is required. This is typical; no action is required. Troubleshooting - HP Armada 1500 | Compaq Armada 1500 Family of Personal Computers Maintenance and - Page 57
allocated correctly. s A conflict exists between applications. Table 3-29 Solving Software Application Problems Problem Probable Cause Solution(s) Cannot use an application. The application has not been Run the run in enhanced mode. command to run in enhanced mode: WIN/3 3-30 Troubleshooting - HP Armada 1500 | Compaq Armada 1500 Family of Personal Computers Maintenance and - Page 58
Display Problems and Solutions Problem Possible Cause Solution(s) Garbled characters on internal display or flashing internal display when connected to external monitor. Toggled to internal monitor from an external monitor that is using higher resolution than that supported Troubleshooting 3-31 - HP Armada 1500 | Compaq Armada 1500 Family of Personal Computers Maintenance and - Page 59
defective. Try connecting a different signal cable and/or power cord. Table 3-34 Keyboard Problems and Solutions Problem Possible Cause Solution(s) External keyboard does not work. External keyboard may not be securely on to system was turned on. integrate the mouse. 3-32 Troubleshooting - HP Armada 1500 | Compaq Armada 1500 Family of Personal Computers Maintenance and - Page 60
This section provides guidelines for troubleshooting common Ethernet network problems. Refer to these guidelines when before installing the network drivers to verify that the network interface is working correctly. Table 3-36 Solving Ethernet Network Problems Problem Possible Cause Solution(s) - HP Armada 1500 | Compaq Armada 1500 Family of Personal Computers Maintenance and - Page 61
problems that would prevent the connection. The files for the network drivers Reinstall the network drivers. have been corrupted. IMPORTANT: If the 100BaseT Ethernet upgrade module has been installed, remove this module before returning the convenience base for replacement. 3-34 Troubleshooting - HP Armada 1500 | Compaq Armada 1500 Family of Personal Computers Maintenance and - Page 62
This chapter provides illustrated parts and references for spare parts for the Compaq Armada 1500 Family of Personal Computers. To review an illustrated parts breakdown of the computer, refer to the Illustrated Parts Map that comes with this guide. Illustrated Parts Catalog for the Computer 4-1 - HP Armada 1500 | Compaq Armada 1500 Family of Personal Computers Maintenance and - Page 63
4.1 System Unit Figure 4-1. System Unit 4-2 Illustrated Parts Catalog for the Computer - HP Armada 1500 | Compaq Armada 1500 Family of Personal Computers Maintenance and - Page 64
-061 254968-191 254968-161 254968-091 * Keyboard (Portuguese) * Keyboard (Spanish) * Keyboard (Swedish/Finnish) * Keyboard (Swiss) * Keyboard (Taiwanese) enclosure assembly 212535-001 5 11.3-inch CSTN display assembly * 12.1-inch CTFT display assembly * Not illustrated 254966-001 254967-001 - HP Armada 1500 | Compaq Armada 1500 Family of Personal Computers Maintenance and - Page 65
4.2 Mass Storage Devices Figure 4-2. Mass Storage Devices 4-4 Illustrated Parts Catalog for the Computer - HP Armada 1500 | Compaq Armada 1500 Family of Personal Computers Maintenance and - Page 66
1 10x CD-ROM Drive 254974-001 2 1.0-GB hard drive 254963-001 * 1.4-GB hard drive 254964-001 3 1.4-MB, diskette drive 254962-001 4 Lithium Ion Battery Pack 254960-001 * Nickel Metal Hydride Battery Pack 254959-001 * Not illustrated Illustrated Parts Catalog for the Computer 4-5 - HP Armada 1500 | Compaq Armada 1500 Family of Personal Computers Maintenance and - Page 67
4.3 Cables and Power Cords Figure 4-3. Cables and Power Cords 4-6 Illustrated Parts Catalog for the Computer - HP Armada 1500 | Compaq Armada 1500 Family of Personal Computers Maintenance and - Page 68
(Europe) 246959-021 * AC Power cord (Italy) * AC Power cord (Japan) * AC Power cord (Korea) * AC Power cord (Switzerland) * AC Power cord (UK and Singapore) 246959-061 246959-291 246959-AD1 246959-AG1 246959-031 AC Power cord (US/Canada) 246959-001 4 RTC Battery 254971-001 5 Microphone - HP Armada 1500 | Compaq Armada 1500 Family of Personal Computers Maintenance and - Page 69
4.4 Standard and Optional Boards Figure 4-4. Standard and Optional Boards 4-8 Illustrated Parts Catalog for the Computer - HP Armada 1500 | Compaq Armada 1500 Family of Personal Computers Maintenance and - Page 70
273158-001 2 LED Status Board, 11.3-inch display * LED Status Board, 12.1-inch display 254958-001 255049-001 3 I/O Fixture Connector CPU 255010-001 * System board, 133-MHz CPU with L2 cache 254949-001 * System board, 150-MHz CPU with L2 cache, MMX * Not yet available 7 Armada 1500 Series - HP Armada 1500 | Compaq Armada 1500 Family of Personal Computers Maintenance and - Page 71
4.5 Options Figure 4-5. Options 4-10 Illustrated Parts Catalog for the Computer - HP Armada 1500 | Compaq Armada 1500 Family of Personal Computers Maintenance and - Page 72
Cord (UK and Singapore) 246959-031 Power Cord (US/Canada) 246959-001 2 Automobile adapter 254970-001 3 Li-ion modular battery pack 254960-001 * NiMH modular battery pack 254959-001 4 External battery charger 254970-001 * Not illustrated Illustrated Parts Catalog for the Computer 4-11 - HP Armada 1500 | Compaq Armada 1500 Family of Personal Computers Maintenance and - Page 73
4.6 Miscellaneous Parts Figure 4-6. Miscellaneous Parts 4-12 Illustrated Parts Catalog for the Computer - HP Armada 1500 | Compaq Armada 1500 Family of Personal Computers Maintenance and - Page 74
Part Number Plastics kit includes: 1 Left clutch cover 2 Microphone/Display cable cover 3 Right clutch cover 4 RTC Battery cover 254981-001 5 CD-ROM access door 6 Modem access door 7 Fan 254977-001 8 AC Power 254961-001 * Miscellaneous Parts Kit (includes microphone) 254981 - HP Armada 1500 | Compaq Armada 1500 Family of Personal Computers Maintenance and - Page 75
Carton (5 ea) Shipping Carton, display (1 ea) Table 4-7 Shipping Boxes Spares Part Number 254972-001 254973-001 4.9 Documentation Description Compaq Armada Family Illustrated Parts Map (10 ea) Compaq Armada Family Reference Guide Software CD Support Table 4-8 Documentation Spare Part Number - HP Armada 1500 | Compaq Armada 1500 Family of Personal Computers Maintenance and - Page 76
Chapter 5 Illustrated Parts for the Convenience Base This chapter provides illustrated parts and spare parts references for the Compaq Armada 1500 Family of Convenience Bases. To review an illustrated parts breakdown of the convenience base, refer to the Illustrated Parts Map that comes with this - HP Armada 1500 | Compaq Armada 1500 Family of Personal Computers Maintenance and - Page 77
5.1 System Unit Figure 5-1. Convenience Base 5-2 Illustrated Parts for the Convenience Base - HP Armada 1500 | Compaq Armada 1500 Family of Personal Computers Maintenance and - Page 78
Australia/New Zealand) 246959-011 * AC Power cord (Denmark) 246959-081 * AC Power cord (Europe) 246959-021 * AC Power cord (Italy) 246959-061 * AC Power cord (Japan) 246959-291 * AC Power cord (Korea) 246959-AD1 * AC Power cord (Switzerland) 246959-AG1 * AC Power cord (UK and Singapore - HP Armada 1500 | Compaq Armada 1500 Family of Personal Computers Maintenance and - Page 79
and Replacement Preliminaries This chapter provides general service information for the Compaq Armada 1500 Family of Personal Computers. Adherence to the procedures and precautions described in this chapter is essential for proper service. 6.1 Electrostatic Discharge A sudden discharge of static - HP Armada 1500 | Compaq Armada 1500 Family of Personal Computers Maintenance and - Page 80
electrostatic-sensitive parts in their containers until they arrive at static-free stations. s Place items on a grounded surface before removing ionizer to dissipate electric charges. Removing Batteries Compaq recommends that you remove all batteries from the computer before beginning the disassembly - HP Armada 1500 | Compaq Armada 1500 Family of Personal Computers Maintenance and - Page 81
Preventing Damage to Drives To prevent static damage to hard drives, use the following precautions: s Handle drives gently, using static-guarding techniques. s Store drives in the original shipping containers. s Avoid dropping drives from any height onto any surface. s Handle drives on surfaces - HP Armada 1500 | Compaq Armada 1500 Family of Personal Computers Maintenance and - Page 82
static-safe materials when fixtures must directly contact dissipative surfaces. s Keep work area free of non-conductive materials such as ordinary plastic assembly aids and Styrofoam. s Use field service tools, such as cutters, screwdrivers and, vacuums, that are conductive. s Use a portable field - HP Armada 1500 | Compaq Armada 1500 Family of Personal Computers Maintenance and - Page 83
-top workstations with ground cord of 1 megohm of resistance s Static dissipative table or floor mats with hard tie to ground s Field service kits s Static awareness labels s Wrist straps and footwear straps providing 1 megohm +/- 10% resistance s Material handling packages s Conductive plastic bags - HP Armada 1500 | Compaq Armada 1500 Family of Personal Computers Maintenance and - Page 84
Compaq part number 100767-001 (includes case utility tool, connector removal tool, and loop back plugs) s 7-mm socket wrench s 5-mm socket wrench/screw driver being removed or replaced. CAUTION: When servicing these computers, ensure that cables are provided to Compaq whenever requesting information or ordering - HP Armada 1500 | Compaq Armada 1500 Family of Personal Computers Maintenance and - Page 85
for the computer. 7.1 Serial Number The computer serial number should be provided to Compaq support when requesting information or ordering spare parts. The serial number is displayed on the rear of the CPU (Figure 7.1). Figure 7-1. Serial Number Computer Removal and Replacement Procedures 7-1 - HP Armada 1500 | Compaq Armada 1500 Family of Personal Computers Maintenance and - Page 86
provided: 7.4 Preparing the Computer for Disassembly Disconnecting AC Power Undocking the Computer Battery Pack DualBay Device PC Cards 7.5 Modem 7.6 Battery 7.11 Microphone/Display Cable Cover and Microphone 7.12 Clutch Covers/Display Assembly Clutch Covers Display Assembly Display Clutches Display - HP Armada 1500 | Compaq Armada 1500 Family of Personal Computers Maintenance and - Page 87
display cables and supports the status LEDs. s The DC-DC converter board creates the CPU (2.9v or 2.5v) and system voltages (3.3v and 5v) from the battery or AC/DC input. s The system board integrates the processor, memory, level 2 cache, local bus video adapter, PCMCIA/CardBus adapter user - HP Armada 1500 | Compaq Armada 1500 Family of Personal Computers Maintenance and - Page 88
circuitry. 7.3.3 Video system The standard video subsystem consists of: s An internal LCD Display s 11.3 inch SVGA CSTN display s 12.1 inch SVGA CTFT display s 1 Megabyte frame buffer s An inverter to supply AC power to the LCD back-light system s A standard external VGA connector for use - HP Armada 1500 | Compaq Armada 1500 Family of Personal Computers Maintenance and - Page 89
: 1. Disconnect the AC power and any external devices (Section 7.4.1) 2. Remove the battery pack (Section 7.4.3). AC power cord from the power source. 4. Disconnect the AC power from the computer. If the computer is docked in the convenience base, see Section 7.4.2 for undocking instructions - HP Armada 1500 | Compaq Armada 1500 Family of Personal Computers Maintenance and - Page 90
the battery contacts. Place only the battery pack for the Compaq Armada Personal Computer into the battery compartment. Do not force the battery pack exposes potentially harmful battery components. There are no field-serviceable parts located inside the battery pack. To remove the battery pack from - HP Armada 1500 | Compaq Armada 1500 Family of Personal Computers Maintenance and - Page 91
To install the battery pack: 1 1. Insert the battery into the battery compartment. 2. Push firmly until the battery pack is seated into place . Figure 7-3. Inserting the Battery Pack CAUTION: Installing the battery pack upside down can cause the contacts to break. Computer Removal and Replacement - HP Armada 1500 | Compaq Armada 1500 Family of Personal Computers Maintenance and - Page 92
compartment. To prevent damage, do not allow metal objects to touch the battery contacts. Place only the battery pack for the Compaq Armada 1500 Family of Personal Computers into the battery compartment. Do not force the battery pack if insertion does not occur easily. ! WARNING: Do not crush - HP Armada 1500 | Compaq Armada 1500 Family of Personal Computers Maintenance and - Page 93
7.4.5 PCMCIA Remove any installed PC (PCMCIA) Cards before performing any service on the computer. To remove a PC Card, complete the following steps: 1 1. Rotate the PC Card eject lever to the forward position . 2 2. Press the PC Card eject button . 3 3. Pull the PC Card out of the PC Card slot . - HP Armada 1500 | Compaq Armada 1500 Family of Personal Computers Maintenance and - Page 94
7.5 Modem The modem is standard on some models and an upgrade option available on some models. If the model is not equipped with a modem, the modem compartment is sealed off by a protective plate. For models equipped with a modem, complete the following steps for removal. 1. Turn the computer - HP Armada 1500 | Compaq Armada 1500 Family of Personal Computers Maintenance and - Page 95
7.6 CD-ROM Drive The CD-ROM drive is standard on some models and an upgrade option for other models. If the model does not have a CD-ROM drive, the CD-ROM compartment is sealed off by a protective plate. To remove the CD-ROM drive and access door, complete the following steps: 1. Turn the computer - HP Armada 1500 | Compaq Armada 1500 Family of Personal Computers Maintenance and - Page 96
3. Remove the CD-ROM drive. Figure 7-8. Removing the CD-ROM Drive To install the CD-ROM drive reverse the procedure. 7-12 Computer Removal and Replacement Procedures - HP Armada 1500 | Compaq Armada 1500 Family of Personal Computers Maintenance and - Page 97
7.7 Keyboard To remove the keyboard, complete the following procedures. 1. Disconnect the AC power and any external devices (Section 7.4.1). 2. Remove the battery pack (Section 7.4.3). 3. Remove the DualBay device (Section 7.4.4). 4. Remove any PC Cards (Section 7.4.5). 5. Turn the computer bottom - HP Armada 1500 | Compaq Armada 1500 Family of Personal Computers Maintenance and - Page 98
8. Turn the computer topside up. 9. Use a case utility tool to carefully lift up the corner of the keyboard. 10. Disconnect the ZIF connector. Figure 7-10. Lifting the Keyboard 7-14 Computer Removal and Replacement Procedures - HP Armada 1500 | Compaq Armada 1500 Family of Personal Computers Maintenance and - Page 99
1 11. Carefully pull the ZIF connector away from the connector . 2 12. Lift the keyboard cable strain relief tab and keyboard from the computer . Figure 7-11. Removing the Keyboard To replace the keyboard, reverse the steps. Computer Removal and Replacement Procedures 7-15 - HP Armada 1500 | Compaq Armada 1500 Family of Personal Computers Maintenance and - Page 100
before another is installed. To remove the memory board, complete the following steps: 1. Disconnect the AC power and any external devices (Section 7.4.1). 2. Remove the battery pack (Section 7.4.3). 3. Remove the DualBay device (Section 7.4.4). 4. Remove any PC Cards (Section 7.4.5). 5. Raise the - HP Armada 1500 | Compaq Armada 1500 Family of Personal Computers Maintenance and - Page 101
7. Lift the free edge of the memory board slightly and pull it straight out of the slot. Figure 7-13. Removing the Memory Expansion Board Computer Removal and Replacement Procedures 7-17 - HP Armada 1500 | Compaq Armada 1500 Family of Personal Computers Maintenance and - Page 102
To install the memory board, complete the following steps: 1 1. Insert the memory board into the memory slot . 2 2. Pivot the memory board so that it lays flat in the memory compartment . 3. Push the memory board firmly into place to seat the connections and - HP Armada 1500 | Compaq Armada 1500 Family of Personal Computers Maintenance and - Page 103
a retaining bracket. To remove the hard drive and bracket, complete the following steps: 1. Disconnect the AC power and any external devices (Section 7.4.1). 2. Remove the battery pack (Section 7.4.3). 3. Remove the DualBay device (Section 7.4.4). 4. Remove any PC Cards (Section 7.4.5). 5. Raise the - HP Armada 1500 | Compaq Armada 1500 Family of Personal Computers Maintenance and - Page 104
7. Slide the hard drive to the right. 8. Lift the hard drive from the hard drive compartment. Figure 7-16. Removing the Hard Drive Reverse the above procedure to install the hard drive. 7-20 Computer Removal and Replacement Procedures - HP Armada 1500 | Compaq Armada 1500 Family of Personal Computers Maintenance and - Page 105
Replacement should be done using the Compaq spare part for this computer. CAUTION: To prevent damaging the RTC battery cable, rock the connector from side (RTC) battery, complete the following steps: 1. Disconnect the AC power and any external devices (Section 7.4.1). 2. Remove the battery pack ( - HP Armada 1500 | Compaq Armada 1500 Family of Personal Computers Maintenance and - Page 106
1 7 Disconnect the RTC battery connector from the system board . 2 8. Remove the RTC battery . Figure 7-18. Removing the RTC Battery Reverse the procedure to install a replacement RTC battery. 7-22 Computer Removal and Replacement Procedures - HP Armada 1500 | Compaq Armada 1500 Family of Personal Computers Maintenance and - Page 107
Microphone To remove the microphone and microphone/display cable cover, complete the following steps: 1. Disconnect the AC power and any external devices (Section 7.4.1). 2. From the rear of the computer, remove two screws securing the microphone/display cable cover from the base enclosure. Figure - HP Armada 1500 | Compaq Armada 1500 Family of Personal Computers Maintenance and - Page 108
2 1 3. Remove the microphone/display cable cover by rotating the cover and lifting it from the rear of the computer . Figure 7-20. Removing the Microphone/Display Cable Cover 7-24 Computer Removal and Replacement Procedures - HP Armada 1500 | Compaq Armada 1500 Family of Personal Computers Maintenance and - Page 109
4. Disconnect the microphone from the audio cable. 5. Remove the microphone. Figure 7-21. Removing the Microphone Computer Removal and Replacement Procedures 7-25 - HP Armada 1500 | Compaq Armada 1500 Family of Personal Computers Maintenance and - Page 110
Assembly 7.12.1 Clutch Covers CAUTION: Do not reuse the clutch screws removed from the old display. These screws may back out of the display clutches and cause the display assembly to loosen from the base enclosure. To remove the left and right clutch covers, lift them from the ends of the computer - HP Armada 1500 | Compaq Armada 1500 Family of Personal Computers Maintenance and - Page 111
the following procedures: 1. Disconnect the AC power and any external devices (Section 7.4.1). 2. Remove the battery pack (Section 7.4.3). 3. Remove the DualBay device (Section 7.4.4). 4. Remove any PC Cards (Section 7.4.5). 5. Remove the microphone/display cable cover (Section 7.11). 6. Remove - HP Armada 1500 | Compaq Armada 1500 Family of Personal Computers Maintenance and - Page 112
the clutches, complete the following procedures: 1. Remove the clutch covers (Section 7.12.1). 2. Remove the display assembly (Section 7.12.2). 3. Remove the display screw covers and screws. Figure 7-24. Removing the Display Screw Covers and Screws 7-28 Computer Removal and Replacement Procedures - HP Armada 1500 | Compaq Armada 1500 Family of Personal Computers Maintenance and - Page 113
4. Use the case utility tool to carefully pry up the display bezel. 5. Remove the display bezel. Figure 7-25. Removing the Display Bezel Computer Removal and Replacement Procedures 7-29 - HP Armada 1500 | Compaq Armada 1500 Family of Personal Computers Maintenance and - Page 114
6. Remove two clutch screws and the retaining plates that secure the clutches to the display panel. Figure 7-26. Removing the Clutch Screws and Retaining Plate 7-30 Computer Removal and Replacement Procedures - HP Armada 1500 | Compaq Armada 1500 Family of Personal Computers Maintenance and - Page 115
7. Remove the display clutch. Figure 7-27. Removing the Display Clutches To replace the display clutches, reverse the steps. Computer Removal and Replacement Procedures 7-31 - HP Armada 1500 | Compaq Armada 1500 Family of Personal Computers Maintenance and - Page 116
7.12.4 Display latches 1. Remove the display assembly (Section 7.12.1). 2. Remove the display bezel (Section 7.12.3). 3. Remove the display latch springs. Figure 7-28. Removing the Display Latch Springs 7-32 Computer Removal and Replacement Procedures - HP Armada 1500 | Compaq Armada 1500 Family of Personal Computers Maintenance and - Page 117
1 2 4. Push the display latch back and down . Figure 7-29. Removing the Display Latch To replace the display latches, reverse the steps. Computer Removal and Replacement Procedures 7-33 - HP Armada 1500 | Compaq Armada 1500 Family of Personal Computers Maintenance and - Page 118
: 1. Disconnect the AC power and any external devices (Section 7.4.1). 2. Remove the battery pack (Section 7.4.3). 3. Remove the DualBay device (Section 7.4.4). 4. Remove any PC Cards (Section 7.4.5). 5. Remove the keyboard (Section 7.7). 6. Remove the microphone/display - HP Armada 1500 | Compaq Armada 1500 Family of Personal Computers Maintenance and - Page 119
7. Use the case utility tool to carefully pry up the top cover assembly from the base enclosure. Figure 7-31. Removing the Top Cover Assembly To replace the top cover assembly, reverse the steps. Computer Removal and Replacement Procedures 7-35 - HP Armada 1500 | Compaq Armada 1500 Family of Personal Computers Maintenance and - Page 120
7.13.1 Power Button To remove the power button from the top cover assembly, complete the following procedures. 1. Remove the top cover assembly (Section 7.13). 1 2. Squeeze inward on the power button retaining latches . 2 3 3. Press down to remove the power button and tension spring . Figure 7-32 - HP Armada 1500 | Compaq Armada 1500 Family of Personal Computers Maintenance and - Page 121
7.13.2 Suspend Button To remove the Suspend button from the top cover assembly, complete the following procedures. 1. Remove the top cover assembly (Section 7.13). 1 2. Squeeze inward on the two Suspend button retaining latches . 2 3 3. Press down to remove the Suspend button and tension spring . - HP Armada 1500 | Compaq Armada 1500 Family of Personal Computers Maintenance and - Page 122
7.13.3 Left and Right Touchpad Buttons To remove the touchpad buttons from the top cover assembly, complete the following procedures. NOTE: Only the right touchpad button is shown in this illustration. 1 2 1. Remove the top cover assembly (Section 7.13). 2. Remove two touchpad board screws and - HP Armada 1500 | Compaq Armada 1500 Family of Personal Computers Maintenance and - Page 123
1 3. Remove the screw from the touchpad button . 2 3 4. Press back and downward on the backside of the touchpad button to remove. Figure 7-35. Removing the Touchpad Button To replace the touchpad buttons, reverse the steps. Computer Removal and Replacement Procedures 7-39 - HP Armada 1500 | Compaq Armada 1500 Family of Personal Computers Maintenance and - Page 124
the following procedures: 1. Disconnect the AC power and any external devices (Section 7.4.1). 2. Remove the battery pack (Section 7.4.3). 3. Remove the 7.7). 6. Remove the microphone/display cable cover and microphone (Section 7.11). 7. Remove the clutch covers/display assembly (Section 7.12.1). 8. - HP Armada 1500 | Compaq Armada 1500 Family of Personal Computers Maintenance and - Page 125
following procedures: 1. Disconnect the AC power and any external devices (Section 7.4.1). 2. Remove the battery pack (Section 7.4.3). 3. Remove 7.7). 6. Remove the microphone/display cable cover and microphone (Section 7.11). 7. Remove the clutch covers/display assembly (Section 7.12.1). 8. - HP Armada 1500 | Compaq Armada 1500 Family of Personal Computers Maintenance and - Page 126
1 2 10. Disconnect the audio cable from the system board and remove the cable. 3 4 11. Disconnect the right and left speakers. 5 6 12. Remove the right and left speakers. 7 13. Remove the audio board from the base enclosure . Figure 7-38. Removing the Audio Cable, Speakers, and Audio Board To - HP Armada 1500 | Compaq Armada 1500 Family of Personal Computers Maintenance and - Page 127
the following procedures: 1. Disconnect the AC power and any external devices (Section 7.4.1). 2. Remove the battery pack (Section 7.4.3). 3. Remove the 7.7). 6. Remove the microphone/display cable cover and microphone (Section 7.11). 7. Remove the clutch covers/display assembly (Section 7.12.1). - HP Armada 1500 | Compaq Armada 1500 Family of Personal Computers Maintenance and - Page 128
1 9. Remove the screw that secures the DC-DC converter to the base enclosure . Figure 7-39. Removing the DC-DC Converter Screw 7-44 Computer Removal and Replacement Procedures - HP Armada 1500 | Compaq Armada 1500 Family of Personal Computers Maintenance and - Page 129
10. Disconnect the DC-DC converter from the system board. Figure 7-40. Disconnecting the DC-DC Converter Computer Removal and Replacement Procedures 7-45 - HP Armada 1500 | Compaq Armada 1500 Family of Personal Computers Maintenance and - Page 130
11. Pull the DC-DC Converter away from the plastic tab separating the DC-DC 1 Converter from the I/O fixture connector . 2 12. Remove the DC-DC Converter . Figure 7-41. Removing the DC-DC Converter To replace the DC-DC converter, reverse the steps. 7-46 Computer Removal and Replacement Procedures - HP Armada 1500 | Compaq Armada 1500 Family of Personal Computers Maintenance and - Page 131
procedures: 1. Disconnect the AC power and any external devices (Section 7.4.1). 2. Remove the battery pack (Section 7.4.3). 3. Remove the DualBay device (Section 7.4.4). 4. Remove any PC Cards (Section 7.4.5). 5. Remove the keyboard (Section 7.7). 6. Remove the microphone/display cable cover and - HP Armada 1500 | Compaq Armada 1500 Family of Personal Computers Maintenance and - Page 132
1 10. Disconnect the fan from the system board. 11. Remove the fan from the base enclosure . Figure 7-42. Removing the Fan Reverse the procedure to install the fan. IMPORTANT: When installing the fan, orient the fan so that the label and airflow direction arrow point to the rear of the computer. - HP Armada 1500 | Compaq Armada 1500 Family of Personal Computers Maintenance and - Page 133
following procedures. 1. Disconnect the AC power and any external devices (Section 7.4.1). 2. Remove the battery pack (Section 7.4.3). 3. Remove (Section 7.7). 6. Remove the microphone/display cable cover (Section 7.11). 7. Remove the clutch covers/display assembly (Section 7.12.1). 8. Remove the - HP Armada 1500 | Compaq Armada 1500 Family of Personal Computers Maintenance and - Page 134
13. Remove the I/O fixture connector. Figure 7-44. Removing the I/O Fixture Connector To replace the I/O fixture connector, reverse the steps. 7-50 Computer Removal and Replacement Procedures - HP Armada 1500 | Compaq Armada 1500 Family of Personal Computers Maintenance and - Page 135
7.19 System Board To remove the system board, complete the following procedures: 1. Disconnect the AC power and any external devices (Section 7.4.1). 2. Remove the battery pack (Section 7.4.3). 3. Remove the DualBay device (Section 7.4.4). 4. Remove any PC Cards (Section 7.4.5). 5. Remove the top - HP Armada 1500 | Compaq Armada 1500 Family of Personal Computers Maintenance and - Page 136
1 12. Tilt the system board up . 2 13. Lift the system board away from the base enclosure . Figure 7-46. Removing the System Board To replace the system board, reverse the steps. NOTE: Before replacing the system board, the PC Card eject levers must be in the forward position. See Section 7.4.5 - HP Armada 1500 | Compaq Armada 1500 Family of Personal Computers Maintenance and - Page 137
power, complete the following procedures: 1. Disconnect the AC power and any external devices (Section 7.4.1). 2. Remove the battery pack (Section 7.4.3). 3. Remove the DualBay device (Section 7.4.4). 4. Remove any PC Cards (Section 7.4.5) 5. Remove the top cover assembly (Section 7.13). 6. Remove - HP Armada 1500 | Compaq Armada 1500 Family of Personal Computers Maintenance and - Page 138
7.21.1 Computer Logo The computer logo is on the outside of the display assembly and may be replaced if damaged. To replace the logo, complete the from the computer. Use a razor blade if needed to lift a corner of the foot free from the base cover. 2. Clean the area where the new foot is to be - HP Armada 1500 | Compaq Armada 1500 Family of Personal Computers Maintenance and - Page 139
the convenience base. 8.1 Serial Number The convenience base serial number should be provided to Compaq when requesting information or ordering spare parts. The serial number is displayed on the rear of the convenience base. 8.2 Preliminary Procedure CAUTION: Electrostatic discharge (ESD) can - HP Armada 1500 | Compaq Armada 1500 Family of Personal Computers Maintenance and - Page 140
8.2.1 Installing the Optional 100BaseT Ethernet Network Module To install the 100BaseT module, complete the following procedures: 1. Turn the convenience base bottomside up and remove seven screws from the lower base plastic housing. Figure 8-1. Removing the Screws from the Lower Base Plastic - HP Armada 1500 | Compaq Armada 1500 Family of Personal Computers Maintenance and - Page 141
2. Remove the base plastic housing. Figure 8-2. Removing the Base Plastic Housing Upgrade Procedures for the Convenience Base 8-3 - HP Armada 1500 | Compaq Armada 1500 Family of Personal Computers Maintenance and - Page 142
3. Remove two screws from the LAN card access shield. Figure 8-3. Removing the Screws from the LAN Card Access Shield 8-4 Upgrade Procedures for the Convenience Base - HP Armada 1500 | Compaq Armada 1500 Family of Personal Computers Maintenance and - Page 143
4. Remove the LAN card access shield. Figure 8-4. Removing the LAN Card Access Shield Upgrade Procedures for the Convenience Base 8-5 - HP Armada 1500 | Compaq Armada 1500 Family of Personal Computers Maintenance and - Page 144
5. Remove the 10BaseT module. Figure 8-5. Removing the 10BaseT 8-6 Upgrade Procedures for the Convenience Base - HP Armada 1500 | Compaq Armada 1500 Family of Personal Computers Maintenance and - Page 145
6. Install the 100BaseT module. Figure 8-6. Installing the 100BaseT module Upgrade Procedures for the Convenience Base 8-7 - HP Armada 1500 | Compaq Armada 1500 Family of Personal Computers Maintenance and - Page 146
7. Replace the LAN access shield and screws. Figure 8-7. Reinstalling the LAN card Access Shield and screws 8-8 Upgrade Procedures for the Convenience Base - HP Armada 1500 | Compaq Armada 1500 Family of Personal Computers Maintenance and - Page 147
8. Reinstall the screws in the base plastic housing. Figure 8-8. Reinstalling the Screws in the Base Plastic Housing NOTE: Return the 10BaseT module to the customer. Upgrade Procedures for the Convenience Base 8-9 - HP Armada 1500 | Compaq Armada 1500 Family of Personal Computers Maintenance and - Page 148
This chapter provides physical and performance specifications for the following: n Computer n Displays n Hard drives n Diskette drive n CD-ROM drive n Battery packs n Convenience Base n External power sources The chapter also includes: n System interrupts n System DMA n System I/O address - HP Armada 1500 | Compaq Armada 1500 Family of Personal Computers Maintenance and - Page 149
245 mm 311 mm Weight With battery and optional CD-ROM Standalone (Battery) Power Requirements Nominal Operating Voltage 60 Hz AC 4/50 kV 100 to 240 VAC RMS 1.10 A RMS 50 to 60 Hz AC 4/50 kV Automobile Adapter DC Compaq Armada operates well within this range of temperatures. 9-2 Specifications - HP Armada 1500 | Compaq Armada 1500 Family of Personal Computers Maintenance and - Page 150
Contrast Ratio Pixel Resolution Pitch Format Configuration Backlight Character Display Table 9-2 11.3-Inch CSTN, SVGA Display U.S. Metric 6.77 in 10.02 in 262 800 × 600 RGB Stripe Edge Lit 80 × 25 Table 9-3 12.1-Inch CTFT, SVGA Display U.S. 171.88 mm 2210.18 mm Metric 10.05 in 10.40 in 262 K - HP Armada 1500 | Compaq Armada 1500 Family of Personal Computers Maintenance and - Page 151
.0 16.6 1:1 3 3 13 13 24 24 4635 4200 3915 6 90-180 512 3915 6 90-180 512 2100 2796 16 16 63 63 512 512 128 128 9-4 Specifications - HP Armada 1500 | Compaq Armada 1500 Family of Personal Computers Maintenance and - Page 152
-in (11 mm) 512 18 (1.44-MB)/15 (1.2-MB) 9 80 (1.44-MB)/80 (1.2-MB) 80 2 3 ms/6 ms 94 ms/174 ms 15 ms 100 ms Specifications 9-5 - HP Armada 1500 | Compaq Armada 1500 Family of Personal Computers Maintenance and - Page 153
) 15 mm 12 cm, 8 cm 1.2 mm 1.6 µm 53.5 ± 1.5 degrees 0.24 ± 0.1 mw Semiconductor Laser GaA1As 780 nm ± 25 nm - HP Armada 1500 | Compaq Armada 1500 Family of Personal Computers Maintenance and - Page 154
temperatures Nonoperating temperatures 50°F to 104°F -12°F to 140°F Table 9-8 Nickel Metal Hydride Battery Pack U.S. Dimensions Height Length Width 0.82 in 5.8 in 3.2 in Weight 1.2 lb Electrical °C to 60°C Metric 20.8 mm 147.32 mm 81.3 mm 5.5 g 10°C to 40°C -30°C to 60°C Specifications 9-7 - HP Armada 1500 | Compaq Armada 1500 Family of Personal Computers Maintenance and - Page 155
km 10 G, 11 ms, half sine 140 G, 2 ms, half sine 0.25 G, 5 to 500 Hz, 0.5 octave/min sweep rate 1.0 G, 5 to 500 Hz, 0.5 octave/min sweep rate 9-8 Specifications - HP Armada 1500 | Compaq Armada 1500 Family of Personal Computers Maintenance and - Page 156
9.8 External Power Supplies The automobile adapter allows the computer to be used in an automobile without a drain on the computer's batteries. Dimensions Height Width Length Weight Input Cord Length 1.0 m 32 to 104°F -4 to 140°F 0 to 40°C -20 to 60°C 10 to 90% 5 to 95% Specifications 9-9 - HP Armada 1500 | Compaq Armada 1500 Family of Personal Computers Maintenance and - Page 157
Operating Nonoperating Table 9-11 External Battery Charger U.S. Metric 1.57 in 5.25 in 9.4 in 1.1 lb 40 mm 133 mm 239 mm 4.95 gm +18.5 +/- 0.25 VDC 40 to 42 W +18.5 +/- 0.25 VDC 40 to 42 W 41 to 104°F -4 to 185°F 5 to 40°C -20 to +85°C 10 to 95% 10 to 95% 9-10 Specifications - HP Armada 1500 | Compaq Armada 1500 Family of Personal Computers Maintenance and - Page 158
or Audio Real-Time Clock (MSIO) Used by either audio or PCMCIA controller Used by either audio or PCMCIA controller Used by PCMCIA Mouse Floating point error input Hard Drive Convenience base NIC interrupt 9. Parallel Port Not assigned Audio Controller Not assigned Not assigned Specifications 9-11 - HP Armada 1500 | Compaq Armada 1500 Family of Personal Computers Maintenance and - Page 159
Controller # 1 Force Software SMI Unused Peripheral Interrupt Controller # 1 Opti Chipset Configuration Registers Unused Counter/Timer Registers Unused Keyboard Data Port B Unused Keyboard ESS Configuration Lock Unused ESS Configuration Unlock Unused Unused Unused Continued 9-12 Specifications - HP Armada 1500 | Compaq Armada 1500 Family of Personal Computers Maintenance and - Page 160
Controller Primary Registers COM1 Serial Controller Registers Unused Extended DMS Registers Unused Configuration/NVM Data Register PCI Configuration Index Register PCI Configuration Index Register Unused Specifications 9-13 - HP Armada 1500 | Compaq Armada 1500 Family of Personal Computers Maintenance and - Page 161
Unused 000E8000 - 000FFFFF System BIOS 00100000 - 00FFFFFF Extended Memory 01000000 - 047FFFFF Super Extended Memory 04800000 - 07FFFFFF Unused 08000000 - 080FFFFF Video Memory (Direct Access) 08200000 - FFFEFFFF Unused FFFF0000 - FFFFFFFF System BIOS ("SHADOW") 9-14 Specifications - HP Armada 1500 | Compaq Armada 1500 Family of Personal Computers Maintenance and - Page 162
Appendix A Connector Pin Assignments This appendix contains the pin assignments for all external connectors. Connector 12 3 KEY 4 5 6 Connector 12 3 KEY 4 5 6 Pin Signal 1 +5 V 2 Joystick Button 3 Joystick Direction 4 Ground 5 Ground 6 Joystick Direction 7 Joystick - HP Armada 1500 | Compaq Armada 1500 Family of Personal Computers Maintenance and - Page 163
Connector 13 5 7 2468 Connector Pin Signal 1 Red Analog 2 Green Analog 3 Blue Analog 4 Blank 5 Ground 6 Ground 7 Ground 8 Ground Table A-4 Ethernet RJ-45 Pin Signal 1 (+) Transmit Data 2 (-) Transmit Data 3 (+) Receive Data 4 Unused 5 Unused 6 (-) Receive Data 7 - HP Armada 1500 | Compaq Armada 1500 Family of Personal Computers Maintenance and - Page 164
14 1 Pin Signal 1 Strobe 2 Data Bit 0 3 Data Bit 1 4 Data Bit 2 5 Data Bit 3 6 Data Bit 4 7 Data Bit 5 8 Data Bit 6 9 Data Bit 7 10 Acknowledge 11 Busy 12 Paper End 13 Select Pin Signal 1 Carrier Detect 2 Receive Data 3 Transmit Data 4 Data Terminal Ready 5 Ground - HP Armada 1500 | Compaq Armada 1500 Family of Personal Computers Maintenance and - Page 165
Table A-9 Expansion Connector Pin Signal 1 GND 2 GND 3 NC 4 GND 5 GND 6 NC 7 GND 8 GND 9 AD[31] 10 DEVSEL 11 IRDY 12 STOP 13 TRDY 14 GND 15 GND 16 AD[12] 17 AD[13] 18 GND 19 GND 20 CLK1 21 AD[0] 22 GND 23 DOCK_S 24 CLK0 25 ACVCC 26 ACVCC 27 ACVCC 28 ACVCC 29 ACVCC 30 - HP Armada 1500 | Compaq Armada 1500 Family of Personal Computers Maintenance and - Page 166
Table A-9 Continued Pin Signal 61 GND 62 AD[14] 63 AD[15] 64 AD[1] 65 AD[3] 66 AD[2] 67 GND 68 MDATA 69 KBDATA 70 MCLK 71 KBCLK 72 ACVCC 73 PMVCC5 74 PMVCC5 75 NC 76 BLUE 77 NC 78 PBUSY 79 PDATA7 80 PBDATA3 81 PSLIN 82 GND 83 GND 84 SPK_IN 85 +5v 86 NC 87 ERDY 88 SYSVCC5A 89 STANDBy_SW 90 NC 91 - HP Armada 1500 | Compaq Armada 1500 Family of Personal Computers Maintenance and - Page 167
Table A-9 Continued Pin Signal 131 RTSA 132 RIA 133 POWER_SW 134 INTB 135 NC 136 INTA 137 NC 138 GND 139 NC 140 AD[27] 141 AD[30] 142 AD[26] 143 AD[29] 144 AD[25] 145 AD[28] 146 AD[24] 147 BLOCK 148 GND 149 PERR 150 SERR 151 AD[11] 152 AD[9] 153 AD[10] Pin Signal 154 AD[8] 155 PORT_REP 156 MSI - HP Armada 1500 | Compaq Armada 1500 Family of Personal Computers Maintenance and - Page 168
Table A-10 Speaker Connector Pin Signal 1 Shield 2 Phone Jack #1 3 Phone Jack #2 Connector Pin Assignments A-7 - HP Armada 1500 | Compaq Armada 1500 Family of Personal Computers Maintenance and - Page 169
it to operate from any line voltage from 100 to 240 volts AC. The power cord set received with the computer meets the requirements for minimum current capacity of 10A and a nominal voltage rating of 125 or 250 volts AC, as required by each country's power system. 4. The appliance coupler must meet - HP Armada 1500 | Compaq Armada 1500 Family of Personal Computers Maintenance and - Page 170
Country-Specific Requirements 3-Conductor Power Cord Set Requirements - By Country Country Accredited Agency Applicable Note Numbers Australia EANSW 1 Austria OVE 1 Belgium CEBC 1 Canada CSA 2 Denmark DEMKO 1 Finland - HP Armada 1500 | Compaq Armada 1500 Family of Personal Computers Maintenance and - Page 171
with the previous command. Parameters: none Answer Command. ATA causes the modem to answer a call without waiting for a ring. This is useful in manually answering a call or when making a direct connection with another modem in the originate mode. Parameters: none NOTE: Any command that follows A on - HP Armada 1500 | Compaq Armada 1500 Family of Personal Computers Maintenance and - Page 172
ROM checksum status. Parameters: n = 0, 1, 2, 4, 9 n = 0 Returns firmware version n = 1 Calculates ROM checksum and displays it (for example, 12AB) n = 2 Performs ROM check, calculates and verifies the checksum, then displays OK or ERROR n = 4 Returns software version of the data pump n = 9 Returns - HP Armada 1500 | Compaq Armada 1500 Family of Personal Computers Maintenance and - Page 173
Table C-1 Continued Command Nn On P Qn Sr=n Description Modulation Handshake. ATNn controls whether or not the local modem performs a negotiated handshake at connection time with the remote modem when the communication speeds of the two modems are different. Parameters: n = 0, 1 n = 0 When - HP Armada 1500 | Compaq Armada 1500 Family of Personal Computers Maintenance and - Page 174
the modem three times in rapid succession (see S12), the modem escapes to the command state. The default value for the escape character is +. When instructed to enter +++, enter the character set in register S2 three times in rapid succession. Do not precede the escape code sequence with AT, and do - HP Armada 1500 | Compaq Armada 1500 Family of Personal Computers Maintenance and - Page 175
Command &Cn &Dn &F &Gn &Kn &Mn &Qn &Sn Table C-2 AT Commands Description Data Carrier Detect Options. AT&Cn controls the DCD options. Parameters: n = 0, 1 n = 0 DCD is always on; the state of the data carrier from the remote modem is ignored n = 1 DCD is on when a data carrier is detected; DCD - HP Armada 1500 | Compaq Armada 1500 Family of Personal Computers Maintenance and - Page 176
digital loopback test. To work properly, both modems must be on-line with error control disabled. &V View Current Configuration. AT&V displays the current configuration of S registers and commands. &W Store Current Configuration. &W stores certain command options and S-register values into the - HP Armada 1500 | Compaq Armada 1500 Family of Personal Computers Maintenance and - Page 177
: In some countries, AT-Cn will return OK but will not affect the calling tone. Default value varies by country %B View Numbers in Blacklist Displays blacklisted numbers if blacklisting is in effect. %Cn Data Compression Control. AT%Cn determines the operation of V.42bis and MNP class 5 data - HP Armada 1500 | Compaq Armada 1500 Family of Personal Computers Maintenance and - Page 178
issued for the specific command is supported or responds with ERROR if it is not supported. Report Active Configuration. AT+FCLASS? interrogates the modem to determine the active configuration. Responses: 0 = Data mode 1 = Fax mode 8 = Voice mode 80 = VoiceView mode Select Service Class. AT - HP Armada 1500 | Compaq Armada 1500 Family of Personal Computers Maintenance and - Page 179
n = 146 V.17 14400 bps (short train) An ERROR response code results if this command is issued while the modem is on-hook or if a non-supported command is issued. Modem Commands C-9 - HP Armada 1500 | Compaq Armada 1500 Family of Personal Computers Maintenance and - Page 180
Table C-3 Continued Command +FTH=n +FRH=n Description Transmit Data with HDLC Framing. AT+FTH causes the modem to transmit data framed in HDLC protocol using the modulation defined below: Parameters: n = 3, 24, 48, 72, 73, 74, 96, 97, 98, 121, 122, 145, 146 n = 3 V.21 Channel 2 300 bps n = 24 - HP Armada 1500 | Compaq Armada 1500 Family of Personal Computers Maintenance and - Page 181
=number command. The range of n is 0 - 3. T Tone Dialing. T instructs the modem to use tone dialing until pulse dialing (P) is selected. Tone duration and may be helpful when dialing through a PBX or for some long-distance services. The maximum wait period is set in register S7. ; (semicolon) - HP Armada 1500 | Compaq Armada 1500 Family of Personal Computers Maintenance and - Page 182
- HP Armada 1500 | Compaq Armada 1500 Family of Personal Computers Maintenance and - Page 183
the agreement. Product names mentioned herein may be trademarks and/or registered trademarks of their respective companies. Maintenance and Service Guide Addendum Compaq Armada 1500 Family of Personal Computers First Edition (January 1998) Spare Part Number 255011-001 Document Part Number 255318-001 - HP Armada 1500 | Compaq Armada 1500 Family of Personal Computers Maintenance and - Page 184
features and supported options are provided in Chapter 1 of the Maintenance and Service Guide, Compaq Armada 1500 Family of Personal Computers. The following computer models are available: Compaq Armada 1500 Family Models Pentium Model Processor Hard Memory Level 2 CD- Modem Serial Display Drive - HP Armada 1500 | Compaq Armada 1500 Family of Personal Computers Maintenance and - Page 185
Compaq Armada 1500 Maintenance and Service Guide 12.1-inch Thin Film Transistors (TFT) SVGA display n 33.6Kbps integrated modem or 56Kbps internal user-programmable keys n Touchpad pointing device n Operates from an internal battery pack, plus an optional battery pack in the Dualbay, or integrated AC - HP Armada 1500 | Compaq Armada 1500 Family of Personal Computers Maintenance and - Page 186
Addendum to Compaq Armada 1500 Maintenance and Service Guide n Infrared interface for wireless communications with other IrDA- Compaq Computer Corporation. Both the model and the serial number of the computer are needed to identify the specific software available. Addendum 255318-001 to Guide - HP Armada 1500 | Compaq Armada 1500 Family of Personal Computers Maintenance and - Page 187
Addendum to Compaq Armada 1500 Maintenance and Service Guide 1.4 External Computer Components The following information provides new mechanical changes to the models, which are different from earlier models Universal Serial Bus A Universal Serial Bus (USB) connector has been added to select - HP Armada 1500 | Compaq Armada 1500 Family of Personal Computers Maintenance and - Page 188
Addendum to Compaq Armada 1500 Maintenance and Service Guide Illustrated Parts for the Computer 4.0 Illustrated Parts for the Computer For an illustrated parts breakdown, refer to the Illustrated Parts Map. The following information provides - HP Armada 1500 | Compaq Armada 1500 Family of Personal Computers Maintenance and - Page 189
to the Maintenance and Service Guide, Compaq Armada 1500 Personal Computers or Illustrated Parts Map. Description Keyboard Assembly US/Canada Belgian Brazilian Danish French French Canadian German Italian Japanese Korean Latin American Norwegian Portuguese Spanish Swedish/Finnish Swiss Taiwanese - HP Armada 1500 | Compaq Armada 1500 Family of Personal Computers Maintenance and - Page 190
Addendum to Compaq Armada 1500 Maintenance and Service Guide Description CD-ROM 10X CD-ROM Drive 20X Max CD-ROM Drive Hard Drive 1.08GB, 3 inch /2.5 inch 1.44GB, 3 inch/2.5 inch 2.1-GB 3.2-GB Diskette Drive 1.44MB Diskette Drive Battery Packs NiMH Li-Ion Table 4-2 Mass Storage Devices Model(s) - HP Armada 1500 | Compaq Armada 1500 Family of Personal Computers Maintenance and - Page 191
Addendum to Compaq Armada 1500 Maintenance and Service Guide Description CD-ROM Cable Modem Cable AC Adapter, internal AC Power Cord RTC Battery (with cable) Microphone Fan Fan Table 4-3 Cables and Power Cords Model(s) All models All models All models Refer to the Maintenance & Service Guide All - HP Armada 1500 | Compaq Armada 1500 Family of Personal Computers Maintenance and - Page 192
Addendum to Compaq Armada 1500 Maintenance and Service Guide Table 4-4 Standard and Optional Boards Description LED Board 11.3 inch display LED board 12.1 inch TFT display LED board 12.1 inch STN display LED board 12.1 inch TFT display LED board I/O Fixture Connector DC/DC Converter Board DC/DC - HP Armada 1500 | Compaq Armada 1500 Family of Personal Computers Maintenance and - Page 193
Addendum to Compaq Armada 1500 Maintenance and Service Guide Description Power Cord US/Canada/Latin America/Brazil Australia/New Zealand Denmark Europe Italy Japan Korea Switzerland UK/Singapore Automobile Adapter Battery Packs NiMH Li-Ion Battery Charger Table 4-5 Options Models All models All - HP Armada 1500 | Compaq Armada 1500 Family of Personal Computers Maintenance and - Page 194
Addendum to Compaq Armada 1500 Maintenance and Service Guide Table 4-6 Miscellaneous Parts Description Miscellaneous Plastics Kit, includes: Left clutch cover Microphone/display cable cover Right clutch cover Battery spacer door CD-ROM access door Modem access door Rubber feet Display Logos Hinge - HP Armada 1500 | Compaq Armada 1500 Family of Personal Computers Maintenance and - Page 195
Compaq Armada 1500 Maintenance and Service Guide Description Power Cord US/Canada/Latin America/Brazil Australia/New Zealand Denmark Europe Italy Japan Korea Switzerland UK/Singapore Automobile Adapter Battery Packs NiMH Li-Ion Battery Modem Cable (RJ11) 10' AC Power Cord Extension US Australia - HP Armada 1500 | Compaq Armada 1500 Family of Personal Computers Maintenance and - Page 196
Addendum to Compaq Armada 1500 Maintenance and Service Guide Option Spares Description Memory Expansion Board 8MB 16MB 32MB 64MB CD-ROM Drive 10X CD-ROM Drive 20X Max CD -001 272110-001 220583-001 273158-001 254974-001 255215-001 255245-001 255014-001 Addendum 255318-001 to Guide 284820-001 13 - HP Armada 1500 | Compaq Armada 1500 Family of Personal Computers Maintenance and - Page 197
Addendum to Compaq Armada 1500 Maintenance and Service Guide 9.0 Specifications This chapter provides specifications on the following new components: n 2.1-GB Hard Drive n 3.2-GB Hard Drive n 20X Max CD-ROM n 12.1-inch TFT, SVGA display 14 Addendum 255318-001 to Guide 284820-001 - HP Armada 1500 | Compaq Armada 1500 Family of Personal Computers Maintenance and - Page 198
Addendum to Compaq Armada 1500 Maintenance and Service Guide Standard Model Configurations Formatted Capacity Per Drive (MB) Physical Logical Drive Type Drive Height With drive frame to 83.4 33.3 1:1 4 13 23 4,000 6975 5 144-240 512 6304 16 63 512 128 Addendum 255318-001 to Guide 284820-001 15 - HP Armada 1500 | Compaq Armada 1500 Family of Personal Computers Maintenance and - Page 199
Addendum to Compaq Armada 1500 Maintenance and Service Guide Applicable Disc Center Hole Diameter Disc Diameter Disc Thickness Track Pitch Laser Beam Divergence Output Power Type Wave Length KB/sec 8.3 MB/sec < 10 seconds typical 550 MB 640 MB 180 MB 16 Addendum 255318-001 to Guide 284820-001 - HP Armada 1500 | Compaq Armada 1500 Family of Personal Computers Maintenance and - Page 200
Addendum to Compaq Armada 1500 Maintenance and Service Guide Dimensions Height Width Number of Colors Contrast Ration Pixel Resolution Pitch Format Configuration Backlight Table 9-3 12.1-inch TFT, SVGA Display U.S. Metric 7.24 in. 9.7 in. 16 million Over 100:1 184 mm 245 mm 16 million Over - HP Armada 1500 | Compaq Armada 1500 Family of Personal Computers Maintenance and - Page 201
Addendum to Compaq Armada 1500 Maintenance and Service Guide Appendix C Modem Commands This section includes modem software that issues the C1 command. However, this modem does not support the C0 command. The C0 command may instruct some earlier modems (such as the Smartmodem 1200) to not send - HP Armada 1500 | Compaq Armada 1500 Family of Personal Computers Maintenance and - Page 202
Compaq Armada 1500 Maintenance and Service Guide Table C-1, Modem Commands, Continued Command Description Dn Dial Command. Dn instructs sends a NO ANSWER result code back to the user. ! Hook flash. Causes the modem to go on the DTE. This modem does not support the F0 version of the command. - HP Armada 1500 | Compaq Armada 1500 Family of Personal Computers Maintenance and - Page 203
Compaq Armada 1500 Maintenance and Service Guide specific product information about the modem. 0: Returns default speed and controller firmware version, same as I3. 1: Calculates ROM checksum and displays Code Default Country Country Country ID Configuration Support Code(zz) String (ccc) -001 - HP Armada 1500 | Compaq Armada 1500 Family of Personal Computers Maintenance and - Page 204
Compaq Armada 1500 Maintenance and Service Guide connection, and retrain its adaptive equalizer (if applicable). If displayed on your monitor. Basic result codes are OK, CONNECT, RING, NO CARRIER, and ERROR. The ATQ command allows the user dial modifier. This command instructs the modem to send DTMF - HP Armada 1500 | Compaq Armada 1500 Family of Personal Computers Maintenance and - Page 205
Compaq Armada 1500 Maintenance and Service Guide Enable Disabled: Displays only the basic result codes OK, CONNECT, RING, NO CARRIER, and ERROR Enabled: Displays basic result default). 1: Enable long space disconnect. NOT SUPPORTED Recall Stored Profile. Zn instructs the modem chip set to go on-hook - HP Armada 1500 | Compaq Armada 1500 Family of Personal Computers Maintenance and - Page 206
Addendum to Compaq Armada 1500 Maintenance and Service Guide Command &Bn &Cn &Dn &F &Gn &Jn &Kn &Mn Table C-2 AT Commands Description V.32 Auto Retrain. This modem always auto retrains. 0: Disable V.32 auto retrain- NOT SUPPORTED 1: Enable V.32 auto retrain (default) Data Carrier Detect (DCD) - HP Armada 1500 | Compaq Armada 1500 Family of Personal Computers Maintenance and - Page 207
Addendum to Compaq Armada 1500 Maintenance and Service Guide Table C-2, AT Commands, Continued Command &P &Qn &Sn &Tn &V &Wn &Yn Description Pulse Dial Make/Break Ratio Selection. Non-adjustable in some countries. In those countries - HP Armada 1500 | Compaq Armada 1500 Family of Personal Computers Maintenance and - Page 208
Addendum to Compaq Armada 1500 Maintenance and Service Guide Table C-2, AT Commands, Continued Command &Zn=s \G \J \K \Nn ASB) mode only. 0: Returns and "OK" for compatibility (default). 1: NOT SUPPORTED responds ERROR Adjust Bits/s Rate Control. When this feature is enabled, the modem emulates - HP Armada 1500 | Compaq Armada 1500 Family of Personal Computers Maintenance and - Page 209
Compaq Armada 1500 Maintenance and Service Guide are country-specific. 0: Inactivity RAM Location. AT&&R,: Writes the value to DSP RAM location AT&&R: Reads from location . Service display the current setting. +FCLASS=? Causes the modem to display the classes it supports - HP Armada 1500 | Compaq Armada 1500 Family of Personal Computers Maintenance and - Page 210
Addendum to Compaq Armada 1500 Maintenance and Service Guide Table C-2, AT Commands, Continued Command %Cn +FCLASS=8 +VIP IS-101 specification for defined bit values. +VEM= +VEM? Returns the current values of the mask +VEM=? Queries the DCE for the range of supported service level - HP Armada 1500 | Compaq Armada 1500 Family of Personal Computers Maintenance and - Page 211
Compaq Armada 1500 Maintenance and Service Guide Table C-2, AT Commands, Continued Command +VNH +VLS Description Automatic Hang-up Control. This command causes the DCE to enable or disable automatic hangups in the data and facsimile modes. See the ISO-101 specification of supported configurations - HP Armada 1500 | Compaq Armada 1500 Family of Personal Computers Maintenance and - Page 212
Addendum to Compaq Armada 1500 Maintenance and Service Guide Command +FCLASS=1 +FTS= +FRS= +FTM=n +FTM=? +FRM=n Table C-3 FAX Commands Description Enter FAX Mode. The 12000 +FRM=145 V.17 14400 +FRM=146 V.17(short train) 14400 Continued Addendum 255318-001 to Guide 284820-001 29 - HP Armada 1500 | Compaq Armada 1500 Family of Personal Computers Maintenance and - Page 213
Addendum to Compaq Armada 1500 Maintenance and Service Guide Table C-3, FAX Commands, Continued Command +FRM=? +FTH=n +FTH=? +FRH=n +FRH=? Description Reports range of legal values for the + "3, 24, 48, 72, 73, 74, 96, 97, 98, 121, 122, 145, 146" 30 Addendum 255318-001 to Guide 284820-001 - HP Armada 1500 | Compaq Armada 1500 Family of Personal Computers Maintenance and - Page 214
calling for support, 3-7 CD-ROM drive removal, 7-11 solving problems, 3-21 specifications, 9-6 test error codes, 3-16 CD-ROM drive cable, spare part number, 4-7 clock battery removal, 7-21 clutch covers removal, 7-26 clutch removal, 7-28 codes diagnostic error, 3-11 Compaq Utilities, 3-7 Computer - HP Armada 1500 | Compaq Armada 1500 Family of Personal Computers Maintenance and - Page 215
number, 4-5 specifications, 9-4 test error codes, 3-13 hardware installation, solving problems, 3-22 I I/O addresses, 9-12 I/O fixture connector removal, 7-49 spare part number, 4-9 infrared solving problems, 3-22 INSPECT, 3-10 See also Compaq Utilities, 3-7 installation battery pack, 7-7 memory - HP Armada 1500 | Compaq Armada 1500 Family of Personal Computers Maintenance and - Page 216
, 3-4 preliminary steps troubleshooting, 3-2 printers solving problems, 3-28 processor test error codes, 3-11 R removal audio board, 7-41 audio cable, 7-41 battery pack, 7-6 CD-ROM drive, 7-11 clutch covers, 7-26 clutches, 7-28 DC-DC converter, 7-43 display assembly, 7-26, 7-27 display latches, 7-32 - HP Armada 1500 | Compaq Armada 1500 Family of Personal Computers Maintenance and - Page 217
pad buttons, 7-38 removal, 7-38 troubleshooting, 3-1 battery and battery gauge problems, 3-18 CD-ROM drive problems, 3-21 diskette drive problems, 3-20 display and external monitor, 3-28 hard drive problems, 3-21 hardware installation, 3-22 infrared connection problems, 3-22 keyboard, 3-23 memory
-
 1
1 -
 2
2 -
 3
3 -
 4
4 -
 5
5 -
 6
6 -
 7
7 -
8
-
9
-
10
-
11
-
12
-
13
-
14
-
15
-
16
-
17
-
18
-
19
-
20
-
21
-
22
-
23
-
24
-
25
-
26
-
27
-
28
-
29
-
30
-
31
-
32
-
33
-
34
-
35
-
36
-
37
-
38
-
39
-
40
-
41
-
42
-
43
-
44
-
45
-
46
-
47
-
48
-
49
-
50
-
51
-
52
-
53
-
54
-
55
-
56
-
57
-
58
-
59
-
60
-
61
-
62
-
63
-
64
-
65
-
66
-
67
-
68
-
69
-
70
-
71
-
72
-
73
-
74
-
75
-
76
-
77
-
78
-
79
-
80
-
81
-
82
-
83
-
84
-
85
-
86
-
87
-
88
-
89
-
90
-
91
-
92
-
93
-
94
-
95
-
96
-
97
-
98
-
99
-
100
-
101
-
102
-
103
-
104
-
105
-
106
-
107
-
108
-
109
-
110
-
111
-
112
-
113
-
114
-
115
-
116
-
117
-
118
-
119
-
120
-
121
-
122
-
123
-
124
-
125
-
126
-
127
-
128
-
129
-
130
-
131
-
132
-
133
-
134
-
135
-
136
-
137
-
138
-
139
-
140
-
141
-
142
-
143
-
144
-
145
-
146
-
147
-
148
-
149
-
150
-
151
-
152
-
153
-
154
-
155
-
156
-
157
-
158
-
159
-
160
-
161
-
162
-
163
-
164
-
165
-
166
-
167
-
168
-
169
-
170
-
171
-
172
-
173
-
174
-
175
-
176
-
177
-
178
-
179
-
180
-
181
-
182
-
183
-
184
-
185
-
186
-
187
-
188
-
189
-
190
-
191
-
192
-
193
-
194
-
195
-
196
-
197
-
198
-
199
-
200
-
201
-
202
-
203
-
204
-
205
-
206
-
207
-
208
-
209
-
210
-
211
-
212
-
213
-
214
-
215
-
216
-
217
 |
 |

.
.
.
.
.
.
.
.
.
.
.
.
.
.
.
.
.
.
.
.
.
.
.
.
.
.
.
.
.
.
.
.
.
.
.
.
.
.
Notice
The information in this guide is subject to change without notice.
COMPAQ COMPUTER CORPORATION SHALL NOT BE LIABLE FOR TECHNICAL OR
EDITORIAL ERRORS OR OMISSIONS CONTAINED HEREIN; NOR FOR INCIDENTAL
OR CONSEQUENTIAL DAMAGES RESULTING FROM THE FURNISHING,
PERFORMANCE, OR USE OF THIS MATERIAL.
This guide contains information protected by copyright. No part of this guide may be
photocopied or reproduced in any form without prior written consent from Compaq
Computer Corporation.
1997 Compaq Computer Corporation.
All rights reserved. Printed in the U.S.A.
Compaq, LTE, Contura, ProLinea, QuickLock, QuickBlank are
registered in the U. S. Patent and Trademark Office. Armada is a trademark of Compaq
Computer Corporation.
Contura is registered in the Philippines Patent Office.
Microsoft, MS-DOS, and Windows are registered trademarks of Microsoft Corporation.
Windows 95 is a trademark of Microsoft Corporation.
The software described in this guide is furnished under a license agreement or
nondisclosure agreement. The software may be used or copied only in accordance with the
terms of the agreement. Product names mentioned herein may be trademarks and/or
registered trademarks of their respective companies.
Maintenance and Service Guide
Compaq Armada 1500 Family of Personal Computers
First Edition (March 1997)
Spare Part Number 255011-001
Document Part Number 284820-001
Compaq Computer Corporation