HP C3180A Service Manual - Page 146
Bail Calibration, EEROM is cleared
 |
View all HP C3180A manuals
Add to My Manuals
Save this manual to your list of manuals |
Page 146 highlights
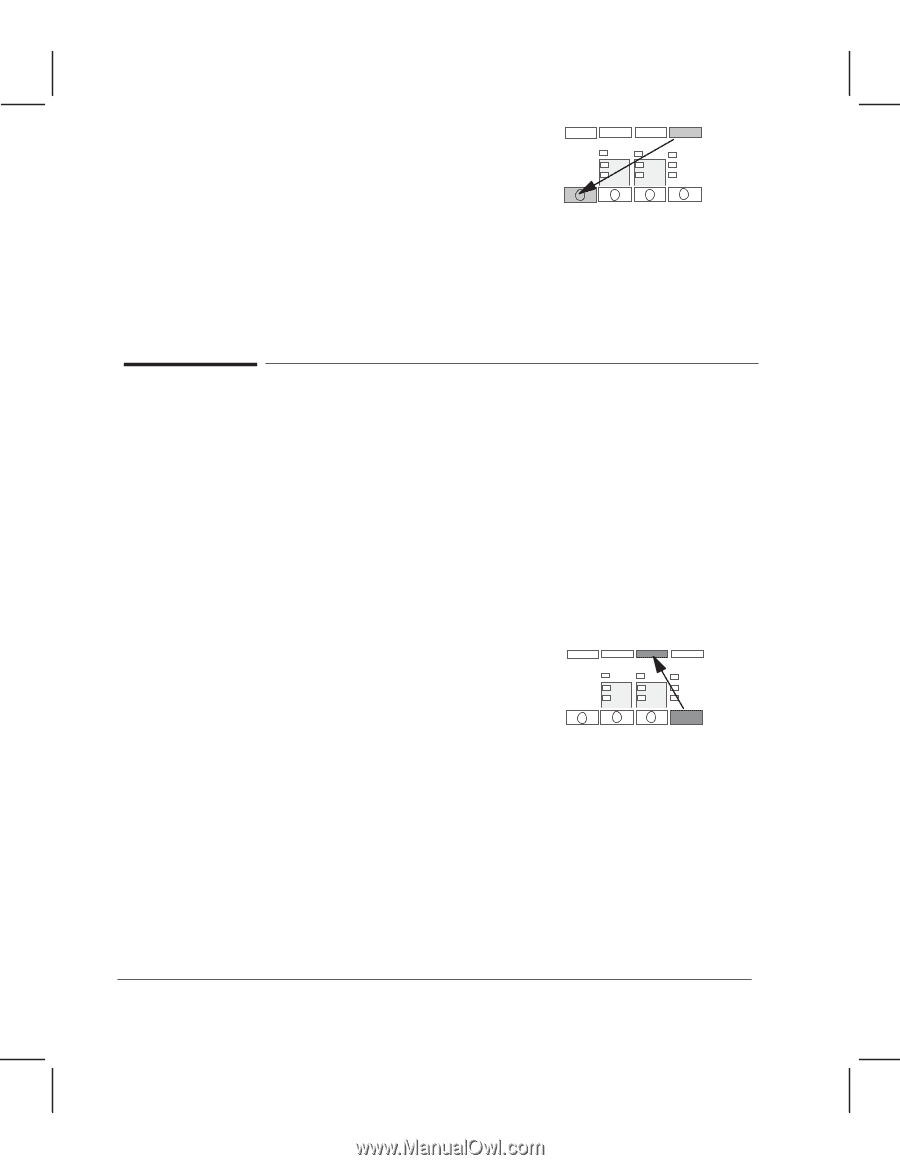
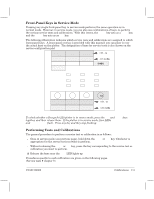
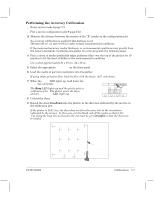
,0 When the Ready LED lights up, hold down the SHIFT key and press Accuracy Calib. Read, The Busy LED lights up. The plotter takes about 3 minutes to read the calibration sheet, to calculate the calibration data, and to save the data in the EEROM. During this time, the plotter appears almost motionless for short intervals. The plotter then ejects the sheet. ,, Unload the sheet. Accuracy Calib. Read SHIFT Bail Calibration In this procedure, the `up' position of the bail assembly is calibrated. A value is stored in the EEROM when the procedure is completed. Perform the bail calibration whenever the: D EEROM is cleared D Main PCA is replaced D Bail falls during media loading D Bail switch is replaced D BailĆlift mechanism is removed or replaced To calibrate the bail, perform the following procedure: , Enter service mode D page 7Ć2. . Hold down the ALT key and press Bail Calibration. Bail Calibration ALT The Busy LED lights up and the bail begins cycles of being raised and lowered. During a number of the cycles, the bail is let fall instead of being gently lowered. The calibration ends after about a minute and a half. 7Ć8 Calibrations C3187Ć90000
-
 1
1 -
2
-
3
-
4
-
5
-
6
-
7
-
8
-
9
-
10
-
11
-
12
-
13
-
14
-
15
-
16
-
17
-
18
-
19
-
20
-
21
-
22
-
23
-
24
-
25
-
26
-
27
-
28
-
29
-
30
-
31
-
32
-
33
-
34
-
35
-
36
-
37
-
38
-
39
-
40
-
41
-
42
-
43
-
44
-
45
-
46
-
47
-
48
-
49
-
50
-
51
-
52
-
53
-
54
-
55
-
56
-
57
-
58
-
59
-
60
-
61
-
62
-
63
-
64
-
65
-
66
-
67
-
68
-
69
-
70
-
71
-
72
-
73
-
74
-
75
-
76
-
77
-
78
-
79
-
80
-
81
-
82
-
83
-
84
-
85
-
86
-
87
-
88
-
89
-
90
-
91
-
92
-
93
-
94
-
95
-
96
-
97
-
98
-
99
-
100
-
101
-
102
-
103
-
104
-
105
-
106
-
107
-
108
-
109
-
110
-
111
-
112
-
113
-
114
-
115
-
116
-
117
-
118
-
119
-
120
-
121
-
122
-
123
-
124
-
125
-
126
-
127
-
128
-
129
-
130
-
131
-
132
-
133
-
134
-
135
-
136
-
137
-
138
-
139
-
140
-
 141
141 -
 142
142 -
 143
143 -
 144
144 -
 145
145 -
 146
146 -
 147
147 -
 148
148 -
 149
149 -
 150
150 -
 151
151 -
152
-
153
-
154
-
155
-
156
-
157
-
158
-
159
-
160
-
161
-
162
-
163
-
164
-
165
-
166
-
167
-
168
-
169
-
170
-
171
-
172
-
173
-
174
-
175
-
176
-
177
-
178
-
179
-
180
-
181
-
182
-
183
-
184
-
185
-
186
-
187
-
188
-
189
-
190
-
191
-
192
-
193
-
194
-
195
-
196
-
197
-
198
-
199
-
200
-
201
-
202
-
203
-
204
-
205
-
206
-
207
-
208
-
209
-
210
-
211
-
212
-
213
-
214
-
215
-
216
-
217
-
218
-
219
-
220
-
221
-
222
-
223
-
224
-
225
-
226
-
227
-
228
-
229
-
230
-
231
-
232
-
233
-
234
-
235
-
236
-
237
-
238
-
239
-
240
-
241
-
242
-
243
-
244
-
245
-
246
 |
 |